NOTE:
This battle report was created to showcase how Epic worked to the chaps over at
The Great Crusade forum, so it's got quite a few notes that might sound a bit like teaching granny to suck eggs to the long-term players here! I hope it's useful for any relatively new players (like myself!), and I'd appreciate any pointers if I've interpreted anything incorrectly – or simply some tactical tips for me.
Thanks to Armyforge for the awesome Armybuilder, Chroma for the battle report sheets (it became very easy to take notes) and to NetEA for the tweaks to the rules/lists etc.

+++
Anyway, here is
Counterstrike at Marrianna City. The game turned out to be a textbook example of how Epic works, with a few complex effects illustrated nicely, and a few good lessons in tactics and strategy learnt by both sides!
Each activation is separated by the '+++' symbol. Anything in italics is background, while the roman text explains what happened and analyses a few of the more complex bits.
I hope you enjoy it! I'll post it turn by turn for space, so feel free to ask for any clarifications on anything that I haven't explained properly.
I'd welcome any comments, and I'd be interested to see if anyone can guess the final result
Counterstrike at Marrianna CityUltramarines XIX Company [Apologist] vs. Waa! Nuzzgrond [Bob Hunk]On the night-side of Ullanor, Lucretius Corvo, Captain of the Ultramarines, had pushed forward with elements of XXIX Company into Marrianna City, a crucial lynchpin of the Imperial assault. Having driven the orks before them in a tough prosecution, the XXIX had followed the ork’s surprisingly swift retreat. Pulled down the highway, Sergeant Communus astoundedly reported the discovery of an immense Cathedral - seemingly pre-dating the orks’ arrival.
As the depleted XXIX advanced to investigate the Cathedral, they came under sustained artillery assault. Acting quickly to escape the ambush, Corvo rallied his stretched forces outside the city limits, regrouping in some defensible terrain while the city shook. His force’s transports were scattered across the city, and he voxed in support, keen to preserve the secure strategic position the Cathedral presented as a defensible command post for the Imperial Army units to whom it would fall to hold the city.
Captain Aethon of XIX, the nearest Ultramarine force; was prosecuting an advance across the moors of Sectus. Unable to respond personally, he diverted a mounted spearhead under Lieutenant Marius to reinforce Corvo. Marius curtly acknowledged the order over the vox, and his troops peeled away from the main force, heading with all speed for Marrianna City.
Nuzzgrond, Scourge of Ullanor Secundus, Grand Git of Marrianna and general all-round no-good, had no intention whatsoever of ceding his control of the urban area. With a cunning curl in his green upper lip, he ordered his greenskinned force to cease their feigned retreat, and ordered their return to Marrianna City. He had enjoyed this new beakie-headed foe, and fancied a few new heads for his bosspole...Rules UsedEpic Update 2008
NetEA Recommendations
NetEA Codex Astartes Final, from NetEA Space Marines v1.1
NetEA Ghazgkhull’s War Horde
All of these are available on the Tactical Command forum, and represent clarifications and minor tweaks to points values in the lists.
Scenario3500pts Tournament Scenario - you can find this in the main rulebook pp124-125
Armies UsedUltramarines, XIX Aethon CompanyXIX Company Ultramarines under Lieutenant Marius [CLICKY]
(Bob Hunk asked for an expansion to 3500pts, so a Terminator detachment and the Starfire Skybears - two Thunderbolts under Sky-Captain Tmoro - joined the XIX.)
Waa! Nuzzgrond, Scourge of Ullanor SecundusNuzzgrond's Shooty Boyz [CLICKY]Reports are innaccurate on the exact composition of the enemy force, but the army was built around three Big Warbands, two Big Blitz brigades and a Gargant. The linked list is a rough approximation.
Battlefield6 x 4ft
Imperial objectives are marked in blue, Xeno objectives in red.
Blitzkrieg objectives are circles, others are triangles.
Faded colours indicate the objective is behind terrain, out of sight of pict-capture records,
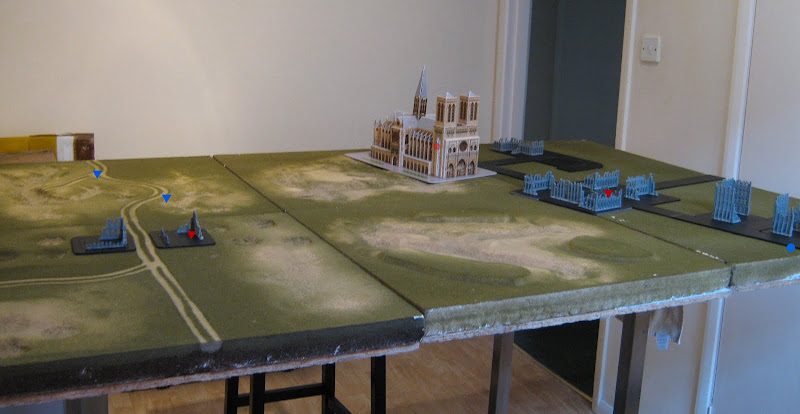
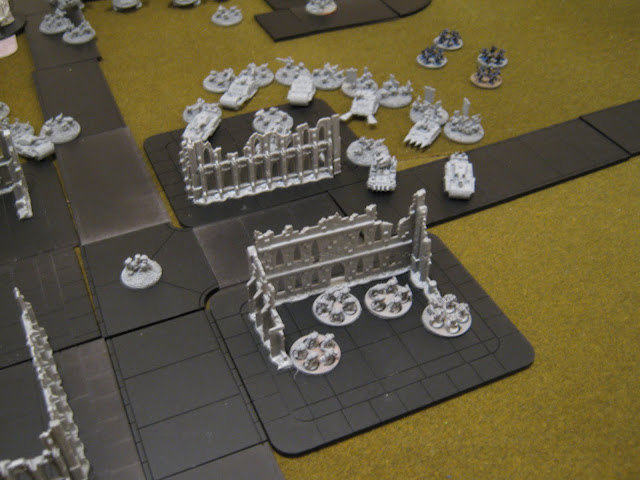
With the terrain set up, Bob Hunk picked the long edge, near the Cathedral. This will be referred to as the north edge.
DeploymentThe Imperial Blitzkrieg objective was set on the south-east at the end of the road, and the two other objectives were deep in the north-west. They were represented with some spare Rhinos - obviously Captain Corvo’s damaged but repairable transports. The Xeno objectives were strung along a broad front, near the centre; and their Blitzkrieg was set up in the shadow of the Cathedral.
With the objectives placed, the Imperials deloyed first (they had a higher strategy rating, and the orks had picked the deployment area). I took advantage of the Space Marine transport rule to garrison Tactical formation 2 (representing Captain Corvo's remaining battered force) on the ork’s western-most objective. The Space Marine transport rule makes marines flexible: they get to choose whether to use free transport vehicles, or to abandon them and deploy further forward. A formation is only allowed to garrison if they have no more than one unit with a speed over 15cm. In this case, Tactical 2 had just one Hunter - a good way to get an AA umbrella started and to cover an advance on the West from aircraft.
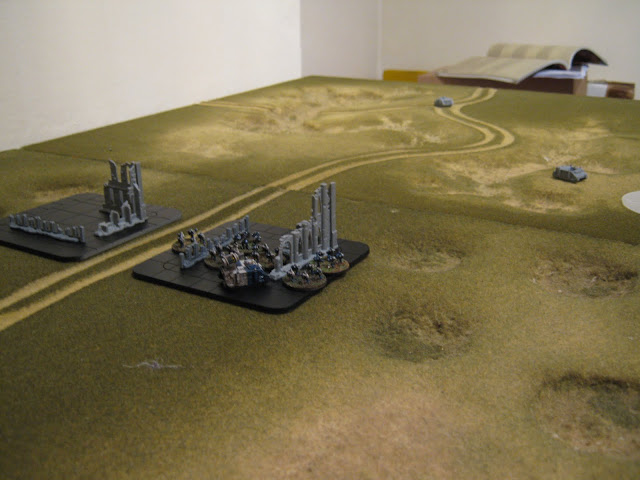
We took it in turn to deploy the remaining non-garrisoned formations. I deployed a large armoured spearhead on the southwest, consisting of the Predators, Land Raiders, Sabres (represented by Predator Annihilators for the moment) and Tactical formation 1, which included a second Hunter to ward off ork fighta-bombers.
Imperial deployment: Southwest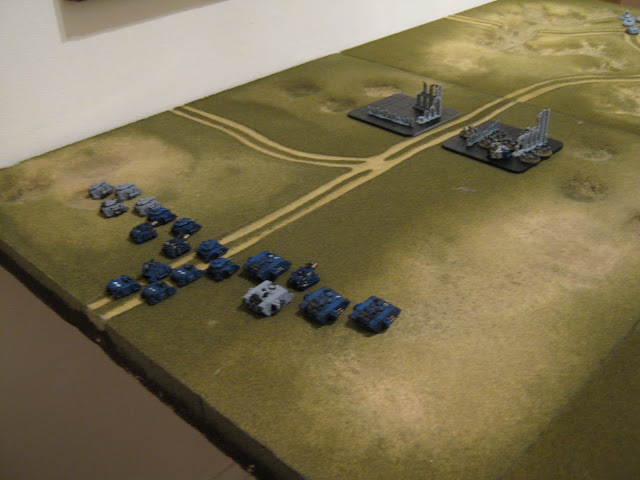
Meanwhile, Lieutenant Marius led a Devastator formation, an Assault formation and the feared Whirlwinds on the southeast.
Imperial deployment: Southeast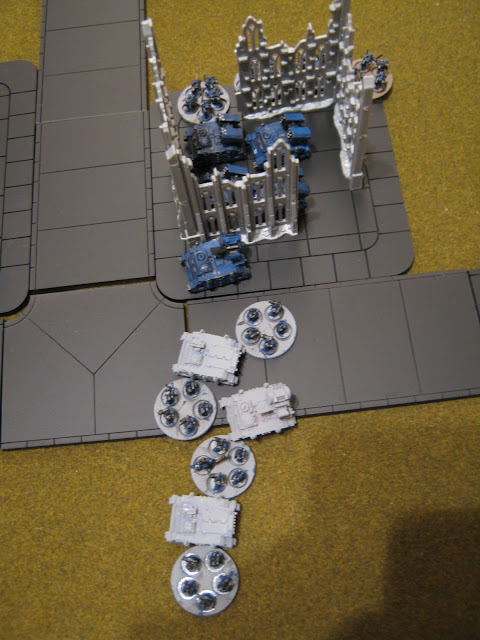
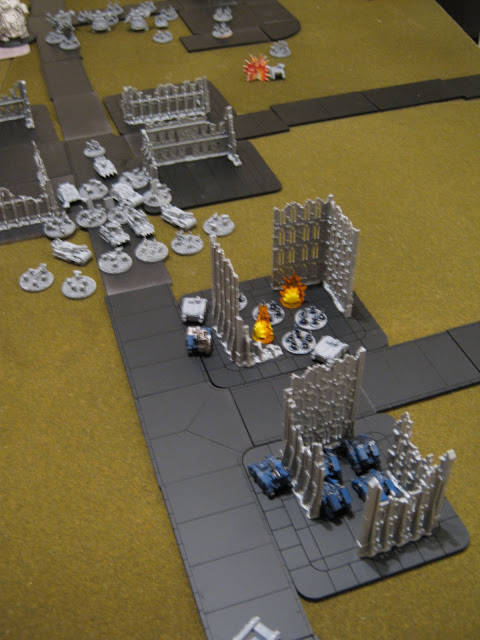
In response, the orks deployed in a broad line across the north side. Three formations, including Nuzzgrond’s household formation and the Gargant
Ragnaork appeared on the northeast, in the shadow of the Cathedral. They grabbed the North exit to the road (the ork Blitz).
Ork deployment: Northeast
A cloud of dust heralded the arrival of an armoured ork contingent made up of three formations on the northwest, opposing the Ultramarine’s spearhead, threatening Corvo and claiming the most distant Imperial objective.
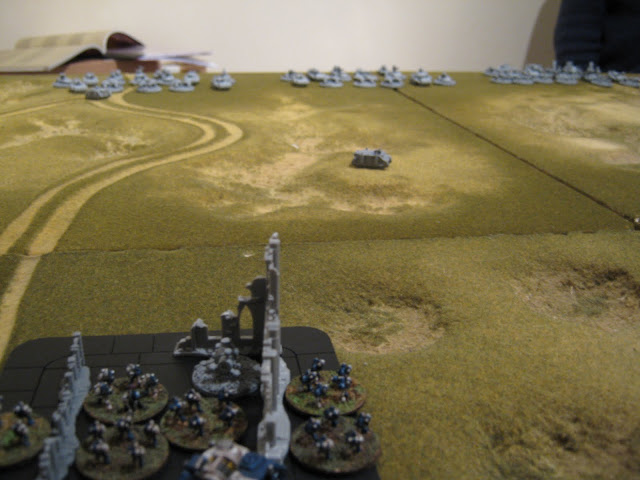
The Ultramarines had set up aggressively on the west, with a formation dug in to the ruins and many fast, powerful formations in support. The open ground in the centre was left free, and Lieutenant Marius' remaining Ultramarines deployed a smaller force defensively on the southeast.
In contrast, the orks had deployed in a long, broad line across the entire length of the table. This meant they could strike anywhere at all - and their mobile formations could quickly redeploy to where the fighting thickened.
+++
Marius narrowed his eyes. This had become more than a reinforcement of Corvo’s position: this was an ambush. He snorted through his nostrils - a typically unsubtle ambush: clearly the orks here were spoiling for a fight.
No matter. The Ultramarines of XIX would engage and destroy this stubborn ork warlord and stamp Imperial compliance on this backwater township...Turn 1Hunkering down in the outlying ruins, Corvo grimly ordered his battered Honour Guard to set overwatch. The Ultramarine tactical formations, resplendent in Corvo’s distinctive quartered livery, dug in. Resting their boltguns on the rubble of a once-proud civilisation, the battered Ultramarines trained their eyes on the road approach.The Ultramarines won the initiative (they have a strategy roll of 5 to the ork’s 3; which is added to a D6 roll to determine initiative). The Overwatch order allows a formation to interrupt and shoot at an enemy action after one of their moves is complete. It’s very useful to ward off enemy forces, and provides something for holding formations to do.
+++
On the Northeast, Bogrot’s Blasta Boyz doubled forwards, their Stompas peering over the intervening terrain, eager to get to grips with this new, excitingly tough, enemy. Down the road, Astartes spotters voxed range coordinates to their comrades...Orks have a fairly poor 3+ initiative, meaning that they have to roll a 3+ to perform an action. If they fail, they may only perform a Hold action (one move, or one shoot at -1 to hit). However, the Waaagh! rule means they get a +2 modifier to the roll if they attempt a Double or Engage action - this makes them perform best if you are aggressive with them.
+++
Far away, the Thunderbolts of the grittyStarfire Skybears
spooled up their engines and made for the front lines...Aircraft have different set of orders to regular troops, and the Thunderbolt formation declared an Intercept action, which meant they were deployed on the edge of the board, but did not yet attack. When (and if) enemy aircraft appeared, the Skybears could interrupt and attack them - a bit like the Overwatch action for ground troops.
+++
With a grumble of immense engines, the ground shook as the immense Ragnaork
began to lumber forwards, gathering pace with each step.War Engines like ork Gargants operate much like other ground forces - and in this case, benefit from Waaagh!, making it easier for the Gargant to double forward.
+++
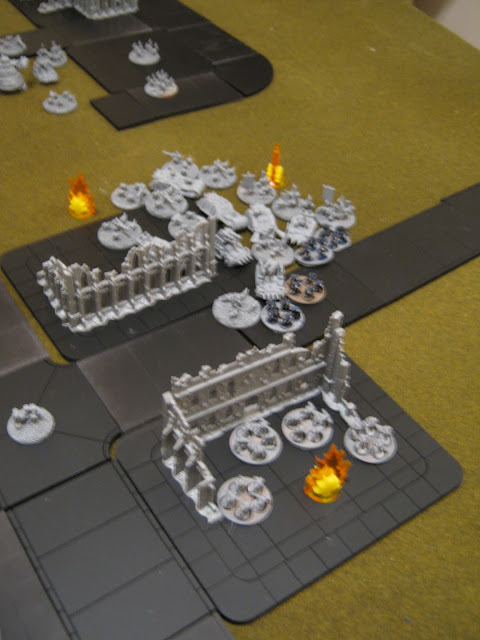
Sergeant Achillon vox-clicked the order to Heartbreaker squadron, and with a series of well-oiled sweeps, the Whirlwind’s turrets swept around, sending a cloud of missiles streaking up and out of the ruins, impacting on the distant Blasta Boyz as they came into range. Broken greenskin bodies and tanks flew up into the air.
Whirlwinds can fire an indirect barrage, which means they double their range and benefit from the Sustained fire rule, which adds +1 to hit. Barrages place a marker the same size as a 40k small blast template, and everything underneath is hit. You add up the number of Barrage Points [BP] and refer to the table on p21 of the rulebook. Whirlwinds have 1 each for a total of 4; which adds a second blast template, damages enemy infantry on a 4+ and enemy vehicles on 5+. These were adjusted to 3+ and 4+ respectively for the sustained rule, and resulted in five casualties, placing six blast markers on Bogrot’s Blasta Boyz (one for each casualty and one for coming under fire).
+++
Grinning as the enemy expended their artillery on Bogrot - an ork Nuzzgrond had always regarded as a bit too
ambitious by half - the Warlord pulled the hatch on his gunwagon down and bellowed the order to double forward to the crossroads.Nuzzgrond’s household doubled down the far eastern side towards the central ruins and captured the objective on the T-junction
+++
Seeing an opportunity to decapitate the ork leadership early on, Lieutenant Marius ordered Chaplain Remor and his Assault formation to cut off the Warlord’s retreat. Voxing sceptical acknowledgement, the young Chaplain and his men appeared on plumes of jump pack wash from behind the ruins and plunged towards the ork advance. It was an uncharacteristic gamble, but perhaps Marius could gain some glory for the Ultramarines...
The assault marines doubled forward and sat to the flank of Nuzzgrond’s Household formation.
+++
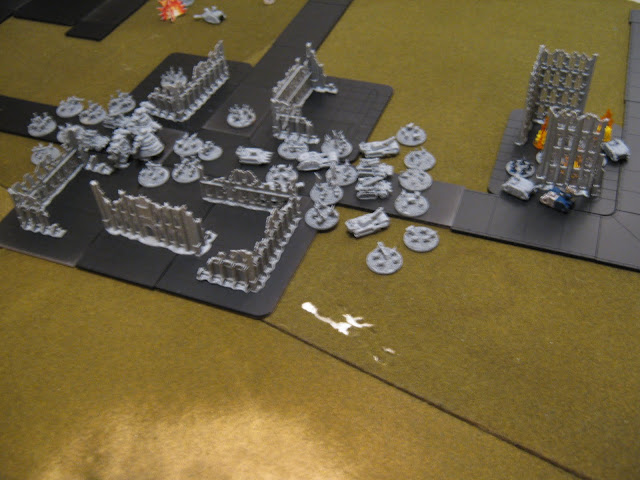
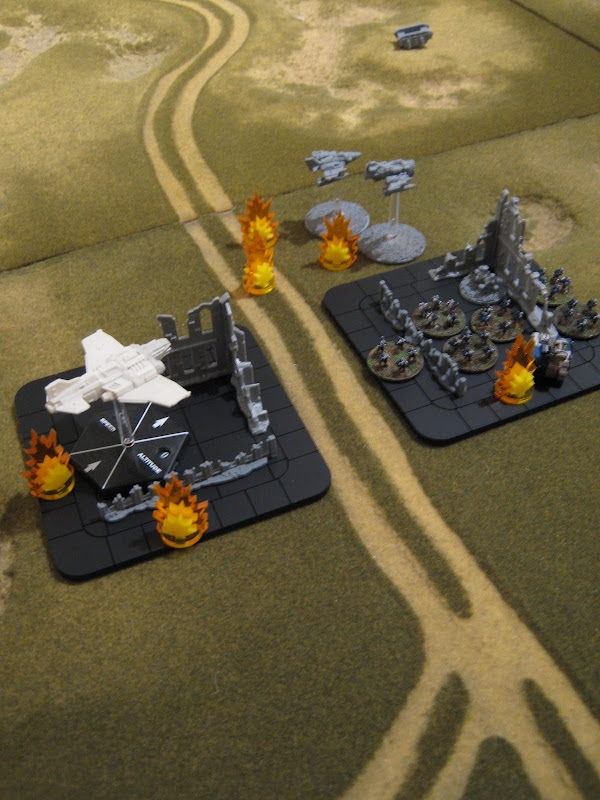
Arriving on spirals of smoky contrail, a flight of four fighta-bommerz appeared over the horizon, the crazed ork pilots gunning for Corvo’s isolated Tactical formation. A streaking Hunter missile from the Hyperios Anti-Air vehicle blew one of them out of sky in a pyrokinetic blast just as two Thunderbolts pounced from out of the sky, sending a second spiralling to the floor. Corvo’s expression turned grim as the two surviving fighta-bommerz homed in on the isolated Hyperios and reduced it to scrap.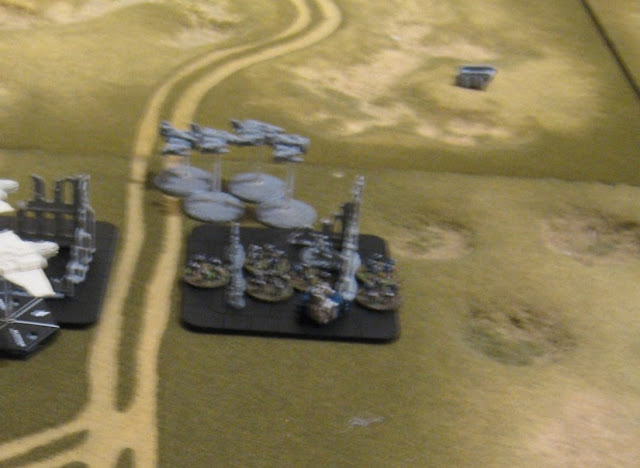
Flyers move quickly. To represent this, activated aircraft are placed at the edge of the table, then are moved directly forwards in an approach move. They then make their attack, and at the end of the turn, make their disengagement move. They are restricted in their turns - one turn (ninety degrees for fighters, forty-five for bombers) for every 30cm they move. This means their flight path must be carefully considered to avoid too much anti-air fire. I’ve added a second picture below to illustrate the result of this complex action, which nicely illustrates the lightning-quick changes of dogfighting aircraft over anti-air units.
The Fighta-bomma squadron launched a ground attack action on the Tacticals, and made their approach move. This activated the Hunter (anti-air units can make a special flak attack which interrupts the flyers when they come within range) and shot down a flyer. This placed two blast markers (one for coming under fire and one for the casualty).
At this point, the Thunderbolts declared their Intercept, and made their own approach move towards the fighta-bommerz, shooting down a second, but suffering a casualty in return (aircraft can make their own flak attacks, which activated when the Thunderbolts foolishly got too close).
Finally, the Fighta-bommas launched their ground attack and destroyed the Hunter (note that Squiggles and his squadron had sustained three blast markers, which would normally have supressed both remaining units, but aircraft use different blast marker rules).
+++
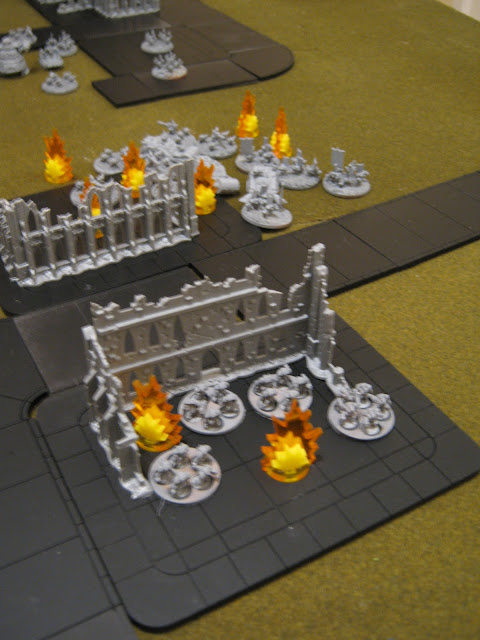
Veteran Sergeant Orison ordered his Tactical formation forward, gunning their engines to relieve Corvo’s troops.Tactical 1 performed a Double action, driving forward in their Rhinos towards the western ruins.
+++
Corvo’s attention turned from the burning hunter as he heard his sergeants ordering the Ultramarines to open fire on the approaching vehicles of Wazdakka’s Blitz Brigade. With disciplined fire, two gunwagons and a warbuggy detonated or slewed to a halt as bolt fire and missiles detonated amongst them. Reloading, the first line of Ultramarines dropped to the ground, and the second line opened up as the ork vehicle’s own weapons belched in return, sending a handful of Astartes slumping to the ground.
The ork Blitz Brigade declared a Double action, meaning they could make two full moves and then shoot with a -1 modifier. As they completed their first move, Tactical 2 declared Overwatch, interrupting the orks before they began their shooting. Some lucky rolls resulted in the five Marine stands hitting and destroying three units before the orks could return fire. As well as reducing the amount of vehicles shooting, the four blast markers placed (one for coming under fire and three for the casualties) meant that the rearmost four ork units were suppressed, preventing those from units firing at all.
Results of the overwatch fire: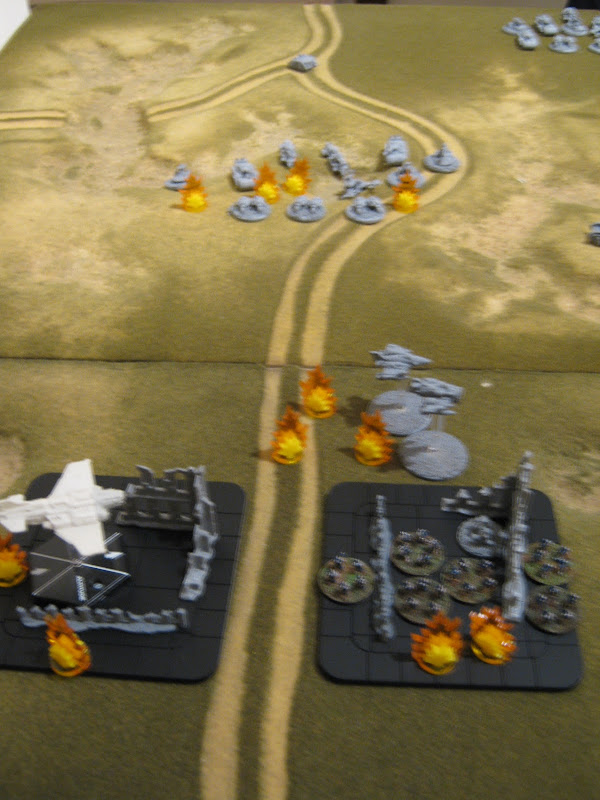
Note that only five marine stands fired because one was supressed - there were two blast markers from the Fighta Bommerz on the Tactical formation. A Space Marine unit is only suppressed for every two blast markers (rather than one, as is usually the case), a special rule which represents their elite states and helps their small formations remain useful. Also, because the Marines opted to fire their weaponry with the AT (anti-tank) mode, only the vehicles and light vehicles were eligible targets - hence the warbikes survived.
Once the overwatch fire was worked out, the orks completed their second move and shot at the Tactical formation, killing one Tactical stand.
+++
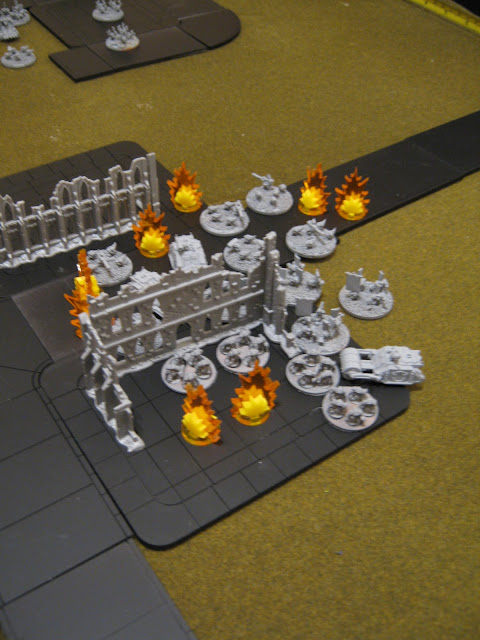
The Predators and Vindicators of Compliance squadron roared along the dirt road towards Tactical 2, their guns spitting long-range death at Wazdakka’s still-advancing Blitz Brigade. Their heavy bolters and autocannons proved deadly, blasting the ork vehicles into scrap. Broken, the orks drew to a halt, then began to withdraw to the cheers of the embattled Ultramarines.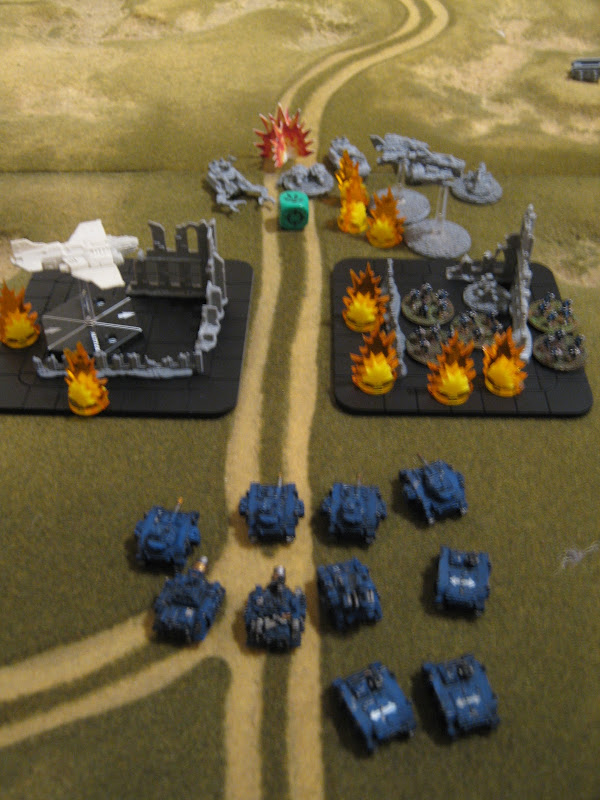
The Predator Destructors performed an Advance action (one move, then shoot with no modifiers). The fire proved accurate despite firing through the ruins, which give a -1 modifier to the dice, and destroyed two skorchas, two warbuggies and two warbike stands. The resultant blast markers now outnumbered the remaining units in the formation, which means that the formation is Broken. The blast markers are all removed, and a broken marker placed (we use a big blast marker and one of the Epic 40k order dice). Broken formations get two special Withdraw moves, which helps them get out of danger. The orks retreated to the distant objective on the northwest crossroad.
The orks withdraw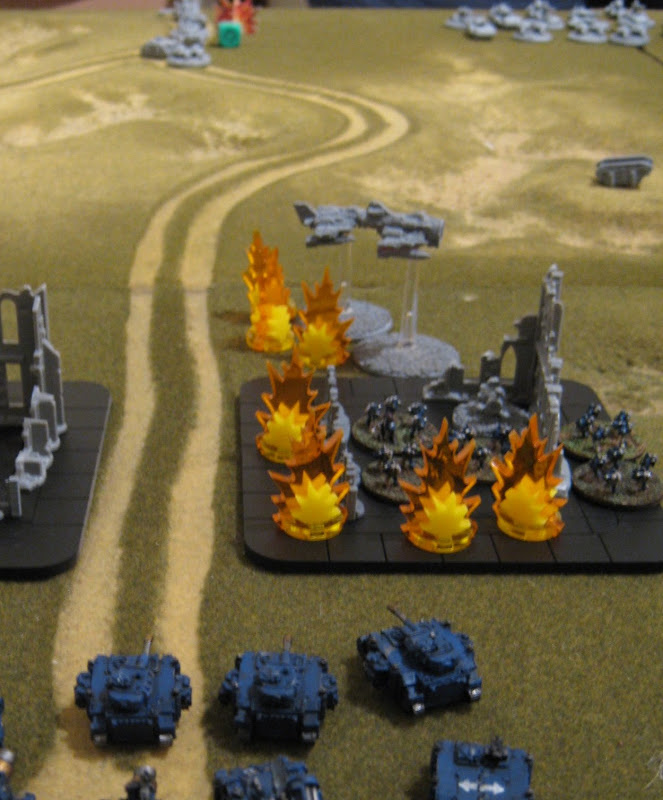
[cont.]