Turn 2No teleports
Strategy - Tau
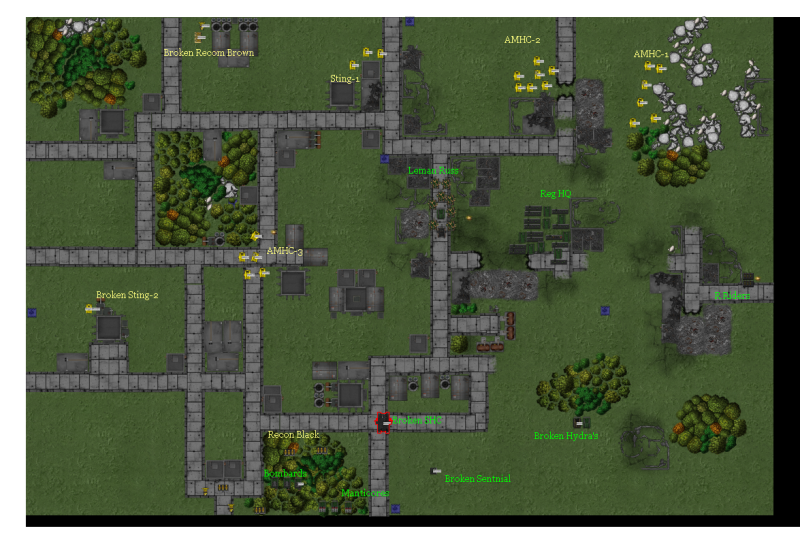
Recon Brown double over and close off the south end of the road behind the Leman Russes and the eastern side of the rubble. The piranha's let fly with guided missiles but they miss.
AMHC-2 are then ordered to advance and take the russes in a crossfire. However the order goes astray and the tanks stay put and remove blast markers -
So my well laid trap fails. With 6 AT3 and 7 AT5 if stood a good chance of breaking the tanks, and with nearly all the exit points covered they would have struggled to escape.The Baneblade commissar has to check with HQ that he heard the order to engage correctly (failed test, re-roll used and passed). Once he was sure the two super heavies moved forward to bring AMHC-3 into FF range. The Hammerheads moved forward to bring most of them into range and a brief and ineffective exchange of fire (one hit each, each saved!) resulted in a straight dice off! The Tau win by two and the super heavies retreat broken, with one of the baneblades pretty beat up.
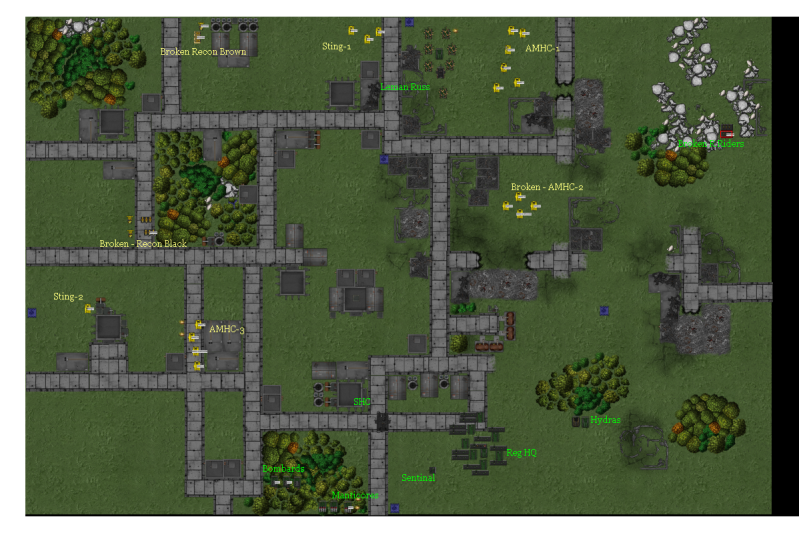
To attempt to do the job the baneblades had just failed at the guard retain with the bombards to shell AMHC-3, Killing 2 hammerheads.
The scorpion advanced to try and do to the leman russes what AMHC-2 was supposed to have done. It selected MW missiles from its salvo launcher and let the missiles fly. However of the 3 tanks hit only one died even with crossfire.
At this point I began to have that sinking feeling. My cunning plan of blocking the russes and hammering them with fire had gone badly wrong.Realising that the Russes are trapped the Reg HQ is ordered to double forward and clear out the Tau recon element. With 21 attacks 6 targets are hit, leaving one tetra and one piranha to retreat rapidly toward the tau blitz.
The Tau commander calls for the AX-1-0 but the aircraft is not ready and stands down.
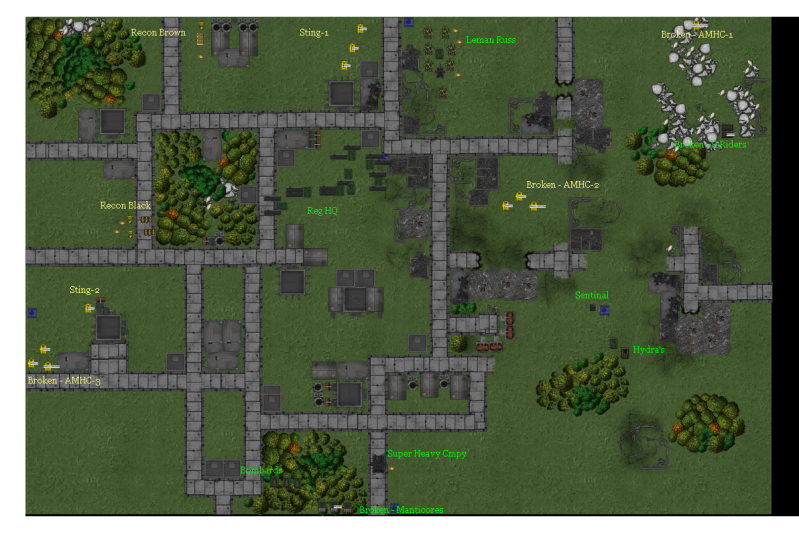
Free of the scouts the leman russes are ordered to engage the scorpion. They move down the road and all get in range. No hits are caused to the russes, but two hits are enough to cause critical damage to the tau skimmer and it explodes harmlessly.
Recon Black are now ordered to double over to the wood containing the artillery. The broken baneblades are a road block leaving the scouts just short of were they were really wanted. The piranhas fire the missiles at the untouched hydras, killing one and breaking the formation.
The manticores are ordered to sustain with the intention of hitting AMHC-2 but the order goes astray and they clear blast markers.
The lone surviving stingray-2 is ordered to sustain at the lit bombards, but the order goes wrong and it is broken, moving towards the objective on the western edge in guard territory.
The final guard activation is the lone thunderbolt. The pilot manages to find a clean route in and attacks Stingray-1, killing one.
AMHC-3 are ordered to advance and take the broken super heavy company under fire. Two hammerheads shoot 2 hits are saved but the damaged baneblade is destroyed by the blast marker.
Stingray-1 marshal, hitting the lit sentinels for no damage but killing one scout due to blast markers and clear all blast markers.
AMHC-1 are then ordered to double, but refuse! They sit still and clear blast markers.
End of turnThe lone T'bolt has to fly through two static skyrays field of fire (only because both formation failed to activate and sat still!). One hit brings the brave plane to the ground despite the desperate manoeuvres of the pilot
Rallying
Tau
Pass AMHC-3 (1 BM),
Fail Stingray-2, Recon Brown,
Guard
Pass Rough Riders (1 BM), Leman Russ (1 BM),
Fail Hydra, Sentinel, Super Heavy Company.