Well, here it is, the battle report I promised. I hope it is imformative and entertaining.
Battle Report – Tyranids vs Marines 3,000pts
Marines:
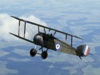
Thunderhawk, Devestators, Dreadnaught, Librarian
Thunderhawk, Devastators, Dreadnaught, Librarian
Predator Annihilators, Hunter
Warhound (standard), Warhound (inferno) - BTS
Terminators, Chaplain
Landspeeders
Tacticals, Supreme Commander, 2 Razorback
Activations: 9
I took Librarians in the T.Hawks instead of Chaplains to try to destroy the AV in the swarms I assaulted, its more risky than inspiring but you need to damage those synapse. The Dreads were used in case of a draw roll and the Tyranids got into CC. It was the first time I had used a Predator squadron for a long time, but as people say they are ok, I thought I would (more AT shots); the Hunter just gives a long range AT shot. Tacticals are (mostly) a waste of time, but I cannot bring myself to field a Marine army without them; the commander was to make sure the T.hawks did not fail an activation (as much as the 150points galled me to do so!). Activations are a little on the low side with this army, but that is because of the commander and using a 2 T.hawk strategy and the dreads – both of which I don’t normally field).
Tyranids:
6 Genestealers
(Left swarm) 3 Warriors, Zoanthrope, 2 Gargoyles, 4 Hormagaunts, 4 Termagaunts, 2 Malefactors, 1 Haruspex
6 Raveners (burrowing)
(Centre swarm) 2 Hive Tyrants, Zoanthrope, 2 Malefactor, 6 Hormagaunts, 4 Termagaunts, 2 Gargoyles
Heirophant Bio-titan
Harridan, 5 Gargoyles
Dominatrix
(Right swarm) 3 Warriors, 2 Haruspex, 2 Malefactors, 4 Termagaunts, 2 Hormagaunts
Activations: 8
BTS: 9
The swarms have designations to be able to identify them during the battle (and from photos). This is a fairly typical Tyranid army he uses, though he recently got some Zoanthropes and wanted to try those out. The Dominatrix has proven to be a tough mother to kill so he decided to field it on its own, rather than with Trygons (though don’t do this against Guard!), she can spawn stuff onto her if needed. The extra Gargoyle was because he had points left over. His tactic was as simple as it always is; triple and charge, firemen and fires!
Deployment

As can be seen from the deployment photo, most of the objectives were on the left, so that is where much of the fighting would be. The Warhounds were to defend the blitz, the predators to assist them by killing anything that can hurt the Hounds (the Tyranid AVs) while the tacticals were effectively a reserve formation; they will move to the right to give width (and break up the Tyranid advance) or swing into the centre to support the push on objectives. The Tyranids had a fairly typical deployment – 3 big swarms broken up by titans. The Harridan was positioned to flank the marine force and help hem them into the bottom left for the inevitable Tyranid rush.
Turn1
Strategy – Marines
The marines call in a Thunderhawk on Centre Swarm to help slow the Tyranid advance, while the Tyranids Left Swarm start to rush towards the Marines, taking position in the rocks. A second Thunderhawk is called in on the Left Swarm and blows a Malefactor and a Hormagaunt to pieces with its attack run. The Genestealers carry on lurking near the hill while the landspeeders, initially going for the genestealers, decided the Harridan was too menacing and switched to move behind Left Swarm; the melta weapons leave a Hive Tyrant a shrivelled husk. Seizing the moment, the Predators are ordered to engage Left Swarm, their Lascannons killing all the Synapse creatures and causing the Tyranids to mill about in confusion.
The Dominatrix acknowledges the plight of her children and charges the Landspeeders – two of the small craft make it out alive and the Dominatrix regains control of much of Left swarm.
Comment - the landspeeders had a choice, I could not counter and try to save as many as possible (she only assaulted 3) but that would enable Left Swarm to support, so I decided to go full speed towards the Dominatrix and hope. She killed 2 Speeders for 0 wounds, so the result was T=5 M=1, meaning 2 more speeders die
Seeing their chance, the Warhounds go on the hunt for the mother Bug and give her everything they have. The Dominatrix screams in pain, but her wounds regenerate and she remains unharmed.
Comment – she is one tough mother! I got 6 hits on her, 1 of them a MW and she lost no wounds! 4+RA, 6+Inv, 8DC is pretty good for less than 500pts. But I suppose it should be.Right Swarm now rushes towards the Marine line and takes position in the ruins. Seeing the threat (and the Harridan looming), the Tactical squad move to the centre and fell a Malefactor from Right Swarm to try to slow them down. The Heirophant moves into the trees near the Tyranid centre and knocks a void shield off a Warhound, while Centre Swarm rushes towards the scout titans. Finally, the mighty Harridan also moves to the centre near the ruins (the Gargoyles spying a Thunderhawk) and its bio-cannons knock another void shield off the Warhounds.
End of Turn1
The Tyranids spawn a few more creatures – Malefactor on Right Swarm, Hormagaunts on Centre Swarm and another Malefactor on Left Swarm. The Dominatrix assumes control of most of Left Swarm, but some of it wanders off without Synapse.
Both the Thunderhawks disengage without a hitch, despite being mobbed by multiple Gargoyles each and the Landspeeders rally behind the hill.
 Comment – observe the positioning of the Tyranid army after turn 1. The swarms have lurched forward into a mass and the big creatures are guarding the rear. This is to ensure that you cannot flank the Tyranid force. Dropping T.Hawk assaults into the rear will see me fighting the big powerful stuff, while attacking the swarms at the front is basically suicide – the Marines cannot get to the Synapse in the assault and, even if they did win, they will be counter assaulted by the big stuff. Knowing there would be space on the right, Right swarm took position in the ruins to make sure his gaunts got armour saves in an assault, making it the toughest swarm to attack. I needed some width to my Marine force now, so as not to get hemmed in.
Turn2
Strategy – Marines
Under pressure, the Marines needed some space. The Warhounds back up and open fire into the oncoming Centre Swarm, inflicting many casualties. The Tactical Marines, seeking to provide width to the army, move to the right of the hill by the ruins and put fire into Right Swarm, again inflicting some casualties.
Comment – I had the opportunity here to accept the Warhounds would be attacked and move the tacticals near Right Swarm then assault with a T.Hawk. It might have worked too. I decided not to risk exposing the tacticals just yet and to try to stem the assault be firing the Warhounds, laying BMs. The Dominatrix with Left Swarm rushes towards the Warhounds and opens fire, knocking down void shields. Centre Swarm then charges, the hormagaunts easily closing the distance and the Dominatrix and Left Swarm provide supporting fire for the attack.

One of the mighty Warhounds was felled in the assault and the other fell back behind the hill on the left – the machines had survived.
Comment – as we decided to play the ‘½ gaunts’ rule, the warhounds got 5 gaunt kills and the Tyranids caused 3 damage, destroying a hound. T=6 M=3. Tyranids would have still won had the ‘1/2 gaunts’ not been used.It was now time to put pressure on the Tyranid rear and the Marines called in a Thunderhawk assault on the Genestealers on the extreme right. The devestators got out and started to concerntrate fire on the bugs and the stealers, caught flat-footed, had no chance – they died to the last.
Comment – M=6, T=1, all stealers die
Seeing their chance the Predators on the hill concentrate all the firepower into the Dominatrix. Lascannon after lascannon shot pounds into the great beast. The Marines expect to see her badly wounded, but when the laser blasts stop, she was totally unscathed!
Comment – what do I have to do to hurt her?! Against my better nature (as my Pred looked vulnerable there) I decided to sustain as I do not think I would get a better chance. 9 hits, 0 wounds!The Tyranids rush Right Swarm from the cover of the ruins towards the Tactical marines. Risking getting shot at, but not caring for the swarm, the Tyranids now have the Marines trapped – there are few places they can move where the Tyranids cannot get them. Attempting to outflank the swarm and retain even more width by baiting the Bio-titan, the Landspeeders move to the rock on the left. The Heirophant takes the bait and moves to intercept the Speeders, its bio-cannons destroying one and causing them to break yet again.
The second Thunderhawk seizes the opportunity and drops from the sky onto the Harridan, Devastators with grim faces engage the huge beast who ignores the shots and charges headlong. A flurry of wings and the Marines are mostly dead or dying and their Gunship in ruins, what remains withdraws towards the Tyranid baseline.
The Harridan gives chase and smashes into close combat again, leaving the rest of the marines dead. The loss of the Thunderhawk assault formation is a major blow to the Marines and removes options.
 Comment – this demonstrates how fragile the Marine assaults can be on Tyranids. I thought the Harridan should be an easy target, but I failed to cause significant damage. The Harridan then followed up into combat and, with it ludicrously powerful 6 attacks (2 of the MW), it tore the Marines to pieces. 1st: T=3, M=4. 2nd: T=5, M=4. 3rd: Tyranids kill all Marines
End Turn 2
All the Tyranid swarms shrug off what shock effects from attacks remained, the synapse easily rallying all Tyranid creatures to them. Many more Tyranid creatures joined the swarms also – Dominatrix gets back a Malefactor and a Haruspex, Right Swarm gets 3 hormagaunts and centre swarm gets 1 gargoyle. The Dominatrix then passes Left Swarm over to Centre Swarm, going alone and forming a huge Centre Swarm in the process.
Unfortunately for the Marines, the Warhound fails to get back into the fight, as does the Landspeeder.
 Comment – I expected the Tyranids to smash the centre, they were going to assault somewhere with 3 possible targets available at the start of turn 2 (firemen and fires!). The loss to the Harridan was a major blow as it meant the Tacticals were unsupported for the assault that is coming their way and, not being able to turn a swarm around, the Devastators on the right will now have minimal impact. To top this all off, I need to bring the Terminators down this turn on the blitz, or I lose the game. This means that yet again, the Tyranids will have 3 targets to assault, so they will defiantly get one of them…
Turn 3
Strategy – Marines
There was a flash of blue light and the Space Marine Terminators of the First Company appear in good order near the Harridan. They then rush towards the Harridan, expecting the fell the miserable creature. However, though they beat it back, they fail in their task and it still lived!
 Comment – the Harridan is impossible! The Terminators only caused 1 wound on it. T=2, M=3 – the Fearless Harridan falls back.
Then, fearing for their own lives and that of their fellow Terminators, the Predators speed towards the Heirophant and away from the Dominatrix. Their Lascannon puncture the Bio-titans flesh multiple times and it is severely wounded. Right Swarm then charges towards the Tactical squad, the Marine commander shouting for his men to stand firm. They do, but it costs them dearly and they die to a man!
Comment – the Marine supreme commander really is rubbish for the 150 points he costs! Neither Fearless nor Inspiring is a bit of a joke for a Chapter Master… Anyway, the Tyranids utterly destroyed the Marines in this assault, it really was embarrassing, even though the Marines actually gave a good show of themselves. T=11, M=4 (without the ‘1/2 gaunts’ rule, the Marines would have been on 6 and still lost by loads). It was not actually that great a loss to the Marines though – something was going to get assaulted and this was the lesser of 3 evils… Seeing the Synapse unguarded on Right Swarm, the Devastators open fire and fell 2 of the 3 Warriors. The Hierophant then moves across towards the Terminators, denying them their objective. Seeing the beast badly wounded, the Terminators call in the remaining Thunderhawk to strafe it – the shots bounce off the creature’s thick chitin, but it is also spooked and it scurries off into the woods. However, it appears that this just delays the inevitable as the Dominatrix also rushes towards the Terminators, while Centre Swarm rushes towards the Marines baseline.
 Comment – I knew the Tyranids would take the Marine blitz as there was nothing to protect it, but I could hold off if the Terminators held the Tyranid blitz. I failed to realise that the Dominatrix was just in range with a triple move… I suppose I could have moved the Predators to the Blitz, but they would have been in assault range of Centre Swarm and certainly would have died. Besides, I needed to hurt that Bio-titan.
The battle was over and the Marines had failed in their task to defend this particular planet. There will be other battles on other planets, but for now, the Tyranids will feed.
Comment – Tyranids won with the Marine Blitz and one other Marine objective for a Take and Hold, while the Marines had one of their own and one Tyranid objective, meaning they had nothing… T=2, M=0
TYRANID VICTORY!
Comment – the Warhound failing to rally, the stalled assault on the Harridan, not being able to hurt the Dominatrix, despite the Warhounds and the Predators shooting her are all things I could point at to blame. A few tactical errors occurred on both sides, but the Tyranids are very forgiving of that while Marines actively punish for them. My overall plan started out well, I destroyed Left Swarm and forced the Dominatrix to commit, removing her from the Tyranid Blitz. I knew she would come for my Blitz like a freight train and I just planned on contesting it with the Warhounds. My Terminators would drop on the Tyranid Blitz while my Devastators held the objective on the hill, giving me two points to the Tyranid zero. Alas, is was not to be. The Tyranids, for their part, performed as expected – Swarms rush while biggies hold the rear, get more assault targets then your opponent can move out of the way, then crush those targets you do have. The fact they they threaten so many of your formations means that it is hard to set up combined assault/support situations because you need activations to save some units.Recommendations.
Harridan – lose the 2 MW attacks and drop its points to 150.
It should be a harassment creature, skulking the flanks and picking off stragglers. However, its current stats allow it to charge headlong into an armoured formation and destroy them!
½ Gaunts – drop it, it is not needed. In this game the dropping the ½ gaunts rule would have meant that the Marines would get a dice roll in assault, as opposed to getting so utterly crushed that they all died.
Rally,Engage - switch to +1 for these instead of +2 as it gives a reason to lay BMs on swarms to try to slow them a little.
I hope you enjoyed this battle report!