| Brood Brother |
 |
Joined: Tue Apr 06, 2004 11:29 pm
Posts: 126
|

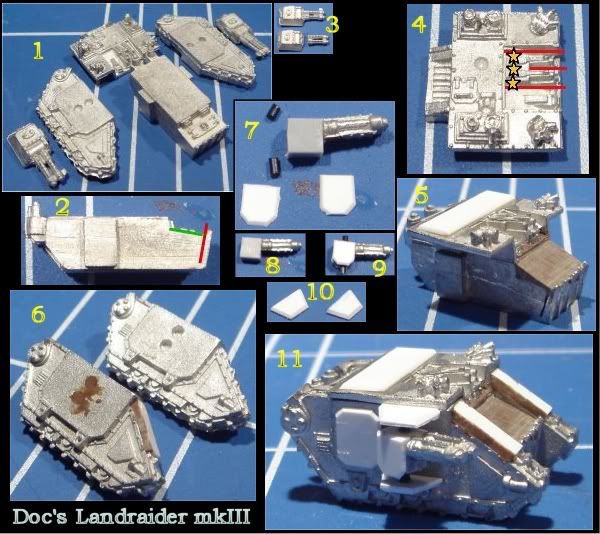
Pic 1, All the parts for an E40k era, Landraider mkII (except I couldn?t find the hatch sprue).
Pic 2, Take the Landraider hull and cut down behind the front ramp (red line), nearly all the way through. Bend the ramp forwards. This enables you carefully cut the hatches from the top of the assault ramp with out damaging the lower ramp (green line). Bend the front ramp back up. If you don?t want to keep the hatches, you can of course just ignore all of that and go onto the next stage. For all this cutting I used a razor saw (I think that?s what it is called).
Pic 3, Cut the Larcenous off the old sponsons as close as possible to the armour. Cut the foresight off the top of the Lascannons.
Pic 4, All the cutting on the top plate was done with the razor saw.
On the rear of the top section of the hull, there are two pairs of aerials and a small hatch. These can be carefully cut off and be kept for later. The top of the hull is then filed flat.
If you want one of the Landraider variants, you need to get rid of the heavy bolters from the hull top piece. Now I did this carefully, trying to keep the heavy bolters intact as much as possible, because if you do four variants, and keep the heavy bolters, you will have enough heavy bolters for one of them to be a Prometheus.
The method I came up with was to drill lots and lots of holes along the back of the heavy bolters (yellow stars). Then I cut down the sides of the heavy bolters to the holes you just drilled. If you got enough holes drilled, you will have weakened the joint enough to just snap the heavy bolters off the top piece. Then I cut down the centre of the heavy bolters, just to separate the two barrels (my saw blade was just the right width to do this).
Pic 5, Glue the top piece to the main hull and then green stuff (*see note below) the assault ramp, to make it more angled like the mk3. I filed it flat to get it smooth. If you wish you can glue the hatches onto the assault ramp top hatch for detail (the ones you carefully removed in step 1). I also added some armour to the top of the hull, to hide the area where the aerials were.
Pic 6, Putting armour over the track. Decide how far down the tracks you want the armour to go and remove the hinges/lumps that join the track links together in this area. File this area to give you a flat surface. Cut a piece of plasticard to size and glue it to the area of the tracks you just filed flat. Add a small length of thin plastic to the front of the track guard to form a lip (not shown in pic). Cut a triangular prism of plastic for the headlight, and glue in place (I never got round to doing this, but it was always my intention to do this). Finally fill the gaps down the side with green stuff.
Pic 7, The Larcenous are mounted horizontally on a square of plastic just as wide as the Larcenous are. Two pieces of plasticard are cut to represent the armour plates on the Lascannon sides. Mine are 7mm long and 4mm wide. Two pieces of plastic rod are used as the mounting shaft. Pic 8 shows the glued Lascannon, and pic 9 shows a complete Lascannon.
I did toy with the idea of using twisted strands of electrical wire to use as power cables, but couldn?t get them to fit well enough for me (a bit too much fiddle factor, maybe on my next one).
Pic 10, To mount the Lascannons on the land raider hull, you need to cut 2 pieces of plasticard for each side. I actually glued two pieces of plasticard together to double the thickness. My shape started as a 7mm by 4mm rectangle. The short side parallel with the long side is also 4mm long. Chamfer the 3 shorter edges and make sure the long edge is flat. Glue one to the tank hull, where the lower sponson mount would be. The Lascannon is mounted between the top and bottom sponson mount by a little plastic rod (see pic's 7 to 9). The Lascannon is glued in position at the same time as the top sponson mount. Do a few dry runs to make sure you are happy with positioning before doing this.
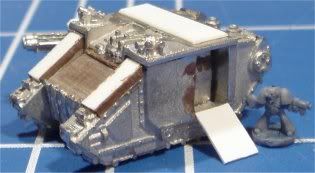
Pic 11, An almost complete example, a door has been added using plasticard (7mm x 5mm). Two hatches from the hatch sprue need to be added to the top plastic plate. On two of my Landraiders I made hunter killer missile tubes instead of using hatches. If you saved the aerials from earlier you can also add one of those too.
(*)I have actually used brown stuff instead of green stuff because I read that it behaves the same way as green stuff but is a lot easier to sand, and file etc once it is dry. I have found that this is true, but use what ever you have/like to work with.
That is the basic Landraider, next post will be about varients.
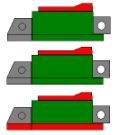
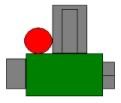
But before i go to bed, because these "how to's" take blooming ages (any one know a quick way?) here is a concept i was playing with on the last conversion. It might eventually make it to a fully complete model.

_________________
Without disappointment, you can?t appreciate victory.
|
|


