| Brood Brother |
 |
 |
Joined: Fri Jun 24, 2005 3:06 pm
Posts: 9684
Location: Montréal, QC, Canada
|
Turn 3
No teleports.
Strategy Roll: Imperial
The Emperor's Wrath continues to blast the same area, this time striking Assault Group 2: 1 Gargoyle, 1 Hormagaunt, 1 Termagant, 1 Ravener, and 1 Tyranid Warrior are all turned to pulp. (Was quite funny that my opponent managed to kill one of each type of creature in the swarm. *laugh*)
Baneblade 1 sustains fire on the Harridan, but the great beast shakes off the hits.
Enraged, the Harridan then engages Baneblade 2. The super-heavy tank has the support of the Chimeras and the Infantry HQ, but, despite doing 1DC to the huge creature, the Harridan tears the tank apart.
Assault Group 1 engages the Tank Company, but none of the Bugs are able to get into the buttoned-up tanks and the Leman Russ crews gun down 2 Hormagaunts and 2 Raveners, forcing the Tyranids back to the cover of the Tank Factory.
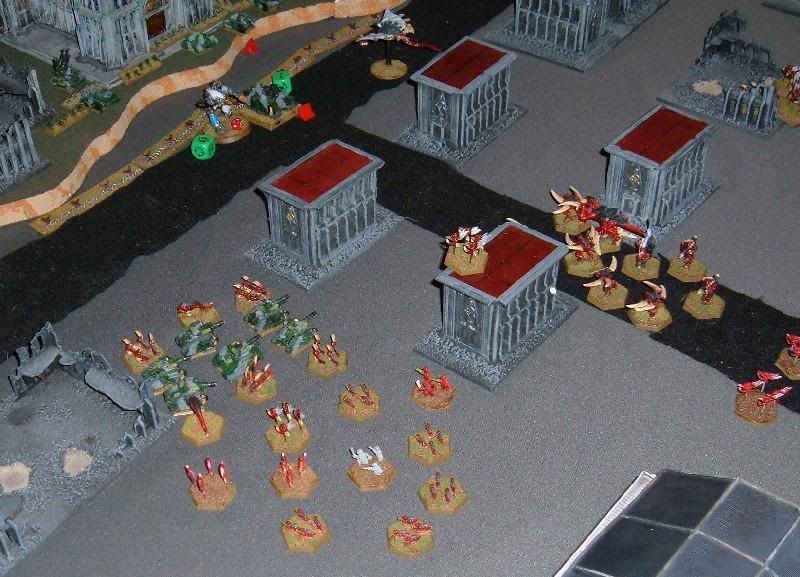
There is a rumble of thunder as the Strike Cruiser arrives, dropping an orbital bombardment on Attack Group 1 and Assault Group 2. The first loses 1 Carnifex while the other loses 1 Hormagaunt and 3 Gargoyles.

And then come the Drop Pods!
The Death Company's landing takes out 1 Gargoyle an 1 Termagant from Assault Swarm 1, while the two Tactical Companies' Deathwinds hit Assault and Attack Swarms 1 to no effect.
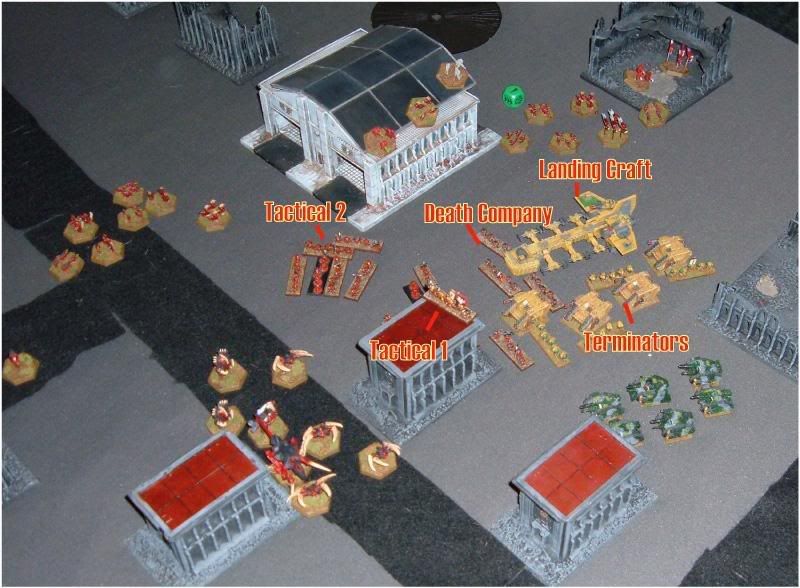
The Commander of Tactical Company 1 takes the Death Company and Tactical 2 on a combined assault against the Queen's Favoured Attack Swarm 1.

It is a complete debacle for the noble Blood Angels as the Marines are thoroughly trounced. Two survivors from Tactical 1 are all that remain to flee into the landing bay of the Landing Craft. The only bright spot being that the Death Company Chaplain was able to take out the Hive Tyrant, causing all the Brood creatures, including the Hierodule, to go to ground. A wave of hopelessness washes over the Imperial forces.
Assault Group 2 attempts to engage the Landing Craft, but they are easily beaten back by the grounded flying fortress and leave 1 Hormagaunt and 3 Termagants behind.

Getting desperate, the Russes advance to fire on the Harridan and actually manage to knock it from the sky.
Attack Group 2 sustains fire on the Infantry HQ and Chimeras again, but only manage to kill a single unit of Guardsmen.
The Infantry HQ marshals, moving back away from the encroaching horde of xenos and removes all Blast markers.
Assault Swarm 3 performs a long distance assault and engages the Chimeras. The 'Nids lose 2 Hormagaunts, 1 Gargoyle, and a Ravener to support fire, but still manage to wipe out the Imperial APCs.
The Landing Craft sustains fire on Assault Swarm 1, killing 2 Termagaunts.
Attack Group 3 doubles towards the Terminators and takes out 1 Land Raider.
The Warhound advances to fire on Assault Swarm 1, but only kills a Termagaunt.
The Hierophant doubles down the road to spray the Terminators, but only manages to place a Blast marker.
The Terminators sustain fire on the Hierophant, knocking it down to 3DC.
End of Turn:
Blood Angel Tactical Company 1 fails to rally and the Landing Craft stays on the ground.
The Hierophant regenerates 2DC.
There is much failed spawning for the Tyranids.
_________________
"EPIC: Total War" Lead Developer
Now living in Boston... any EPIC players want to meet up?
|
|