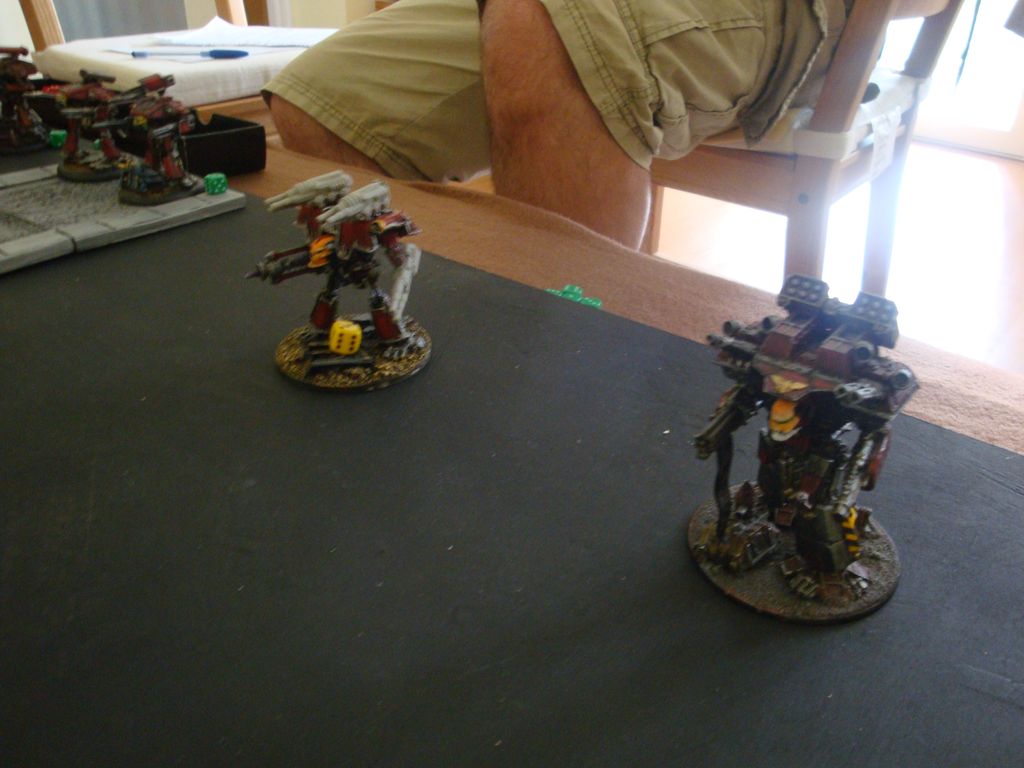
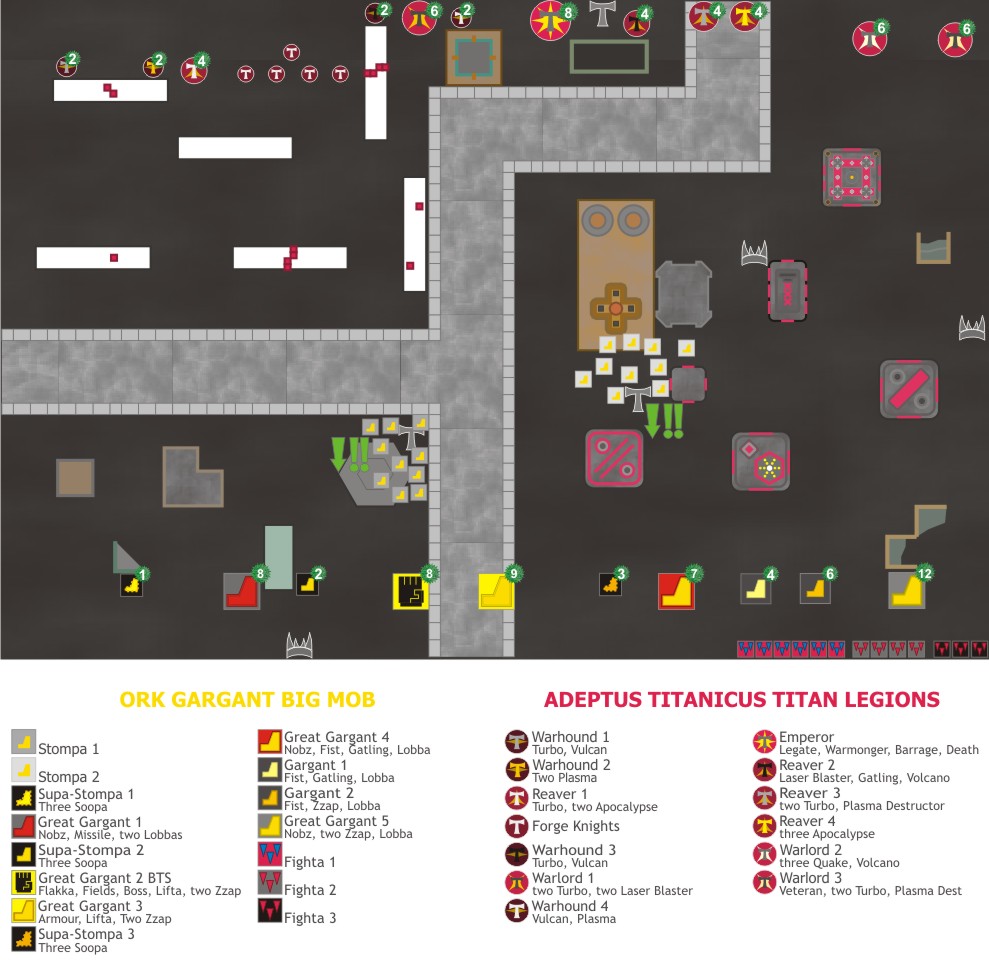
Turn 1. The Imperial side gets the initiative. T:
T: Warmonger powers-up all the main weapons and shoots a Barrage Missile at Stompa 1, which destroys five machines, breaking the formation. The remaining ones choose to stay in place and remain around the objective.
 G:
G: Fightas 1 ground attack Forge Knights hoping to break them after seeing there was no flyers on the Titan side but they save everything. I forgot they had three saves ...

 T:
T: Reaver 2 advances to the right and shoots on Stompa 2, but the smaller Titan cannot repeat the success of its biggest cousing and destroys three and they remain unbroken.
 G:
G: Stompas 2 marshall fearing what could come next (they were close to breaking) and remove all the blast markers.
 T:
T: Warhound 2 advances to behind the next building in front of it.
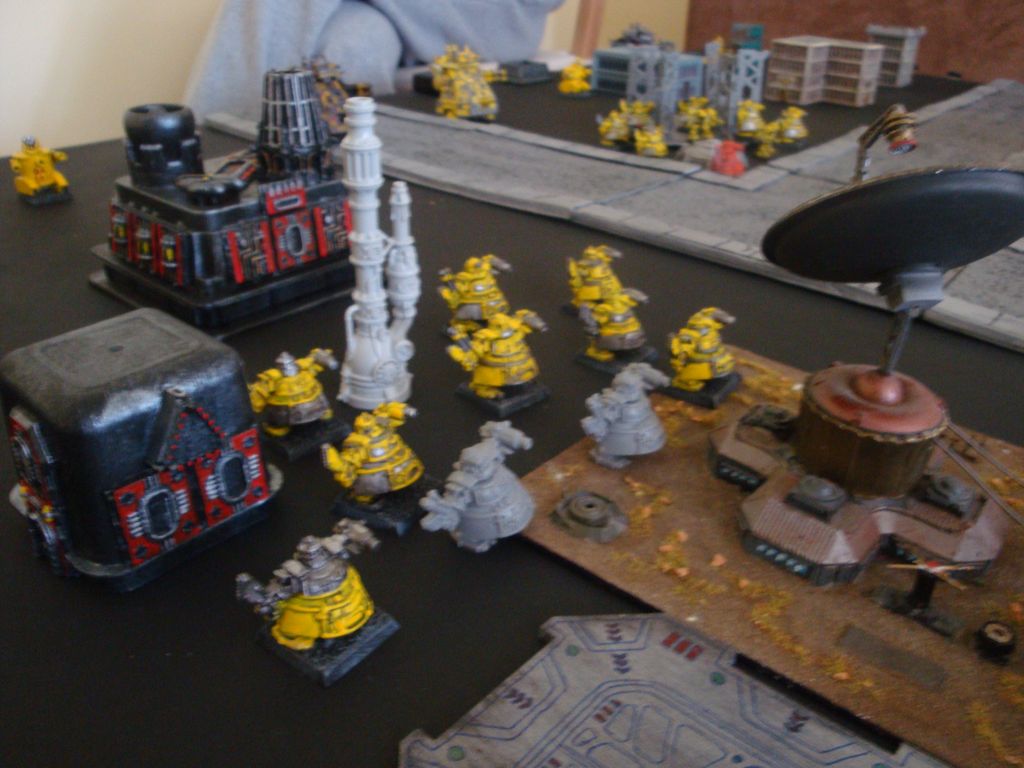
 G:
G: Supa-Stompa 1 doubles through the left flank.
 T:
T: Warhound 3 doubles forward to behind a building close to the road in the middle.
 G:
G: Supa 2 fail and move left of Stompa 1.
 G:
G: Retain with Fightas 2, seeing that the Forge Knights are invulnerable, ground attack on Warlord 1 and strips two shields. (I am conscious that one cannot retain after failing an activation but that's what i have on my notes)
 T:
T: Warlord 2 advance to behind the building in front of them.
 G:
G: Fighta 3 ground attack Warlord 1 to strip another shield down.
 G:
G: Great Gargant 3 double through the road but only manages to strip down two more shields with its Supa-Zzaps and leave it with one left.
 T:
T: Warhound 4 advance, remaining with the left foot on the road and the right behind a building.
 T:
T: Retain by using the Supreme Commander with Warlord 1 and sustains at Great Gargant 3 stripping all five shields and taking out one DC whic ends up being a critical hit.
 G:
G: Great Gargant 2 BTS doubles on Warhound 4 and destroys it outright and the cover it was using.
 T:
T: Reaver 3 advance towards the middle and onto the road shooting at Great Gargant 3 for another point of damage.
 G:
G: Great Gargant 1 sustains with both missiles on Warlord 1 and take out the last remaining shield and two points of damage, with one of them causing a critical leakage on the reactor.
 T:
T: Reaver 4 moves to the left of Warlord 2.
 G:
G: Great Gargant 4 doubles and shoots Reaver 3 for three shields and 2 BMs and puts also under the template Warlord 2 which was hidden behind a building but does nothing to it.
 T:
T: Warhound 1 doubles through the left flank to behind a building close to the middle road.
 G:
G: Great Gargant 5 doubles on Reaver 3 and also puts Warlord 2 under the template for 1 shield and another 2 BMs on each of them.
 T:
T: Forge Knights double to the center in front of Reaver 1 and shoots Stompa 1 for one casualty from a BM.
 G:
G: Gargant 2 doubles to the side of Great Gargant 5 and shoots at the same objective for another set of 2 BMs.
 T:
T: Reaver 1 advances onto the center and shoots Great Gargant 2 BTS and puts Great Gargant 3 under the template, taking one shield out of Great Gargant 2 BTS.
 G:
G: Supa 3 doubles to the right side of Great Gargant 4 and shoots again Reaver 3 and Warlord 2, breaking the first, taking out one point of DC which flees to its deployment area. Warlord 2 remains unscathered but takes 2 more BMs.
 T:
T: Warlord 3 advances to the right of Warlord 2 and shoots at Great Gargant 5 for five shields.
 G:
G: Gargant 1 doubles and lines up with Great Gargant 5 and Gargant 2 and shoots at Warlord 3 taking Warlord 2 under the template. Warlord 2 breaks with no damage and Warlord 3 takes 2 BMs and loses one shield. Warlord 2 chooses to remain where it is behind the building.


Warlord 1 and Great Gargant 3 take one extra point of damage from their critical hits but no further fireworks happen.
Everyone rallies successfully.
Turn 2. The Gargants get the initiative.
 G:
G: Great Gargant 2 fails and shoots at Warlord 1, taking out one shield and two DCs.
 G:
G: Retain with Supa-Stompa 2 which doubles with the Supreme Commander help, and takes out another DC out of Warlord 1, which breaks and stays in place. (At this point it is clear that we definitely forgot that it is not possible to retain after failing an action test).
 T:
T: Warmonger advances and shoots a Barrage Missile and its Vengeance Cannon towards Gargant 2 and also puts under the missile's template Gargant 1 and Great Gargant 5. The first takes 4BMs and loses all its six shields, the second takes 3BMs, and the third takes 4BMs and loses 1 shield.
 T:
T: Retains with Warlord 2 and advances shooting at the same objectives, putting 5BMs and taking out 3 DCs out of the first, puttin 2BMs on the second and putting another 2BMS and taking out one shields from the third. Gargant 2 breaks, and retreats to stop the bombardment oportunities from continuing as it was the one in the middle.
 G:
G: Gargant 1 marshalls, shooting at Warlord 2 and 3 for a single shield on Warlord 3 and two more BMs. It removes all of the BMs it had.
 T:
T: Warlord 3 sustains at Great Gargant 5 removing all five remaining shields and three DCs.
 T:
T: Retain with the Forge Knight but fail even with the Supreme Commander's help and shoot at Supa-Stompa 2 for a single shield.
 G:
G: Great Gargant 5 fails its action and remove four plus one BM from the Leader upgrade.
 T:
T: Reaver 1 advances in front of the Forge Knights and shoots Supa 2 for its remaining shield.
 G:
G: Supa-Stompa 3 doubles to Warlord 3 and 2 to give another 2 BMs to each.
 T:
T: Warhound 1 advance on Supa 1 and takes out one shield.
 G:
G: Stompa 1 marshall and shoot Reaver 1 for a shield. They remove all of the remaining BMs.
 T:
T: Warhound 2 advances on Supa-Stompa 2 and destroys it outright.
 G:
G: Supa-Stompa 1 fails to activate and shoots Warhound 1 for no damage.
 T:
T: Reaver 3 advances to the center and onto Great Gargant 3 which loses 3 DCs one of them a critical hit due to terrible save throws and lucky Reaver hit throws.
 G:
G: Fightas 1 ground attack Reaver 1 for two shields down.
 T:
T: Warhound 3 advances towards the right and in the road and shoots Great Gargant 3 for one point of damage.
 G:
G: Great Gargant 1 fails to activate and shoots Reaver 1 and puts Forge Knights under the template. Reaver 1 loses one shield and both formations take three BMs each.
 T:
T: Reaver 4 doubles toward the center and shoots Great Gargant 3 for no damage.
 G:
G: Great Gargant 4 doubles to its right in front of Great Gargant 5 and shoots Warlord 3 and 2 for no damage but Warlord 2 breaks again due to so many Mega Lobbas as in the first turn.
 T:
T: Reaver 2 doubles to the front of Warlord 3 and shoots Supa 3, taking out three points of damage and breaking it, which retreats back.
 G:
G: Great Gargant 2 BTS sustains on Reaver 1, shutting off its remaining shields and taking out three DCs, breaking it. It retreats behind the closest building on the left.
 G:
G: Fighta 3 ground attack Forge Knights and give them the last BM needed to break them. They retreat with Reaver 1 behind the same building.
 G:
G: Stompas 2 double forwards and to the right surrounding the objective there and shoot Reaver 4 for 1 DC.
 G:
G: Fighta 2 ground attack Forge Knights for a casualty from a BM.


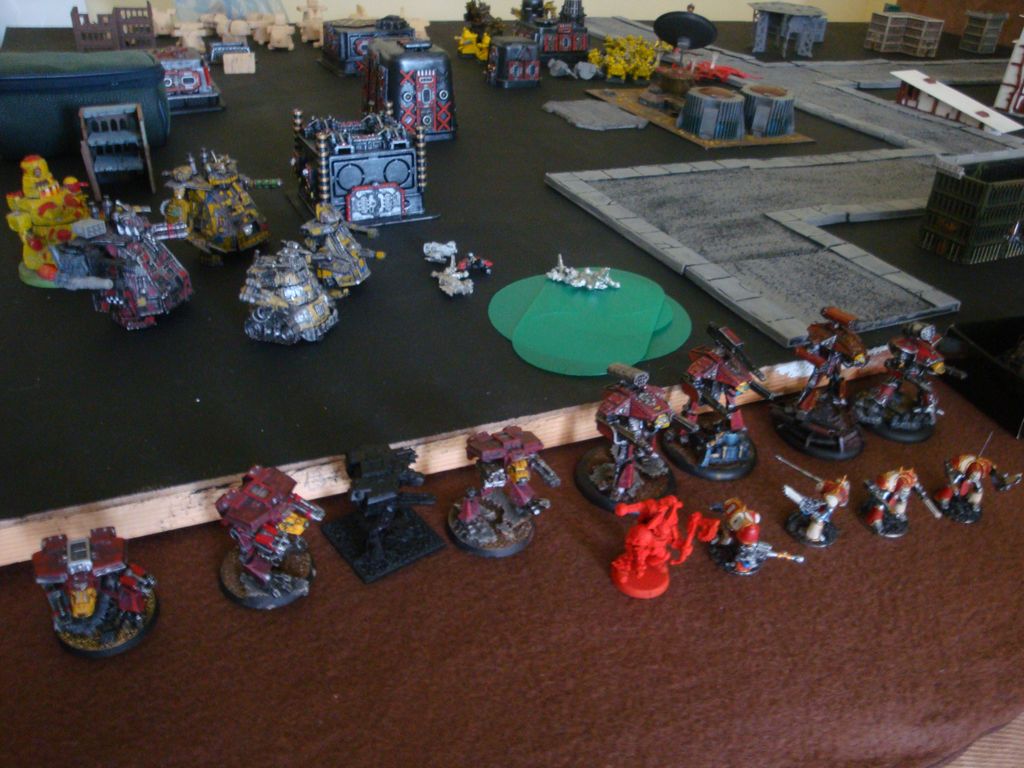
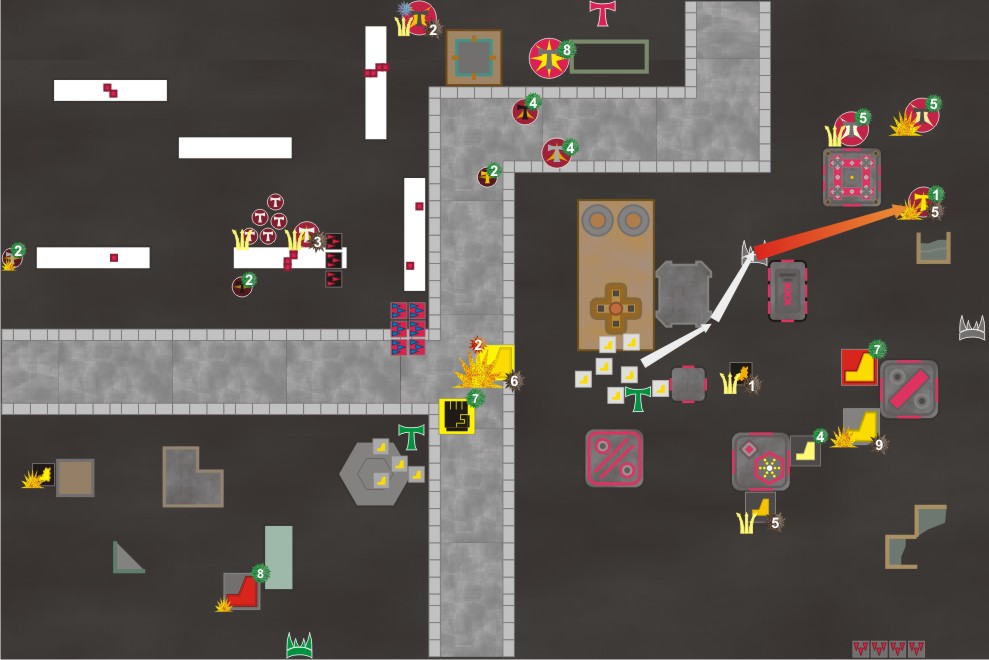
And we left here the game, as the AMTL player had to leave before time, unfortunately. The game ended with only a single ''explorer'' Titan casualty from each side and eight Stompa Gargants down.
About the damages, the Imperials ended with three Titans damaged and the rest almost intact with one shield down on two Warlords. The Orks had four Gargants damaged and only three Gargants almost intact on shields.
Orks controlled more territory and objectives, had a monopoly on air, had an advantage on activations and less broken, but they were a lot more damaged and would not be strange if one Supa, one Gargant and one Great Gargant would go down at the beginning of turn 3, while only one Imperial Titan was close to being destroyed and two Warhounds were in a bad place even if completely fresh. Given this, while it could go to either side i think the Imperials had the advantage the more the battle dragged on, contrary to the basic belief that Orks are an attrition army.
ConclusionsFirst of all, i should note that there were some parts of the game which i could not understand from my notes and photos, like how the Ork side kept on retaining the initiative after failing the first activations, or how the Warlord 2 used templates even though it was only Warlord 1, the one in the middle of the board, the one which had them and the Volcano Cannon, and one of the reasons it was targeted so much. About the first i think that they were sustain actions made thinking that it did not matter if they were going to fail as the Orks just wanted to shoot, and about the second i think there was a misunderstanding with the loadout from the Imperial player, as i remember something along those lines.
About how the game went, I was expecting low numbers of casualties, but not this low, and that is lower than what it should be, even though the Ork players were hitting at no cover most of the time. On the other side, while the Orks were on cover most of the time, their armour saves were bad. I also expected to be less constraining on room to move as we only had a few more than a dozen formations from each but the buildings and concentration of objectives made it a template fest, even though it was also because both sides were quite greedy on wanting to make some damage, already on the first turn. The Forge Knights seemed invulnerable in the middle of the game so i switched to use the Fightas on taking down shields instead and left the templates to take care of the Knights.
On the matter of hitting, there is a single weapon which stood up amongst the rest by a large margin: the Mega Lobba. I expected it to stand out of the rest as in theory taking a single one per Titan makes wonders even if two or three is not as good, but it surpassed my expectations by far. It kept breaking things around (Warlord 2 was broke on each turn by only them and one shoot from a set Soopagunz) and was the one who did the most work as the loses on shields and DCs on the Imperial side were low even though they were on the open for most of the time. Overall they did, just by themselves:
9 BMs and 2 shields on the first turn and 11 BMS and 2 shield on the second, by only five Mega Lobbas on the first turn and six on the second, not counting the BMs for coming under fire.
Soopagunz added 6 more BMs, one or two shields and one DC. The rest of the army added 11 shields and 12 Dcs down, with almost every DC down from TK weapons.
While they did almost no damage as they were hitting on 6+ and 7+, Mega Lobbas took out more BMs than the rest of the army combined, broke formations five times almost by themselves and the rest of the weapons only one more, with only five/six weapons from the thirty Titan weapons and thirty-six Big Guns in total which got to fire.
The Imperial player told me after the battle that he felt a bit helpless, as we were pouring 4-6 BMs with each of those activations which he could not avoid with cover or hiding, as it is a one third chance of 2BMs no matter the penalizers for shooting, which make it, from an Ork point of view a Disrupt weapon, as it puts a BM on a 5+ instead of the 6+/7+ which is the normal if it were Disrupt, even if there is more dices thrown. He told me also that this was a concern already since the times of Nealhunt's version of the list, which surprises me.
It makes me wonder if we were to have put a Mega Lobba on each Gargant on play or if we were not playing against a Fearless army what would have happened, as they would have killed the enemy by pure BM onslaught.
On about the other things i wanted to test, if i do not count the Mega-Lobbas the list felt a bit under-gunned even from a Ork point of view even if i could absorb a lot more of damage which makes me wonder if it would have been better to take more Gargants, only one or two Great Gargants, and use the Supa-Stompas for harassing with BMs and contesting objectives.
The Leader upgrade felt useful as so much fire was raining down, but as it was more than usual getting back to zero BMs was hard even with it. As both sides barely advanced on the second turn there was no option to test the Ripper Fist which was a pity.
Supa-Stompas felt a bit underwhelming, but that's normal as their weapons work worse against this kind of list.
The missiles continue to be an auto-take for me as they do more damage with both than a single Deathstrike for the same cost, most of the times are better than taking a Deth Kannon, and they are a lot more valuable than in a Imperial army, so now that some years have passed I see the change on the more recent Gargant list on the missiles as a good one which also fits Orks better.
The Orks felt quite low on numbers compared with the Imperials from a Ork point of view which is a pity. Imperials can take lots of smaller Titans and even two per formation but Gargants can only take a few Supa-Stompa Gargants and never more than one per formation which feels both strange, and out of place for the faction.
The Imperial side reported that felt quite helpless against so many DCs, but from the Ork side we felt something similar, as we only got a single Battle Titan close to destruction, another at half, and destroyed a Warhound. If analyzing the damages, the Imperials lost 14 DCs and 15 shields and the Orks lost a lot more with 20Dcs and 34 shields. Probably that feeling came from so many formations broken by Mega Lobbas which halted his advance on both flanks as there were no Mega Lobbas on the center.