This tutorial covers how to make your own epic bases cheaply, quickly, and to a good level of finish. The bases shown here cost me under 1p each.

Orange bases from this tutorial, showing 4 and 5 hole variants next to a GW base.I’m focusing here on 12*40mm bases (regular epic strip base size) with 4 holes, but the same method will work for bases of varying size and hole configuration. The skills and tools needed are minimal, if you can cut in a straight line with a ruler and own a drill you’re all set.
I find 4 hole bases useful as many of the GW epic figures look crowded at 5 to a base: ogryns, marine scouts, and khorne berserkers are all good examples. It also helps to economise when using rare models.
You need some 1mm styrene sheet (see below), poly cement (plastic glue), masking tape, a scalpel, steel rule, a 6mm drill bit and a drill.
Drills, knives and poly cement are all potentially dangerous, if you hurt yourself it’s your fault. I used a hand drill, if you want to bring in power tools that's your look out, take relevant safety precautions!If you're doing a lot of bases, you need to obtain 1mm styrene in bulk. You could buy ‘hobby’ styrene sheet (woodland scenic etc), but that’s a really unnecessarily expensive way to buy a very cheap material. Instead, you can buy 1mm HIPS (high impact polystyrene sheet), normally intended for vacuum forming, cheaply online in bulk. It’s available in a wide range of colours, I’ve got it in black and white, but have used red/orange here as it was on discount – 80p for an A2 sheet!
 Step 1 – blanks
Once you have your styrene, you need to mark out a grid of base blanks onto the sheet. I’m doing regular epic strip base size, so my blanks are 40*12mm.
You need at least twice as many blanks as you want bases (two blanks per base, plus a few extra for spoilage).
How you mark the bases out on the sheet is up to you, but do it as a grid so you can just snap along the lines. I’ve attached a printable sheet to this post with 88 blanks drawn up on it, print full size (do not scale). I spray-glue this onto the styrene directly and use the lines as a guide. (more details on this and scoring/snapping the bases out added in post 13 of this thread)
Attachment:
 88_12_by_40_base_blanks.pdf [8.44 KiB]
Downloaded 650 times
88_12_by_40_base_blanks.pdf [8.44 KiB]
Downloaded 650 times
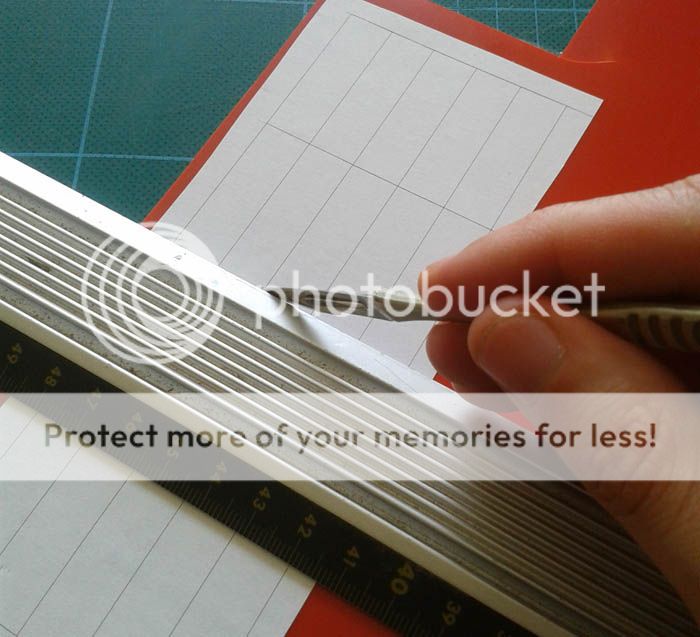
Do not cut the bases from the sheet,
just score with a sharp knife using a steel rule as a guide, then snap the styrene. It will break cleanly along the score line with minimal bur. Scoring and snapping is faster, safer, and gives a far better finnish compared to brute force cutting. Might need a bit of practice to work out how hard you need to score to get a good snap and minimal bur.
You should end up with lots of small rectangular styrene blanks, like so:
 Step 2 – drilling
Next you want to tightly bind
a bit over half of these blanks into small stacks using tape (this half will be drilled, the other half will form the lower layer of the bases). The larger the stacks the faster the drilling stage is. However, if you use a large number of smaller stacks you can get more variations in hole placement over the hole batch.

Hold the stack securely (not with your fingers …) and drill the desired number of holes. A 6mm drill bit is exactly the right size. You might want to mark the hole placement in advance of drilling, but for 4 holes bases it’s not really needed.


Depending on how close your holes go to the edge, the bottom most blank on the stack will often be damaged beyond use as the drill will rip it on exiting the stack (YMMV depending on your drill bit, drill, and method of holding the stack).
 Step 3 – glue
Once drilled, un-tape the stacks and discard any damaged pieces. You should now have a pile of plates with holes and a pile of blanks.

(blanks not pictured here, they look the same as they did in step 1!)
Stick ‘em together using poly cement. You need less glue than you think.


If you scored, snapped, and drilled everything neatly there should be minimal bur meaning clamping is not needed while the glue sets. If not, you'll want to clamp them tight while the glue sets.
Bases!
Bases with painted minis in:

Alternative to drilling in stacks (if you don't have a vice/bench clamp?): after scoring the base blank grid onto the styrene, but before snapping the blanks apart, clamp the whole sheet to a bit of junk chipboard and drill the holes base by base. This involves a lot more drilling, but means you can give every base a different hole configuration. Extra care is needed when snapping if the holes are near the edges. Again, only drill half of the blanks.


 A pack of HIPS like this: