Like I wrote earlier I started converting some DE vehicles for my self.
I've shown them in my painting thread in the 6mm sub forum and got some request to do tutorials for them.
And as those have been appreciated I thought I'd share them here as well for those of you who don't nesscarily head over to the 6mm forum. This is just my way of course, the tips and tutorials in raiders are great inspiration as well.
I've relied heavily on parts from the (new) 40k reaver model and missile parts from the 40k razorwing airplane for my conversions, like you will see. These should be easy to find from bits stores around the internet.
First is the raider tutorial. Borka wrote:
kyussinchains wrote:
As a request, both to Borka, and other talented scratchbuilders, please post very detailed guidelines on your scratchbuilds, I am determined to have all the models that I want in my armies, but not being a huge modelling talent it's not easy to figure out for myself
I'm happy to help so below follows a tutorial. I was in kind of a rush so didn't have time to arrange good lightning, so I would like to appologise for the bad picture quality.
Their super easy to make if you have the right parts, you don't really have to model anything. (ok it's very fiddley but other than that they're easy.)
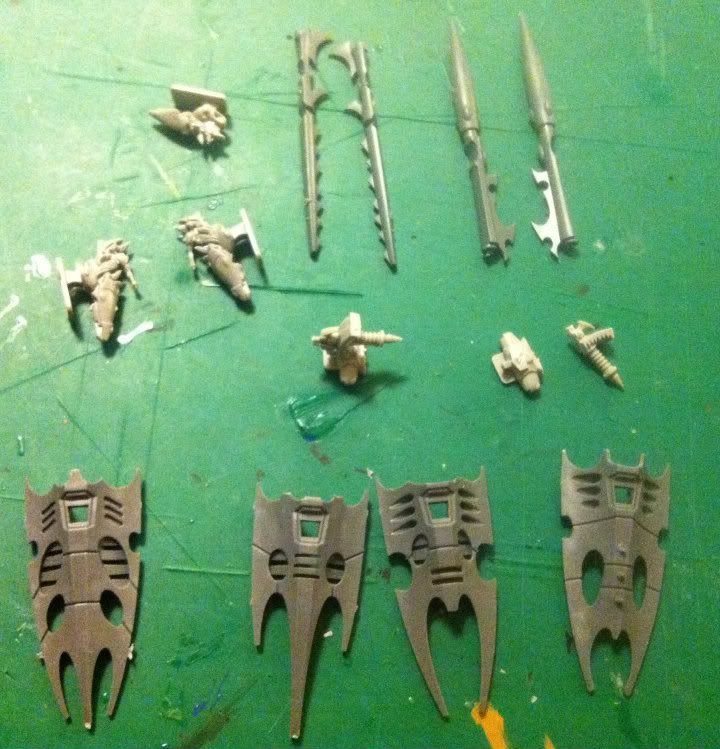
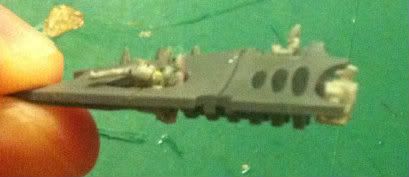
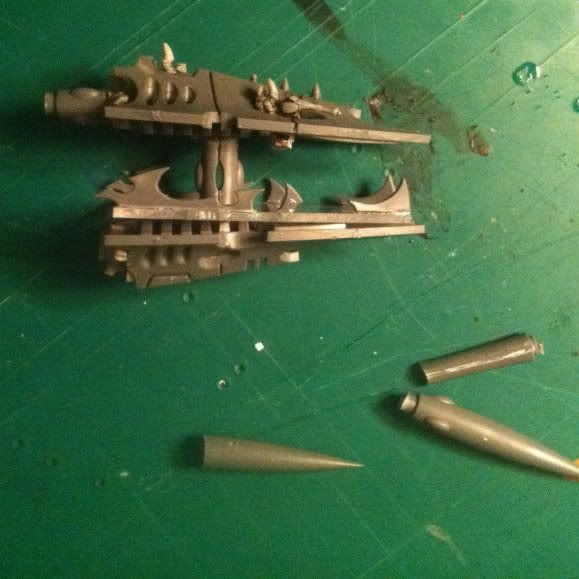
My raider tutorial:First pic; pieces needed are these: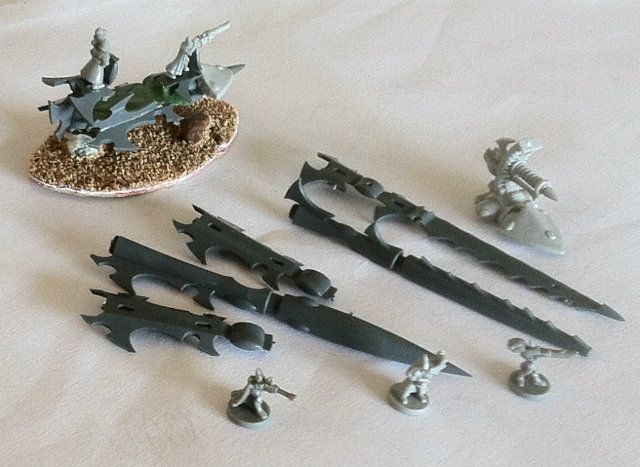
What you see above are.
One eldar ranger,
old plastic gun crew,
old plastic shoulder mounted heavy weapon guardian,
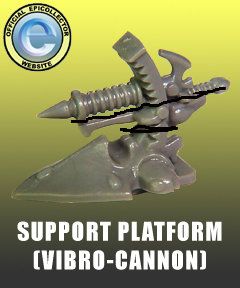
old vibro cannon/support weapon,
one new 40k DE razorwing necrotoxin missile (unassembled),
1,5 new 40k DE razorwing shatterfield missile,
Some kind of base (technically not necessary by the rules, but makes a skimmer look a lot better).
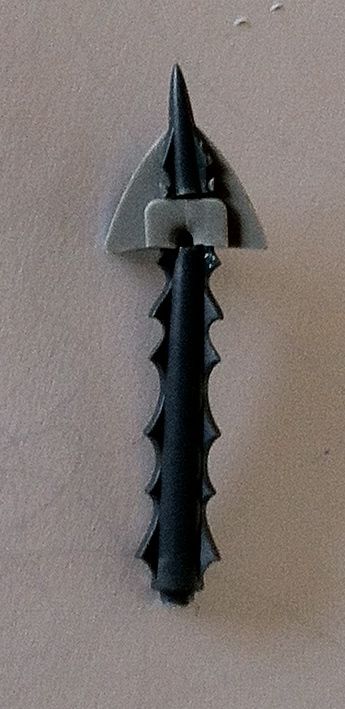
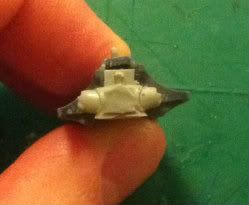
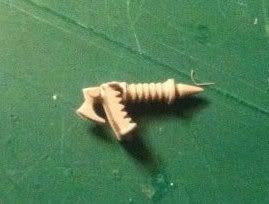
II) Step two. Cut the necrotoxin missile part like in the below picture.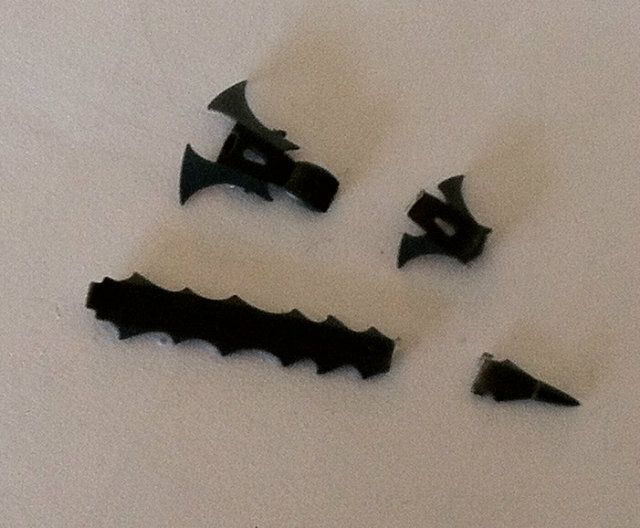 III) Cut of the frontal part of the vibro cannon. Glue it together with two of the parts from step II. Glue them straight and not asquint like I did in the picture
 ![:{[]](./images/smilies/headbang.gif "Headbang")
 IV) Cut shatterfield missile part like this
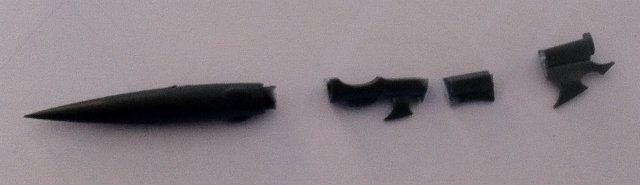 IVb) Below pieces goes together. Som flattening of their surfaces are needed to easy and convenient glueing.
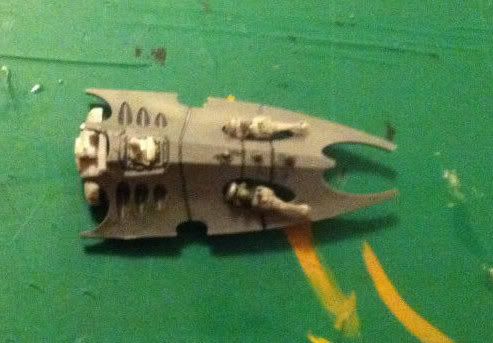
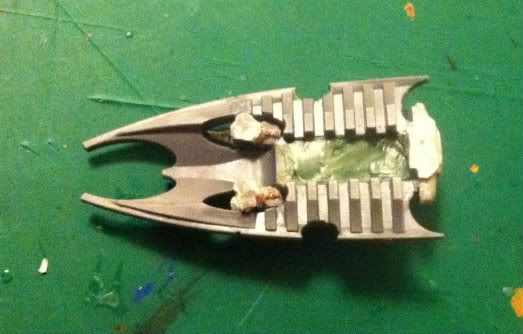
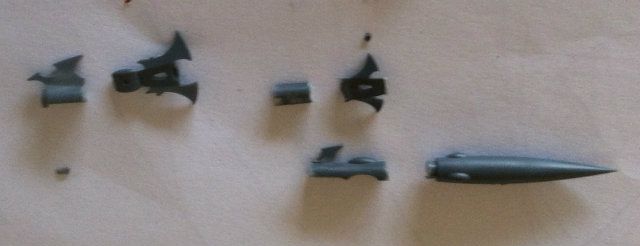 V) The smaller two paired parts goes to the front. The bigger part from the shatterfield missile should be placed to the back to give som "back fins" to the raider and on top of that glue the large part form the necrotoxin missile to form the raised area for the steersman. Fold it first before gluing it on
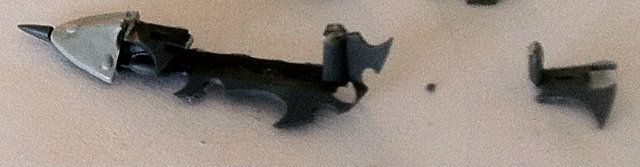 VI) Right vessel in pic: Take weapon crew miniature and cut of the feet from the base. Glue to the back. Take some small piece of suitable plastic and glue for the aft gunner to have his weapon rest on.
Left vessel in pic: Cut of weapon barrel part from shoulder heavy weapon dude and glue to rangers weapon instead of the thin part of his rifle barrel. Glut to the front. Add green stuff to floor can be done earlier.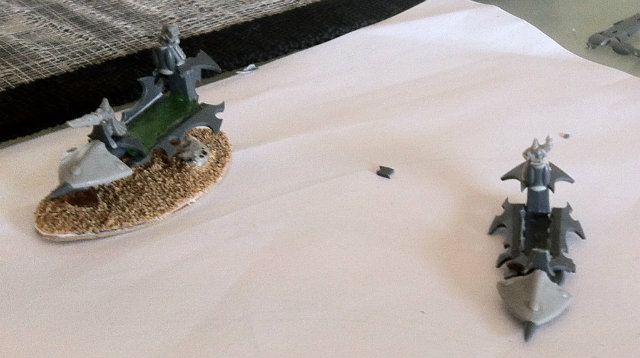 VII) After green stuff is hardend you add railings. I used parts from the shatterfield missile.VIII)The finished product looks like this. I added a sail before painting it is made from wing parts from the 40k reaver. The 40k raider has a more traditional sail, but that wasn't really doable for me. They were way to thinn and fragile.
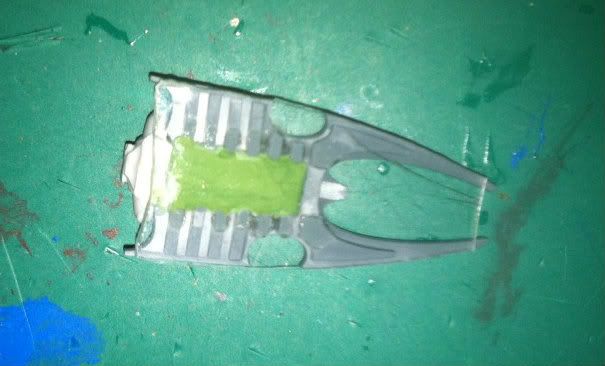
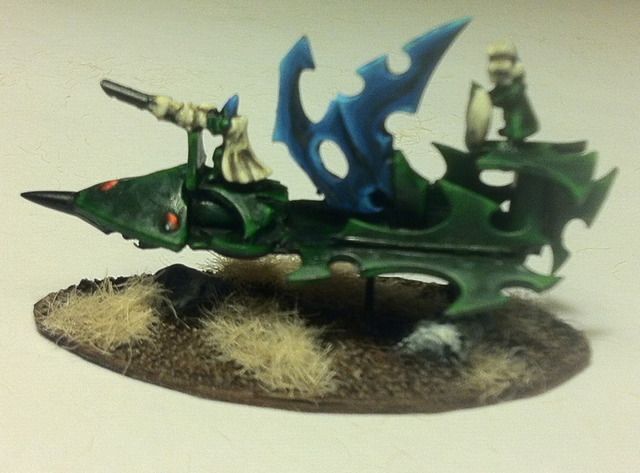
It looks a lot more bright green in the pic than it actually is. The green is rather dark looking realy.
cheers
Borka wrote:
The airplanes:The airplanes were really easy to make. All you need is an old plastic jetbike. Then buy these parts from the reaver jetbikes from any bits store (the 4 parts on the lower row).
http://i.ebayimg.com/t/WARHAMMER-40K-BIN-BITS-DARK-ELDAR-REAVERS-HULLS-and-WINGS-/00/s/OTAwWDkwMA==/$(KGrHqZHJC4E8fW,EPnUBPPh8zUg3g~~60_3.JPGCut off the hammerhead looking part that protrudes from the "bridge" between the wings. Cut the jetbike in two behind the back of the rider. Glue the two parts to the "bridge" between the reaver wings, like in this picture.

Add some greenstuff underneeth in the middle to make the two parts of the jetbike and the reaver wings "blend" together.
The cannons seen on the picture are from the old plastic vibro cannon. They're the small support piece that sit under the actual cannon. Cut like the black lines suggests.
That completes the airplanes

cheers
The third tutorial I made were for my Barges of Pleasure.Borka wrote:
Ok so here comes tutorial number three, The one for the Barge of Pleasure. Ones again mostly used parts from the current reaver model and missiles from the new 40k DE airplane.
Parts that I've used can be seen in this picture.
What you see is:
1 old plastic epic eldar jetbike.
2x old plastic epic eldar vyper jetbikes.
2x old plastic Vibro cannons (mine are somewhat cut up).
2x necrotoxin missile part
2x shatterfield missile part
2x 40k reaver jetbike hull part (4 are shown)
1 piece of plasti-card (not shown)
Like you can see the vibro cannons have their frontal part missing, these are used for
the raiders like you saw earlier
Step 1Cut off the lower part of the vibro cannon, you can see the piece already cut off in the above picture. Glue it to the back of the reaver hull part. Like this. Do this to both the reaver parts, 1 will form the bottom(/deck) and one will form the top(/roof) of the vehicle.
 Step 2
Cut off the driver from the ordinary jetbike and place it in the hole in the reaver hull part you've chosen for to be the top/roof part. Cut out the vyper gunner with gun, seat and all from behind the driver (be sure to save the rest as it can now be used as a regular jetbike). Take two of these and put them in the holes in the reaver hull part. I use these throughout my army to represent Dark lances, which the BoP have two of.
 Step 3
Fill the hollow inside of the reaver parts with greenstuff, both top and bottom part.
 Note that the above picture is WIP. You will want to fill the green stuff up so that it becomes level with the raised areas, and not just halfway like in the picture.Step 4
Cut out a piece of plastic card that fits on top of the bottom part. This is going to be your deck. Glue it to the bottom.
 Step 5
Now you take the missiles. First cut off the missile wing parts (
blue lines). These are rather delicate so you will need to be careful (they're already cut off in the picture see first picture for reference). They will be used for railings.
Cut along the red lines on the two shatterfield missile parts. Take the two pieces you get and flatten their backsides, glue them together. This will be the "stem" of the vehicle, which holds the top and bottom parts together.
Take whats left and cut along the green line. Glue the piece you get to back of the top hull part. This will be the engine exhaust.
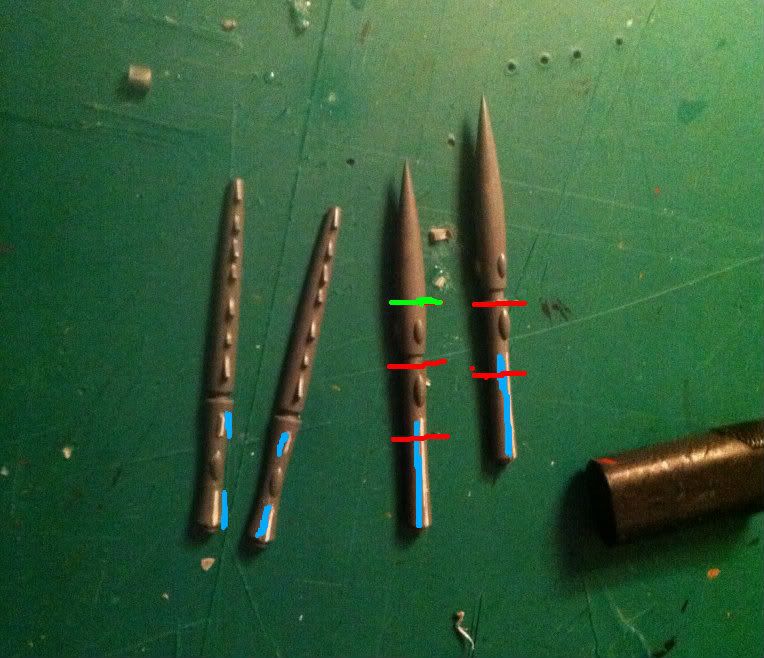
It will look like this when all is glued together.
 Step 6
Cut one of the vibro cannon cannon pieces free.
Glue it underneath the deck somewhere that you think is fitting, which I guess depends a bit on which reaver piece you use for the bottom. I use it to represent the barrage weapon on the BoP (the name escapes me at the moment).
Step 7Base the vehicle according to your preferred method.
That completes the tutorial.
cheers


