Tactical Command
http://www.tacticalwargames.net/taccmd/

Epic Flamer Walkthrough
http://www.tacticalwargames.net/taccmd/viewtopic.php?f=7&t=16081
Page 1 of 2

Author:  Ghudra [ Mon Jul 06, 2009 7:29 pm ]
Post subject:  Epic Flamer Walkthrough

Here is a brief walkthrough on putting a Flamer together for a standard 2.0 IG supertrooper.  Things you'll need include:

-.64mm plastic rod
-1.2mm plastic rod
-.64mm plastic sheet
-thin wire
-handy tools, CA+, & poly cement
-IG trooper

*First thing I do is cut 2X bits of .5mm thick .64mm rod.  These are going to go on top of the fuel tanks.  
*Next, cut a 2-3mm section of 1.2mm rod and cement it to the bit of rod that it came from.  I usually just lay both bits flat on the table, add cement to a side, line them up, & push them together.  This keeps what will be your fuel tanks relatively straight.
*Next, take a 1mm wide strip cut from the .64mm sheet, lay it flat on a table, & cement it to a section of .64mm rod.  You may want to cut ~2cm+ of length to make manipulation easier and this piece is what you will be making nozzles out of.

Author:  Ghudra [ Mon Jul 06, 2009 7:31 pm ]
Post subject:  Epic Flamer Walkthrough

*One your tanks are relatively dry, add the two small bits of .64mm rod to the tops of the tanks.  This is just like doing rivits for larger models and I like to use tweezers to dip the small bits into a puddle of CA+ and then place them with a pin or similar pointy object.

Author:  Ghudra [ Mon Jul 06, 2009 7:39 pm ]
Post subject:  Epic Flamer Walkthrough

*While your fuel tanks are drying, shave a flat spot on the back of your IG trooper and clip the extreme end of his lasgun off.
*Once your tanks are dry, cut them free from the main portion of rod and trim them up to right around 2mm long.
*Cement them to your trooper.
*Taking a bit of wire, put a bend in it around the end of a pair of needle nose pliers or similar round object.
*Test fit the wire from the back of the tanks to where you want it on the main body of the gun and clip it to fit once it seems right.
*Cement wire at the bottom of the tanks & the main body of the gun.  This can be amazingly fiddly and you might try to use some blu-tack to hold the wire in place while the glue sets.

Author:  Ghudra [ Mon Jul 06, 2009 7:48 pm ]
Post subject:  Epic Flamer Walkthrough

*For the barrel, you want to cut a small angled section out of the sheet portion of the .64mm rod/sheet piece you glued earlier to resemble the shape of a 40K flamer barrel.
*The rod portion of the .64mm rod/sheet piece is going to be the "top" of the flamer barrel, so you want to cement a small bit of wire to the "bottom" of the sheet section.  It's easiest to curl the wire around a pin to create a rounded edge and then clip it to fit your barrel.
*If you want to add any detail to the barrel, like holes etc, now is the time.  Onc you get it cut & cemented to the IG trooper, that will be much more difficult.

Author:  Otterman [ Mon Jul 06, 2009 7:52 pm ]
Post subject:  Epic Flamer Walkthrough

That's great stuff, Mr. Ghudra, sir.

This how-to compares well to another of my favorite how-to.

Author:  Ghudra [ Mon Jul 06, 2009 7:55 pm ]
Post subject:  Epic Flamer Walkthrough

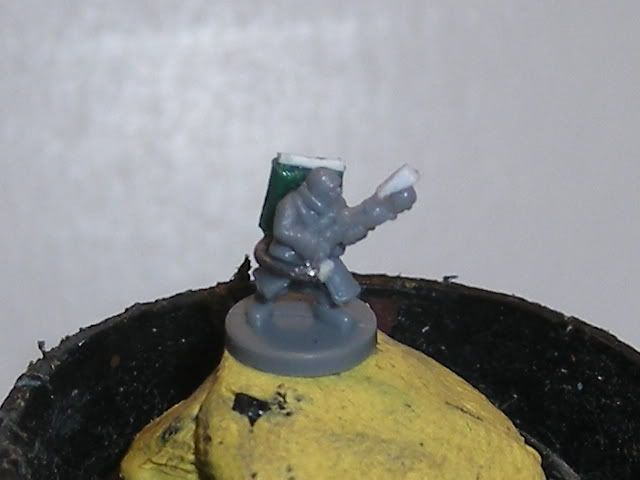
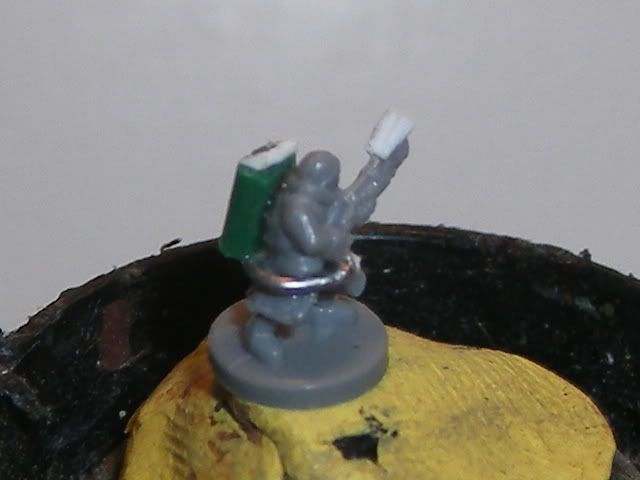
*Next you want to cut the "barrel" off of the .64mm stock.  A cut straight across the piece about 1.5mm back from the front edge of the flamer should get you close to where you want to be lengthwise.
*Attach flamer barrel to the end of the chopped IG trooper lasgun.
*While your trooper dries, look at something really far away for a few minutes.  This will hopefully preserve your eyesight so that you can go on to make entire legions of flaming IG troopers. :vD

Author:  Ghudra [ Mon Jul 06, 2009 7:56 pm ]
Post subject:  Epic Flamer Walkthrough

Oooo..I love the Tick! :))

Author:  Brother-Captain Parzval [ Mon Jul 06, 2009 7:58 pm ]
Post subject:  Epic Flamer Walkthrough

Thats a rockin' tutorial, we need more of these  :agree:

Author:  levinas [ Mon Jul 06, 2009 10:04 pm ]
Post subject:  Epic Flamer Walkthrough

Excellent stuff, thanks for sharing. My only suggestion would be to remove more of the lasgun to bring the flamer-end-bit closer to the barrel but this really is nit-picking of the highest order - that little flamer-dude is absolutely superb. One of the very best epic conversions I've seen.  :agree: :agree:  :agree:

Author:  Warmaster Nice [ Mon Jul 06, 2009 11:38 pm ]
Post subject:  Epic Flamer Walkthrough

Excellent. I think I may have to make a couple of those for my own Siegers... :cool:

Author:  Tiny-Tim [ Tue Jul 07, 2009 8:43 am ]
Post subject:  Epic Flamer Walkthrough

Great job, thanks for sharing.

Author:  Apocolocyntosis [ Tue Jul 07, 2009 11:20 am ]
Post subject:  Epic Flamer Walkthrough

Great walkthrough and very clear pictures.

Also Ghudra ive just looked through your ork thread, that stuffs amazing :O , how did you do the rivets? Pressed through thin plastic sheet I assume, but with what?

Author:  Ghudra [ Tue Jul 07, 2009 2:44 pm ]
Post subject:  Epic Flamer Walkthrough

Thanks. :))

They are impression rivets.  Essentially you take a nail, screw, or other pointy object that isn't sharp enough to punch through the plastic outright and apply pressure to the rear of the p-card sheet.  

You can actually buy commercially available "rivet tools" that resemble mini pizza cutters, but Orks benefit from a more random effect.  If you were working with Imperials, it might be worth checking into a rivet tool.  Trumpeter has a good one HERE .

Author:  Legion 4 [ Tue Jul 07, 2009 3:26 pm ]
Post subject:  Epic Flamer Walkthrough

Frakk ! ???  Now I may have to try my hand at it !  :vD 8v)    Not as good as "G's" ...  But He did inspire me !!!   :agree:    Thanks "G" !!        


Author:  Ghudra [ Mon Jul 20, 2009 12:30 am ]
Post subject:  Epic Flamer Walkthrough

Just a bit more goofing around with an idea for Sapper proxies.  I gave a Commissar a bit of new headgear and a tellermine-esque Melta Bomb to make the stand resemble the description.  Might try some more dynamite looking sticks next go.  

Food for thought I spose'. :))

Page 1 of 2 All times are UTC [ DST ]
Powered by phpBB® Forum Software © phpBB Group
http://www.phpbb.com/