I built these recently and thought that i'd give them there own thread in case people ever want to refer back here in the future. THey're a little rough but i'm happy enough with them :-)
ALthough i've used them as Landtranporters i can easily see myself bulking out my ork forces with by changing a few things and i'm sure that with a bit more work they could make really good steam junka trucks too. Perhaps also a good base for making all manner of civilain epic vehicles? Just need to make them a bit more clean cut i guess!
WIthout further ado:
MOK's MK1 BLAHBLAH PATTERN LANDTRANSPORTER: How to: PT1Prep
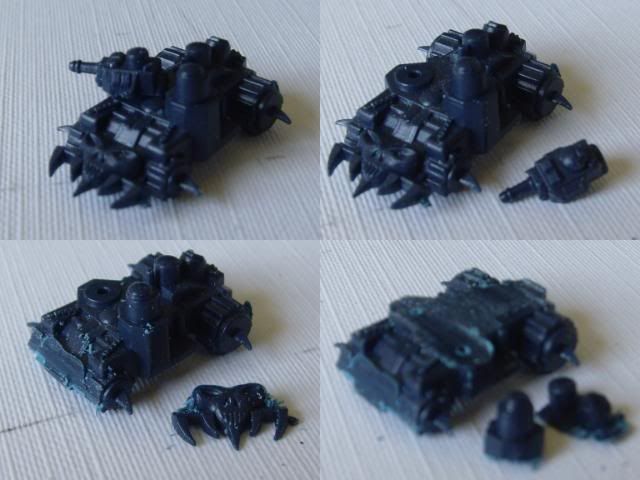
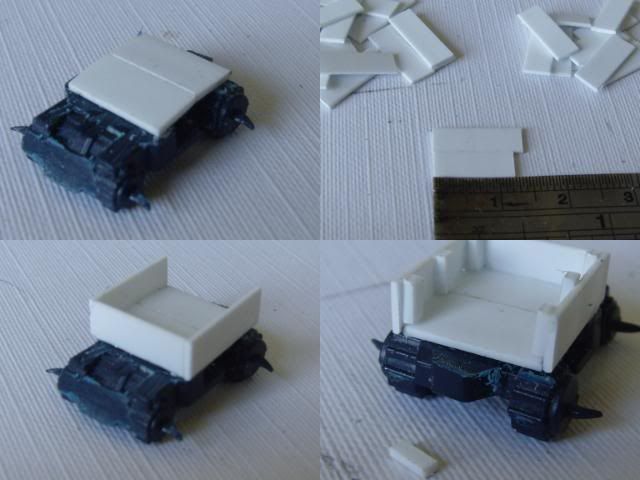
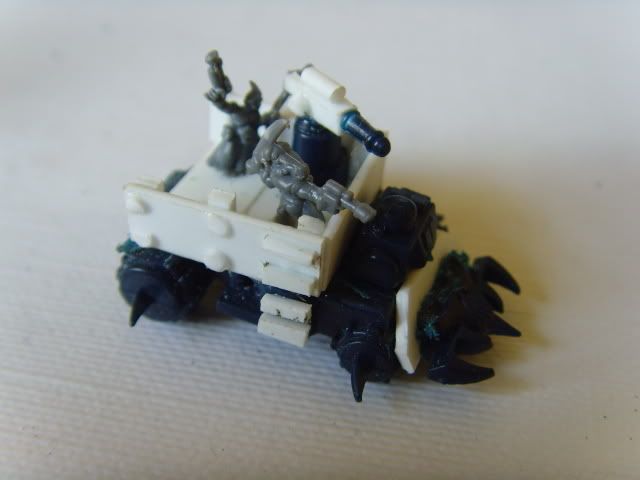
Take yourself an old space marine era plastic battlewagon, readily available on ebay or from yr bits box. Remove the turret, saw off the pointy skull faced dozer bits and also the 'engine' and other bits to create a smooth surface. FIle to flat as necessary
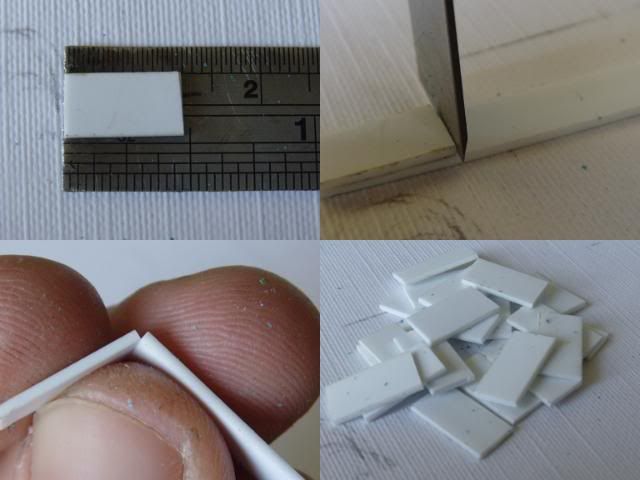
Now it's time to play with plasticard. First we're going to create the 'bed' of the truck. In case new people come across this the easiest way to work with plasticard is to measure the parts you need and then just SCORE the cuts you're gonna make; then the plasticard can be neatly snapped instead. RIght now cut yoursel out two sheets (or one large one) to act as the bed. Now's the time to start a production line rather than doing these things singulalry.
Next cut out some sides and then using a square 'rod' rather than long sheets create some struts. I'll leave measurements up to individuals but for structural purposes my tip is to let the sides NOT rest on top of the bed but to meet it at the side and rest on the plastic body of the wagon; also gluing them together at the cornters. GLue on sides and struts as shown. I had to let out a long breath when i realised that i had to create over 70 struts for the 20 odd i'm making...
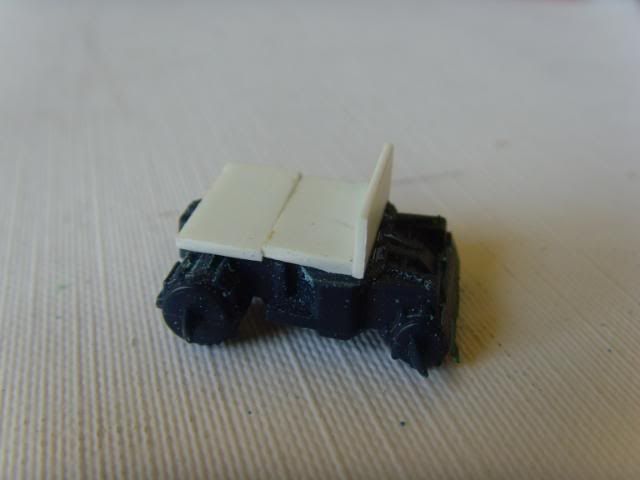
Take a time at whatever step it is to not that you could also create yourself epic humvee's like this; just lean that front bit back; add seats and figs and you're away :-) I may try this at some time though for what i've no idea!
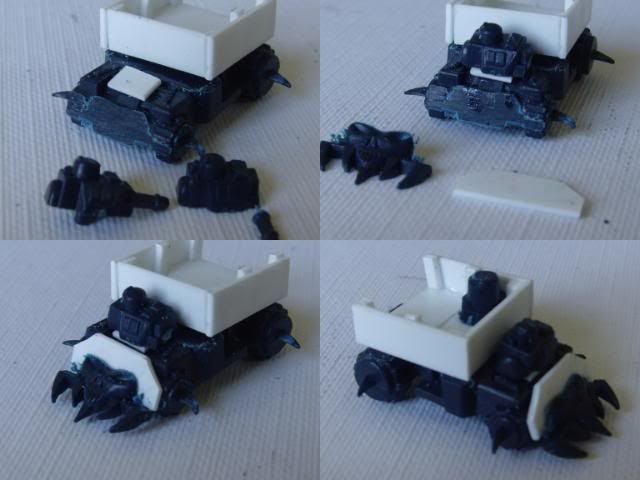
Not it's time to add the front bits from all those parts you kept earlier and didn't throw in the bin ;-) First take the turret and cut off the peg as well as the gun (keep the gun barrel). Now add a small bit of plasticard on the fronnt and pop the turret (turned 90 degrees) to on top of that. As per the picture create a khornate/chaos'y looking dozer blade.
Well; now that the main structure is done all we really need to do is add details. That includes the anonymous 'heavy weapons' that all land transporters seem to armed with and, in this case a ladder and rivets. All relatively simple to do but a SHARP knife of chisel blade is needed to get things looking good. Even so by hand some of my attempts are a bit clunky, I've hear people reccoment the use of a riveting tool but i don't even know what one of these is! I've also seen battleship accesories put to excellent use.
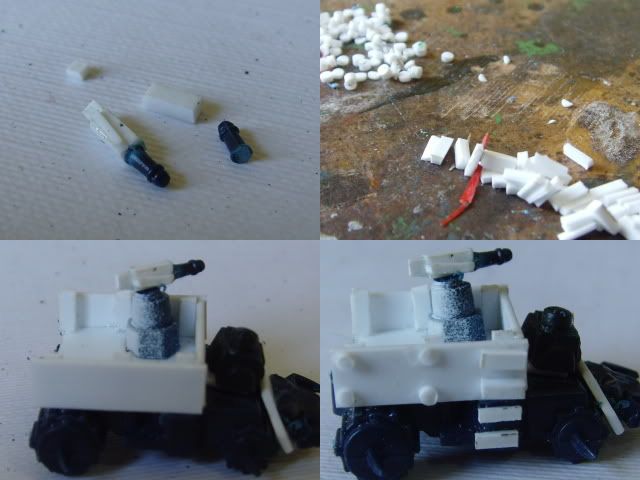
For this i figured i'd need somehow to REALLY control the flow and placement of glue. I've mentioned before that i use 14g medical needles to scrape paint out of receses so i just bucthcered one into a pippette.

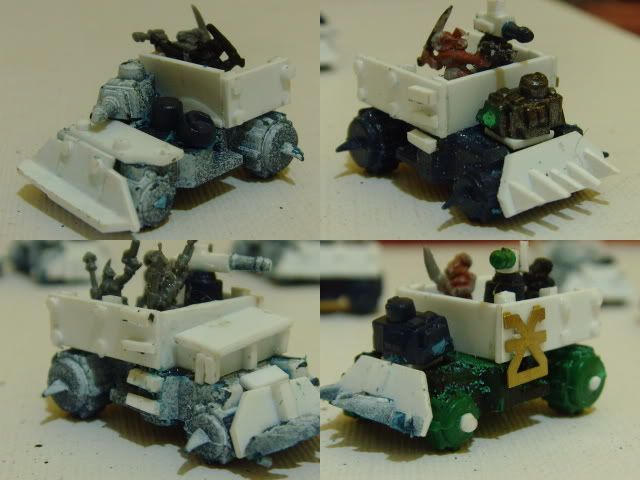
Well; you're nearly there! Put some crew/passengers in there and you've got yr very own home brewed land transporters :-) I've made 18 and they can't of cost me more than a tenner in total.
Variations on the design are easy enough; weapon swaps, changing the bulldozer blade, making your own cabs, grills etc etc, adding iconography (i used Forge Worlds etched brass symbols, a shame that i used all the small one's on a titan...). Others will do better but here are some example.
_________________
MoK's Painting BlogNow Showing:Mok's Modular Modern Messy Guard Army