Login |  Register |  FAQ
   
Post new topic Reply to topic  [ 86 posts ]  Go to page Previous  1, 2, 3, 4, 5, 6  Next

First look at my Chaos conversions..

 Post subject: First look at my Chaos conversions..
PostPosted: Wed Feb 04, 2009 5:50 am 
Brood Brother
Brood Brother
User avatar

Joined: Wed Jun 27, 2007 4:23 am
Posts: 126
Location: Wollongong
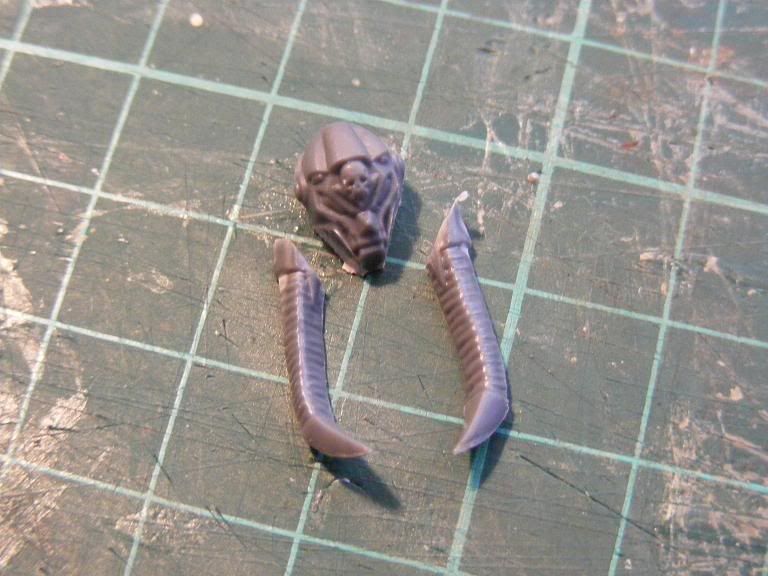
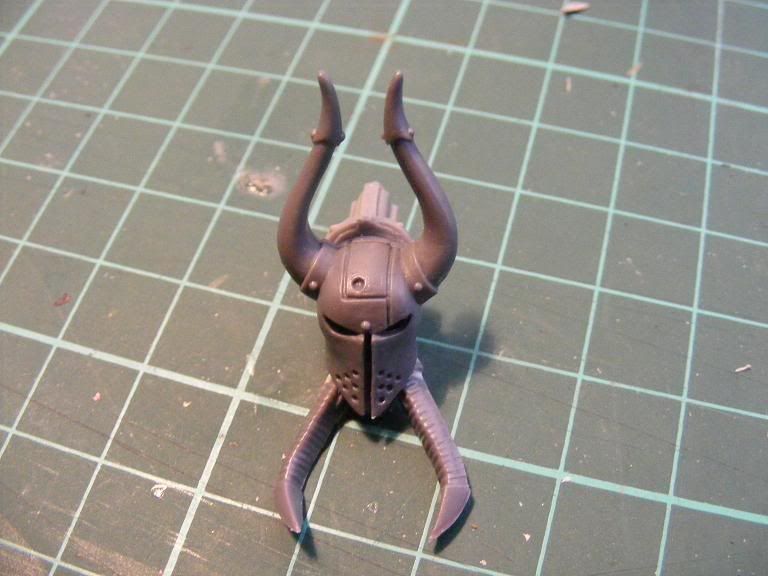
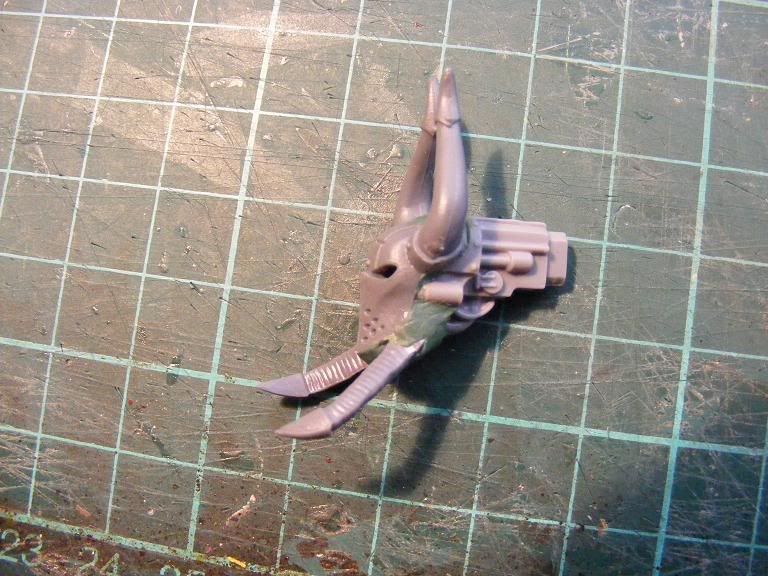
Step 3 – Head
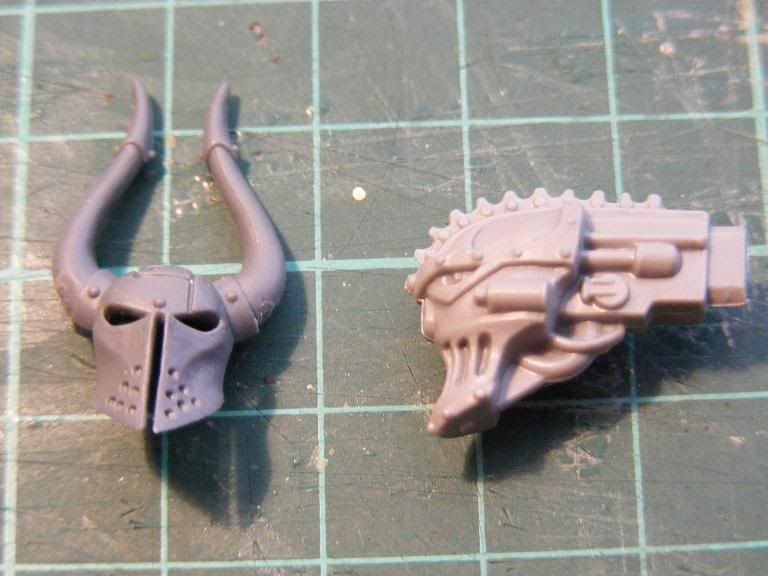
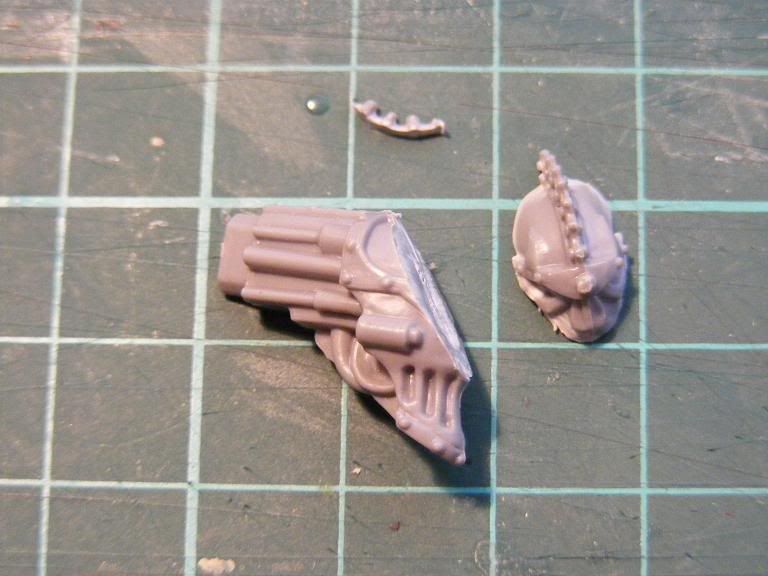
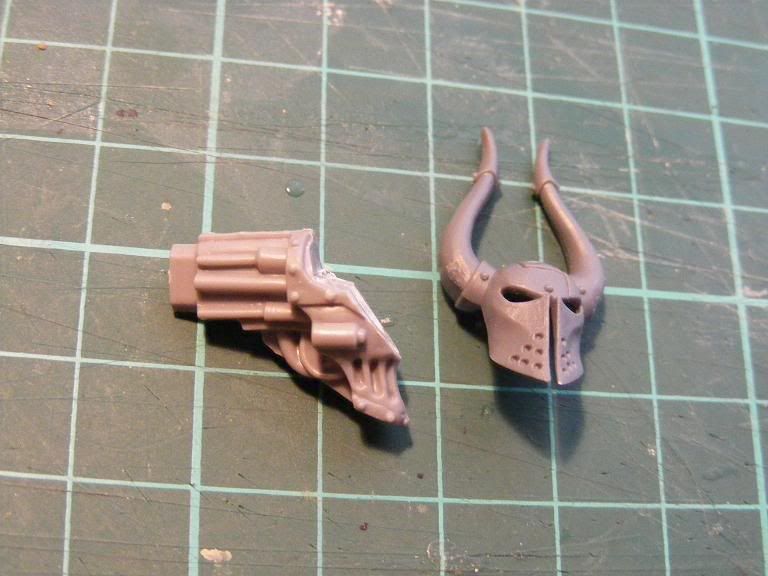
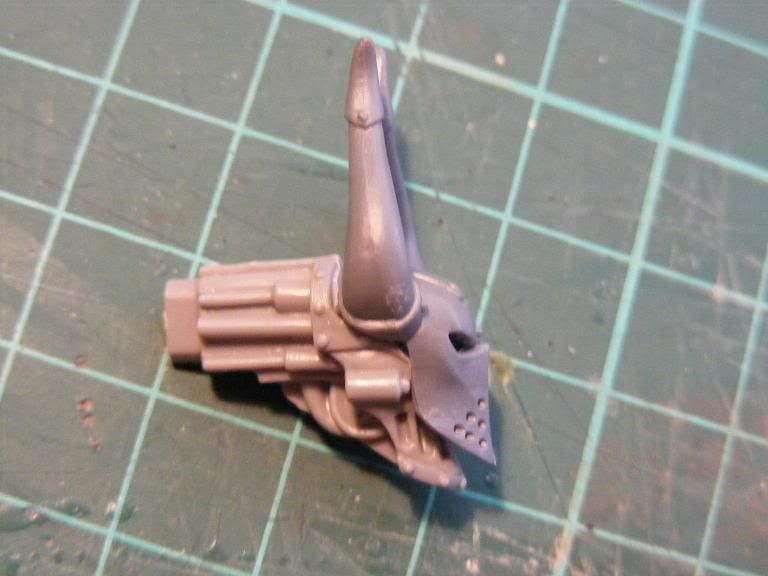
• The next part was to cut the original head and face up and to add the new Head that I had acquired from a  40K Chaos Defiler.


• I then added some more horns fro the front of the Jaw of the head, these came from a head of a 40K Terminator (thanks for the idea Onyx).


_________________
Check out the Nationwide Aussie Epic Campaign:

http://epiccampaign.proboards80.com/index.cgi


Top
 Profile Send private message  
 
 Post subject: First look at my Chaos conversions..
PostPosted: Wed Feb 04, 2009 5:51 am 
Brood Brother
Brood Brother
User avatar

Joined: Wed Jun 27, 2007 4:23 am
Posts: 126
Location: Wollongong
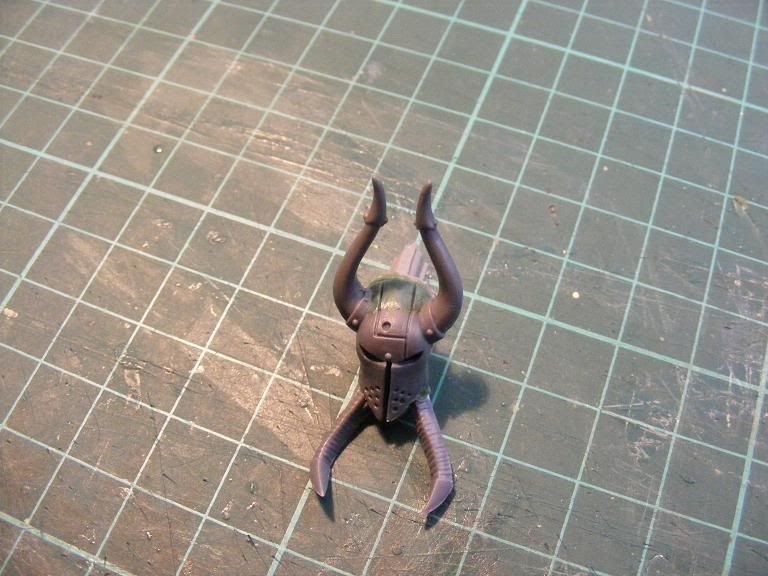
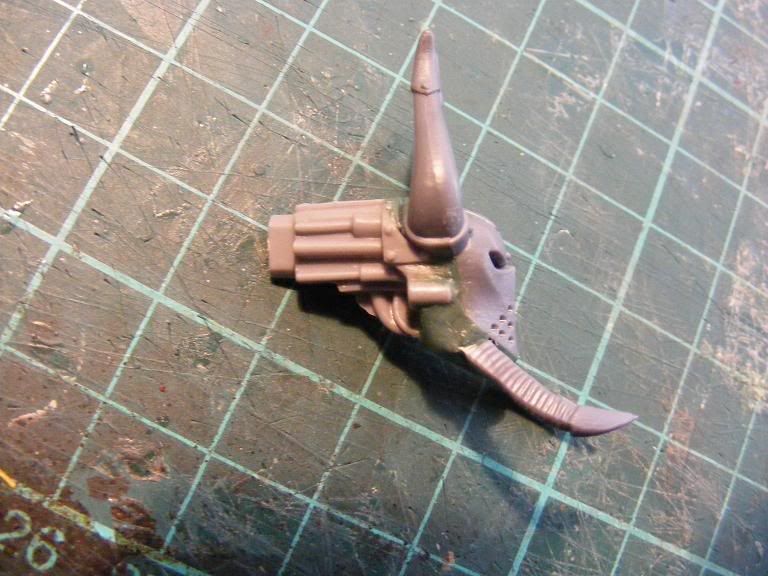
• The third step was to add the putty around the top of the head and around the Jawline. The photo’s didn’t tend to do the work justice as it looks a bit rough.


_________________
Check out the Nationwide Aussie Epic Campaign:

http://epiccampaign.proboards80.com/index.cgi


Top
 Profile Send private message  
 
 Post subject: First look at my Chaos conversions..
PostPosted: Wed Feb 04, 2009 7:55 am 
Purestrain
Purestrain
User avatar

Joined: Mon Jul 09, 2007 10:14 am
Posts: 3416
Location: Western Australia
:wow:

Wow!
Drew, this thing is going to be a work of art.
I'm hanging out to see it completed. Amazing stuff.

Well done mate.

Steve.

_________________
Just call me Steve.

NetEA Rules Chair
NetEA FAQ

Want to play Iron Warriors in Epic Armageddon? Click HERE
Some of my Armies.
My Hobby site.


Top
 Profile Send private message  
 
 Post subject: First look at my Chaos conversions..
PostPosted: Wed Feb 04, 2009 8:39 am 
Purestrain
Purestrain
User avatar

Joined: Mon Jul 28, 2003 10:43 pm
Posts: 7925
Location: New Zealand
Great work!!

_________________
http://hordesofthings.blogspot.co.nz/


Top
 Profile Send private message  
 
 Post subject: First look at my Chaos conversions..
PostPosted: Wed Feb 04, 2009 3:20 pm 
Brood Brother
Brood Brother
User avatar

Joined: Mon Feb 04, 2008 9:49 pm
Posts: 583
Location: Hockeytown
I dig it! Keep it coming


Top
 Profile Send private message  
 
 Post subject: First look at my Chaos conversions..
PostPosted: Wed Feb 04, 2009 3:46 pm 
Brood Brother
Brood Brother
User avatar

Joined: Fri May 20, 2005 8:45 pm
Posts: 11148
Location: Canton, CT, USA
Oooo, I like this. Looking forward to seeing more.

_________________
"I don't believe in destiny or the guiding hand of fate." N. Peart


Top
 Profile Send private message  
 
 Post subject: First look at my Chaos conversions..
PostPosted: Wed Feb 04, 2009 3:48 pm 
Brood Brother
Brood Brother
User avatar

Joined: Wed Jan 10, 2007 10:26 pm
Posts: 2110
Location: Rockledge, FL
uh - well that's about the coolest thing I've seen this week.  Which is both a comentary on your great creation and my rather boring life. :)

_________________
ONSLAUGHT MINIATURES onslaughtmini.com


Top
 Profile Send private message  
 
 Post subject: First look at my Chaos conversions..
PostPosted: Tue Feb 17, 2009 12:12 am 
Brood Brother
Brood Brother
User avatar

Joined: Wed Jun 27, 2007 4:23 am
Posts: 126
Location: Wollongong
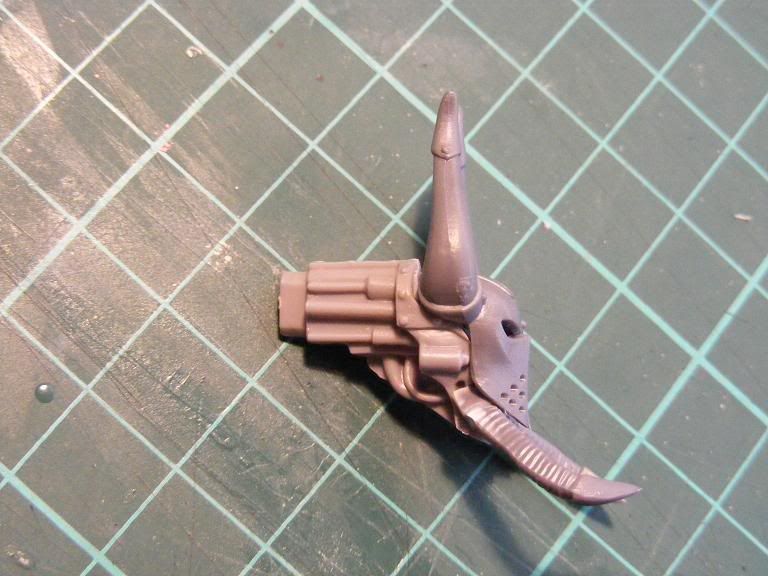
Step 4 - Left arm

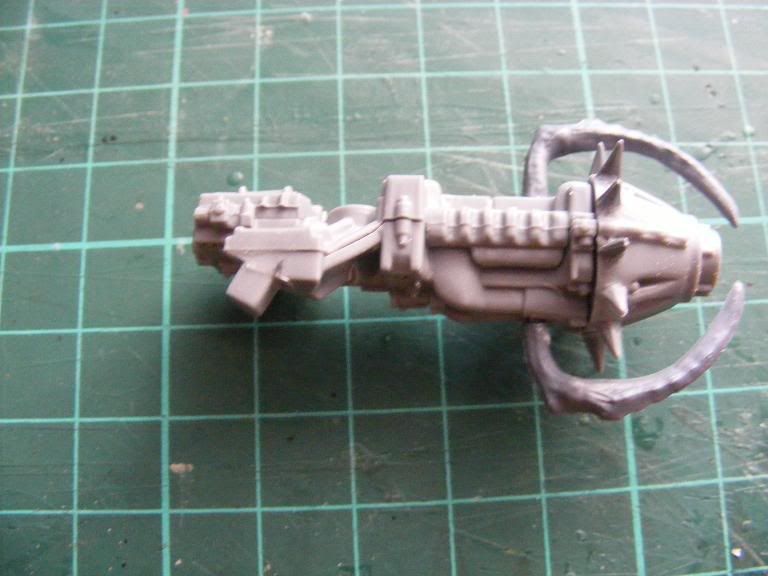
• Started once again with glueing the left gun arm together and making sure that it fit into the cavity in the left side of the shoulder.
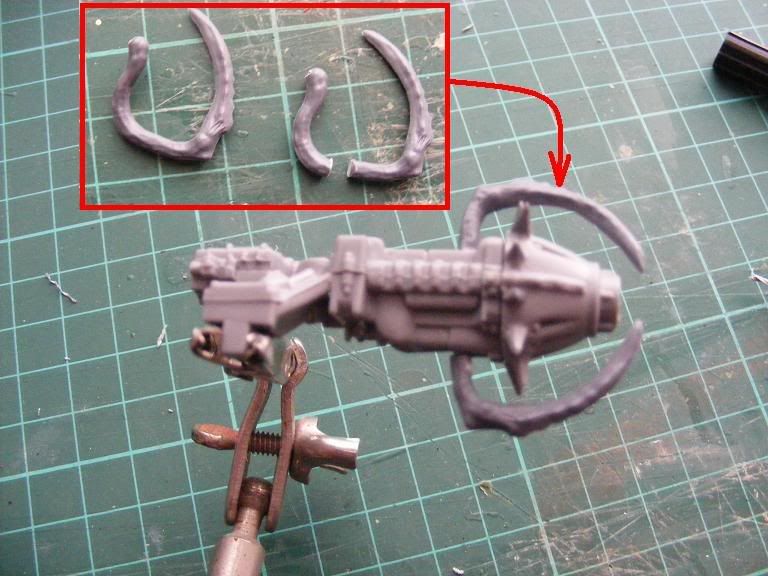
• The next step was to add some spikes around the outside of the head of the gun, the pikes came off the trophy racks from the 40K Chaos Rhino’s. 12 spikes were put around it.


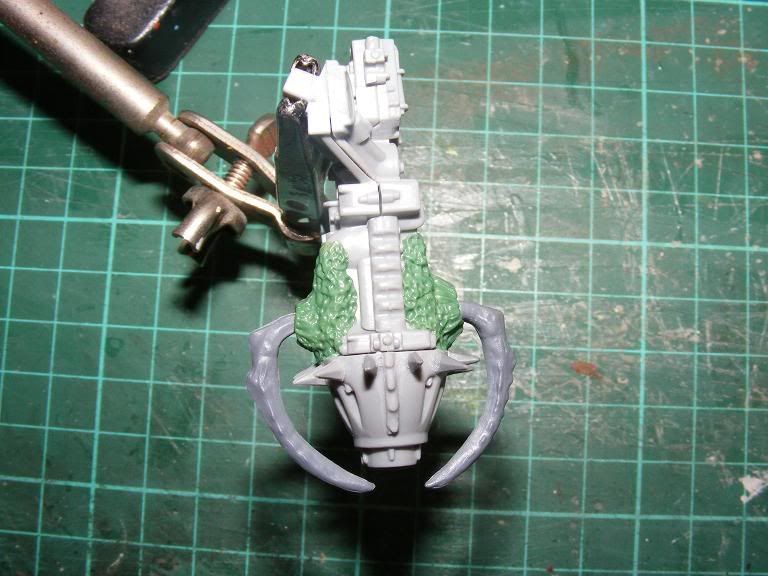
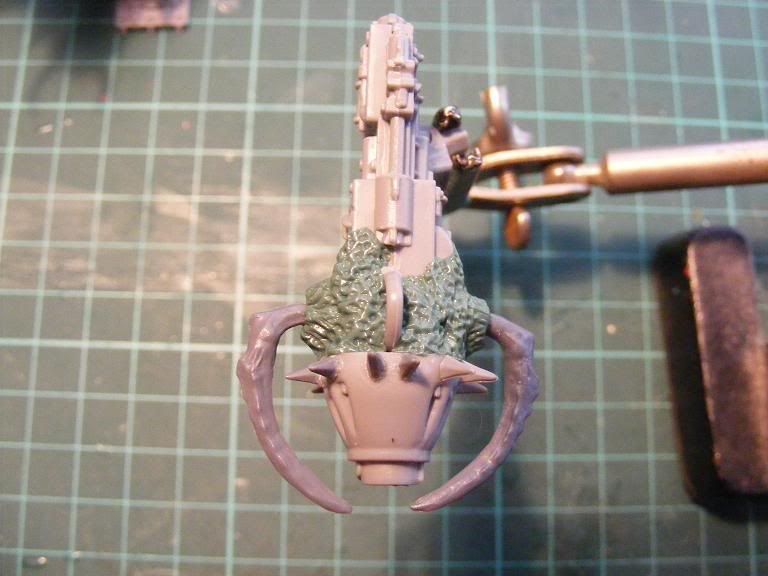
• The next step as to add the close combat arms/appendage’s to the side. These came from the 40K Chaos spawn sprues.


• The body attachment point or the gun was then moved slightly, I cut this off and sliced the solid part of the shoulder attachment point away, replaced the pin that goes into the body, and now the gun faced slightly off to the side.


• The final step was to add the putty to the gun, around where the CC weapons had come out from.


_________________
Check out the Nationwide Aussie Epic Campaign:

http://epiccampaign.proboards80.com/index.cgi


Top
 Profile Send private message  
 
 Post subject: First look at my Chaos conversions..
PostPosted: Tue Feb 17, 2009 12:38 am 
You disgust me. Please stop posting wonderful stuff this moment.


Top
  
 
 Post subject: First look at my Chaos conversions..
PostPosted: Tue Feb 17, 2009 7:24 am 
Brood Brother
Brood Brother

Joined: Sat Sep 16, 2006 2:03 am
Posts: 168
Location: Minnesota US
Very cool!  The step by step "how to" is nicely done.


Top
 Profile Send private message  
 
 Post subject: First look at my Chaos conversions..
PostPosted: Tue Feb 17, 2009 9:28 am 
Brood Brother
Brood Brother
User avatar

Joined: Tue Jun 03, 2008 12:51 am
Posts: 2785
Location: Nr Glasgow, Scotland, United Kingdom
This is a wonderful tutorial. You have fantastic vision of what you want to have it look like.  :cool:

_________________
My head is full of War...

[img]http://i278.photobucket.com/albums/kk120/Warhead40k/Tyranid%20Swarm/DSC02262.jpg[/img]


Top
 Profile Send private message  
 
 Post subject: First look at my Chaos conversions..
PostPosted: Sat Feb 21, 2009 4:53 am 
Brood Brother
Brood Brother
User avatar

Joined: Wed Jun 27, 2007 4:23 am
Posts: 126
Location: Wollongong
Step 5 – Right arm

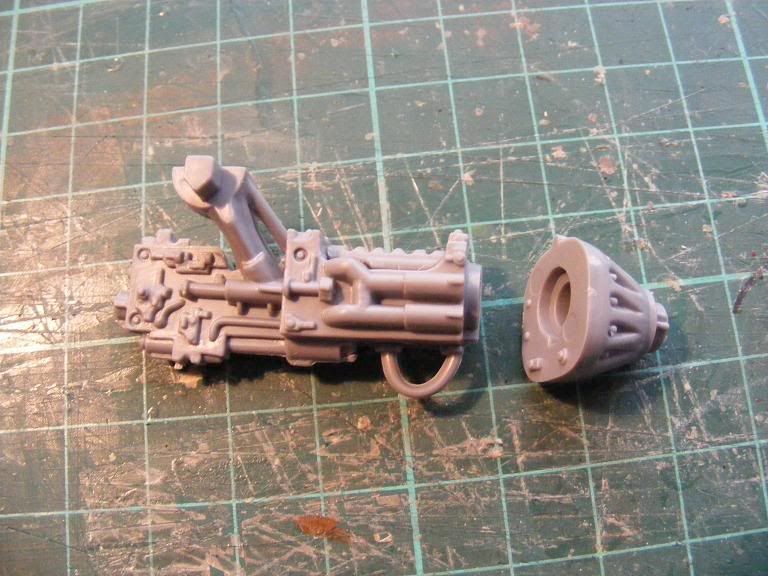
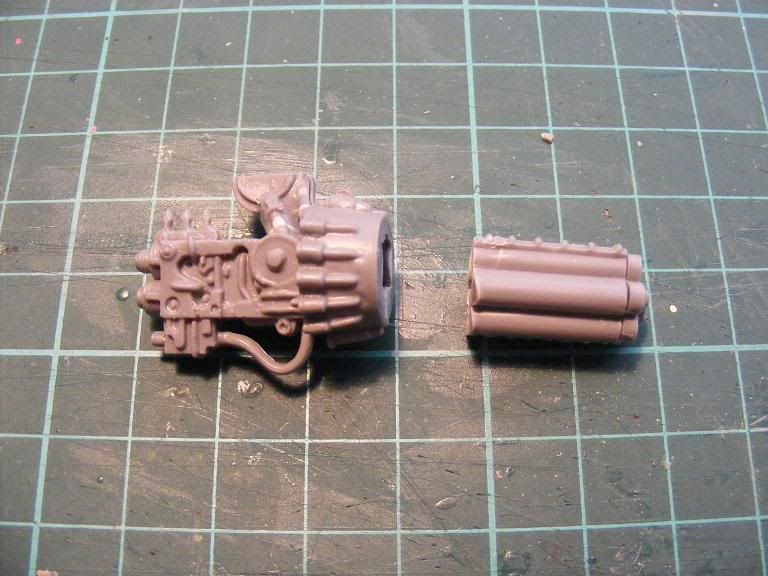
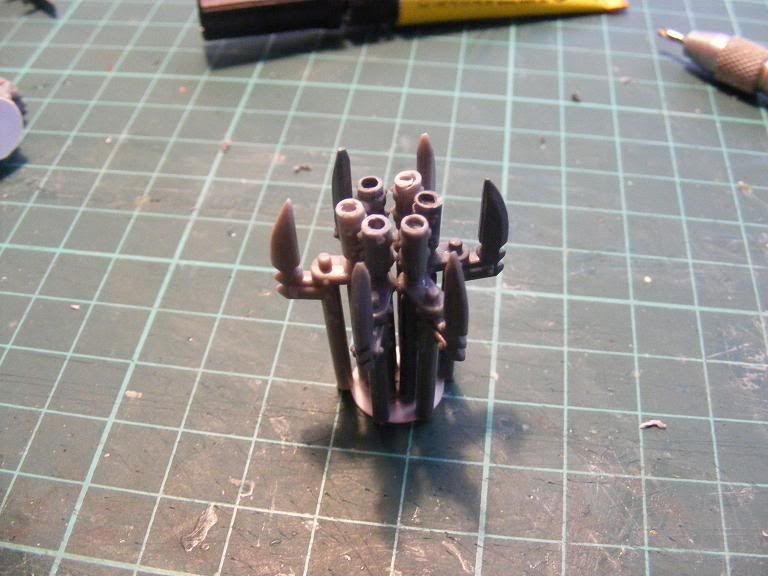
• I had some interesting plans for the Right arm, but due to parts taking forever to get here I had been putting off doing anything with it. The first step this time before glueing the gun together was to take the barrels off the gun.


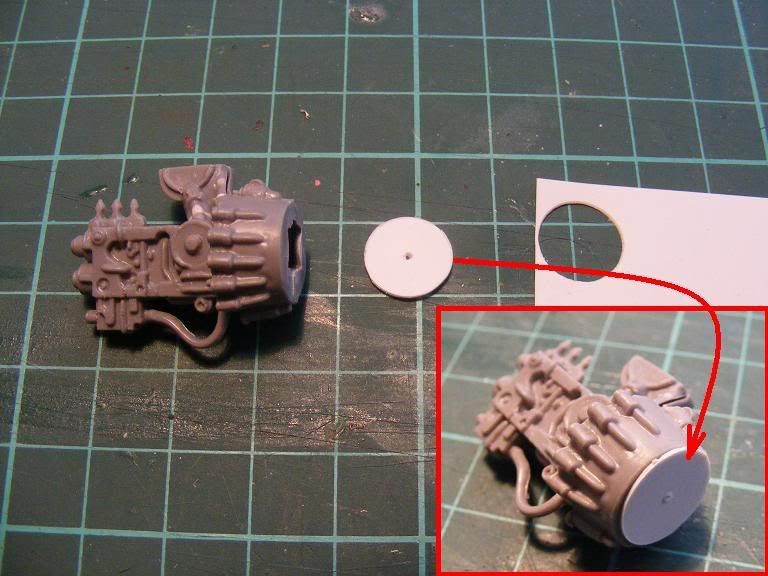
• Next I cut 2 round plates out of plasticard, one was to cover over the hole that was left in the body of the gun. The other piece was cut for the barrels.


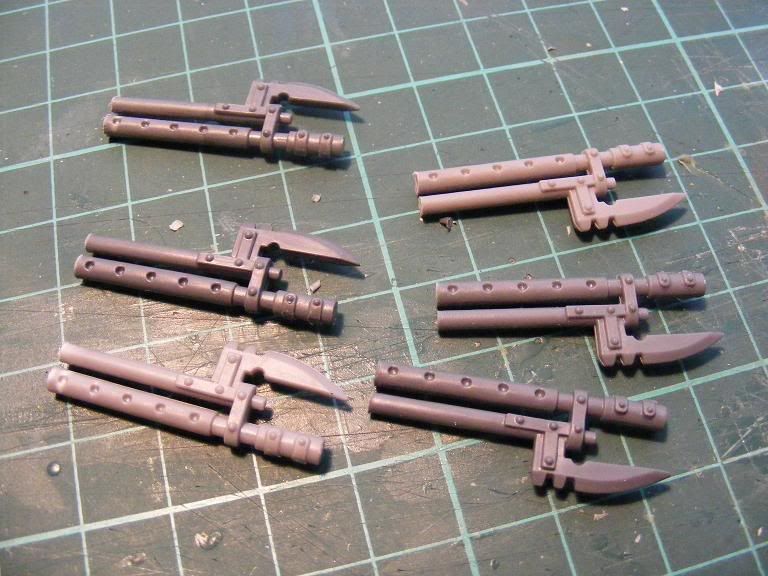
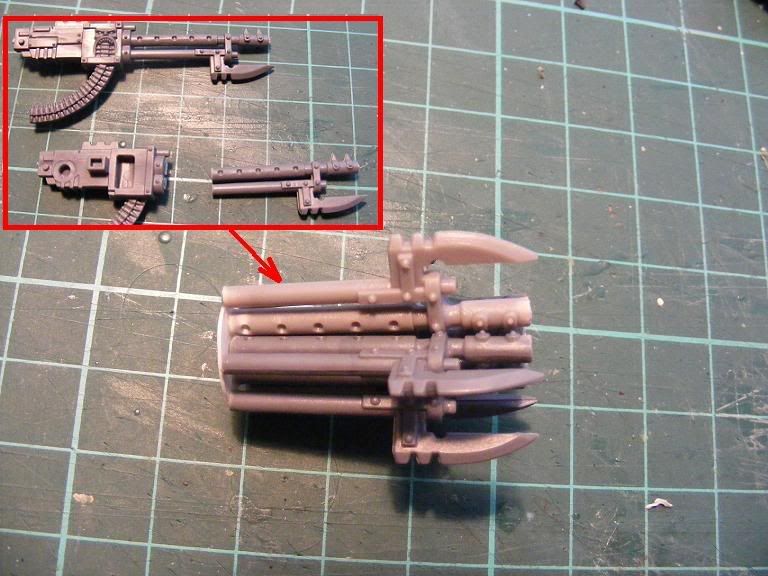
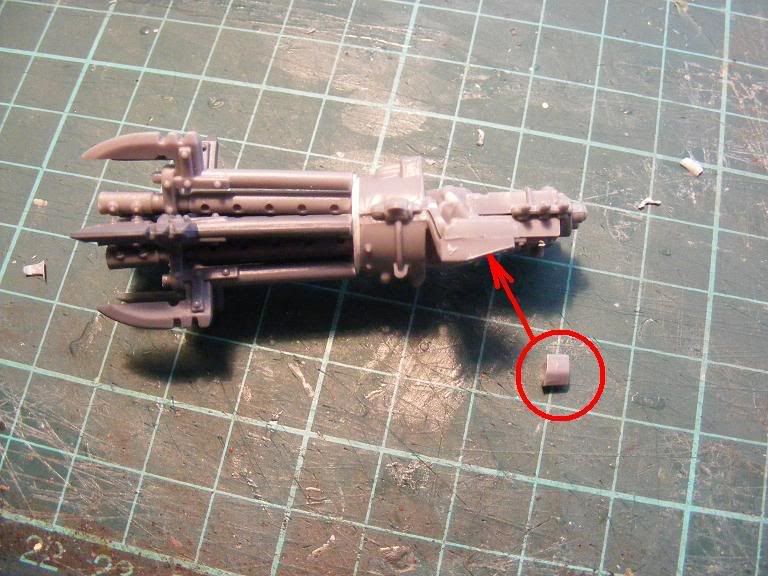
• The barrels of the gun were the next part that was needed to be made, 6 of the 40K defiler Autocannons were cut down to make the 6 barrels of the right arm. They were attached to the plasticard so that they had the blades all facing outwards.


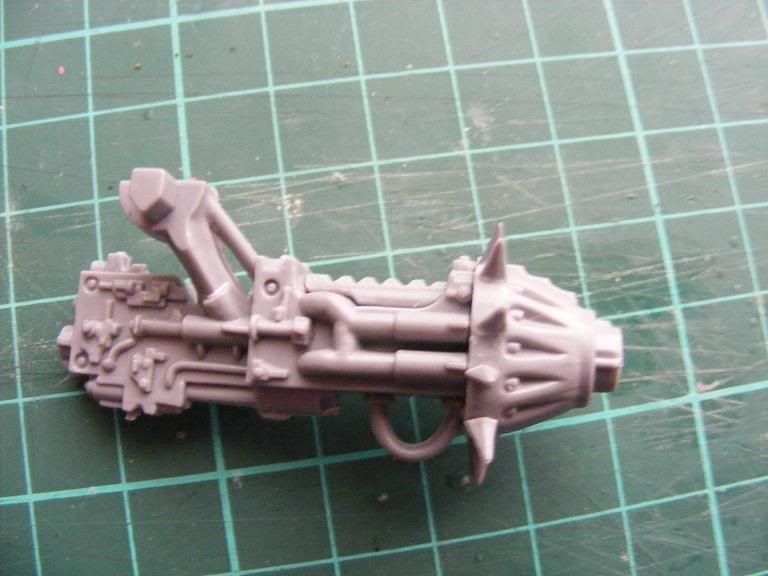
• The barrels were attached and then the locator pin for the arm to locate to the body was removed. I had decided to have the gun face slightly outwards like the let arm, but I also wanted this arm t face downwards slowly.


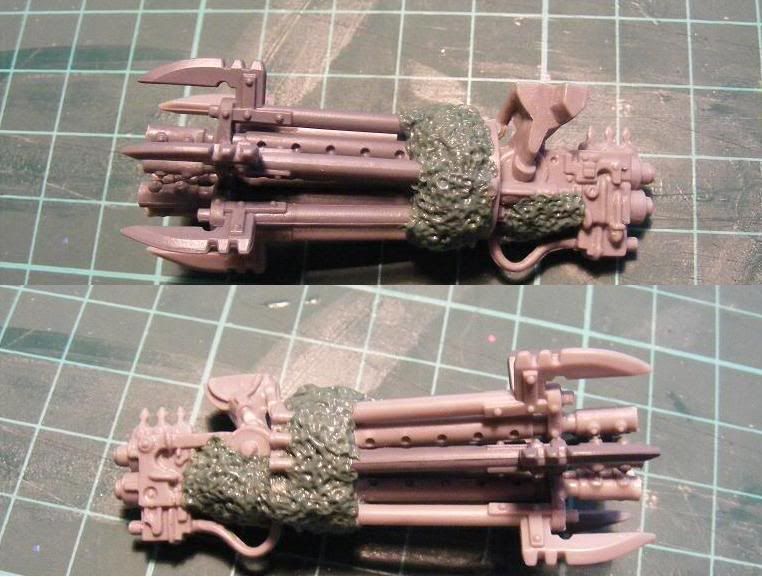
• The next and final stage for this arm was to begin the putty. To follow in the same mould as the other arm and most of the army I went for the rough textured look.

_________________
Check out the Nationwide Aussie Epic Campaign:

http://epiccampaign.proboards80.com/index.cgi


Top
 Profile Send private message  
 
 Post subject: First look at my Chaos conversions..
PostPosted: Sat Feb 21, 2009 8:53 am 
Brood Brother
Brood Brother
User avatar

Joined: Tue Jun 03, 2008 12:51 am
Posts: 2785
Location: Nr Glasgow, Scotland, United Kingdom
*THUD!*

NOTE TO SELF: On viewing this thread - helmet crash harness advisable to prevent jaw dropping off with amazement.

_________________
My head is full of War...

[img]http://i278.photobucket.com/albums/kk120/Warhead40k/Tyranid%20Swarm/DSC02262.jpg[/img]


Top
 Profile Send private message  
 
 Post subject: First look at my Chaos conversions..
PostPosted: Sat Feb 21, 2009 9:07 am 
Brood Brother
Brood Brother
User avatar

Joined: Fri Sep 30, 2005 12:21 am
Posts: 810
Location: United States
Wow man This thing is great!

One question, how did you get the circle cut into the plasticard so nicely? I can barely manage straight lines!!!

_________________
-Malakai

"You'll never understand how much watching other people's pain gets me off, hearing their screams and knowing that I have the power of a god." -Velvet Acid Christ


Top
 Profile Send private message  
 
 Post subject: First look at my Chaos conversions..
PostPosted: Sat Feb 21, 2009 9:23 am 
Brood Brother
Brood Brother
User avatar

Joined: Sat Oct 13, 2007 11:52 am
Posts: 3078
Location: Bristol, UK
Oooh! This is just getting better and better :-) Shame i sold my imperator...

_________________
MoK's Painting Blog
Now Showing:
Mok's Modular Modern Messy Guard Army


Top
 Profile Send private message  
 
Display posts from previous:  Sort by  
Post new topic Reply to topic  [ 86 posts ]  Go to page Previous  1, 2, 3, 4, 5, 6  Next


Who is online

Users browsing this forum: Google [Bot] and 27 guests


You cannot post new topics in this forum
You cannot reply to topics in this forum
You cannot edit your posts in this forum
You cannot delete your posts in this forum
You cannot post attachments in this forum

Search for:
Jump to:  


Powered by phpBB ® Forum Software © phpBB Group
CoDFaction Style by Daniel St. Jules of Gamexe.net