End of turn 2 the important sector. Mine are with the drawing pins in, my opponents the red coloured markers.
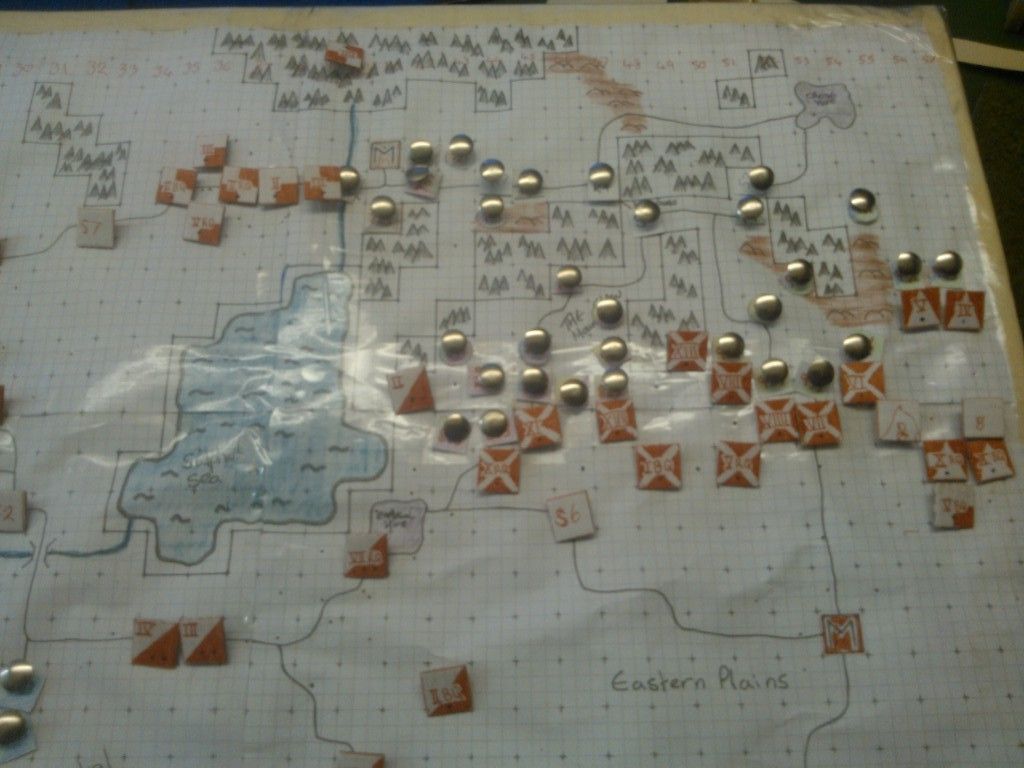
As you can see i held the bridge (left on picture), and lost an army near his hive (down left from centre) although it still looked very exposed. After writing orders down i was hoping to win iniative as would enable me to pin some of his armies and make more of an opening to threaten his city.
This is how it looks after turn 3 movement
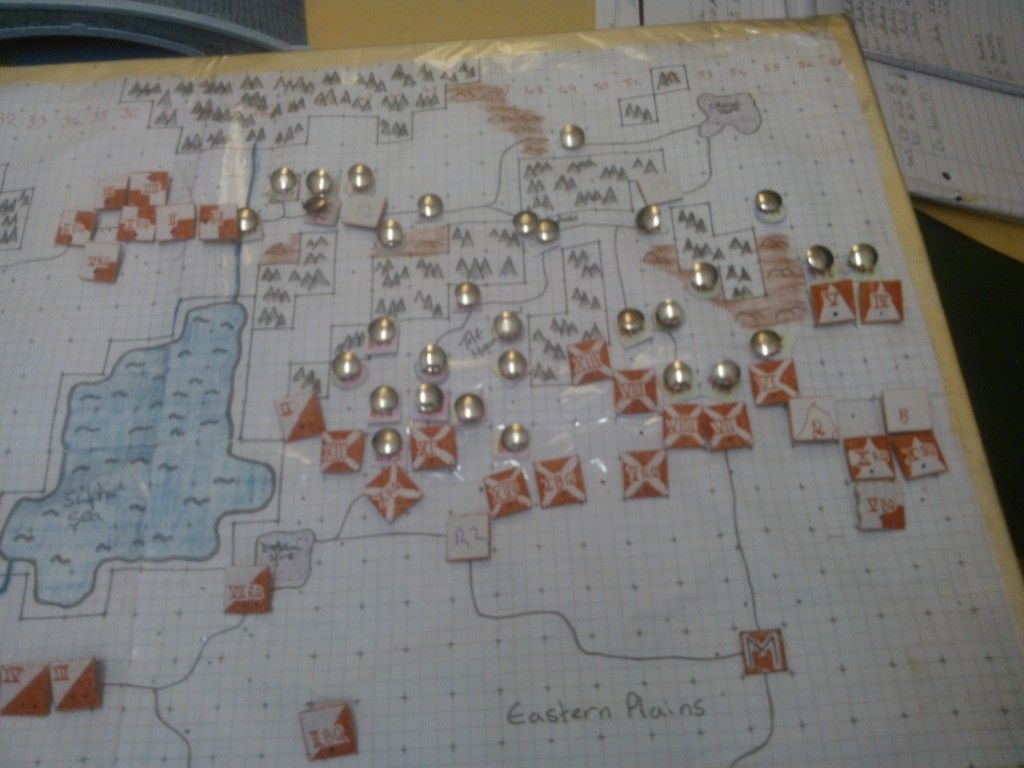
There are eight battles to be fought, and they are all along the bootom. This sector is getting very hot, although can he manage to keep supplies up and can i withstand the attrition?
Other highlights are that i have cut his top left sector off from his armies (capturing a supply convoy) and also cutting his middle top sector of aswell (capturing another supply convoy) so making it even harder for him to supply his offensive.
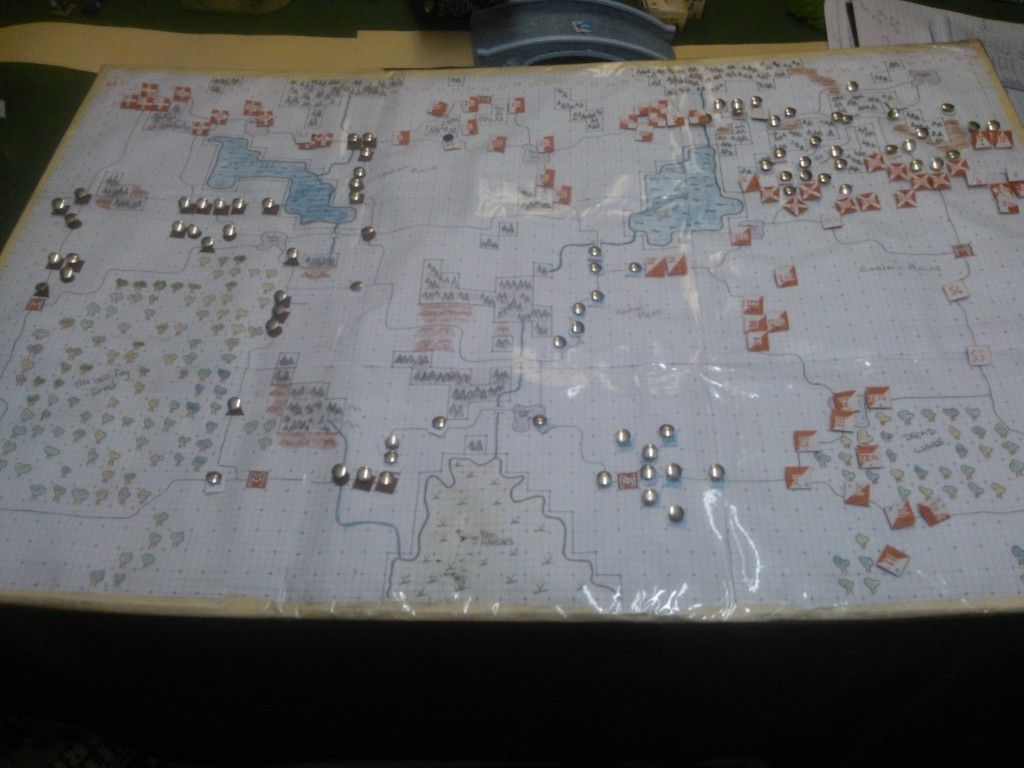
The big map. As you can see on the left my forces snaking up, and a pincer movement on his eastern sector hive.