Hi people

I brought out my Tau again tuesday this week. This time I phased a Lost and the Damned force. 3000 pts , standard scenario. I used the same list as above again. I know I have to redo it as it stands now BTS and supreme commander is the same formation. Just didn't have the time to try and come up with a new list. Will have to look into it before my next game.
Anyways my opponent had the following formations, I can't remember the exact upgrades but there were a total of four hydras. A bunch of big mutants, here and there.
Quote:
Covenants x 4
1 with chimeras, but no flak, the 3 others had 1 or two hydras)
Plague Towers formation, w 2 towers (BTS)
Lord of Battle.
Hellfire cannons
Doomwings
2 x plague zombies
I have tried to number all actions so that you know better were you are in the report. LatD (1.6) would mean LatD 6th activation turn 1.
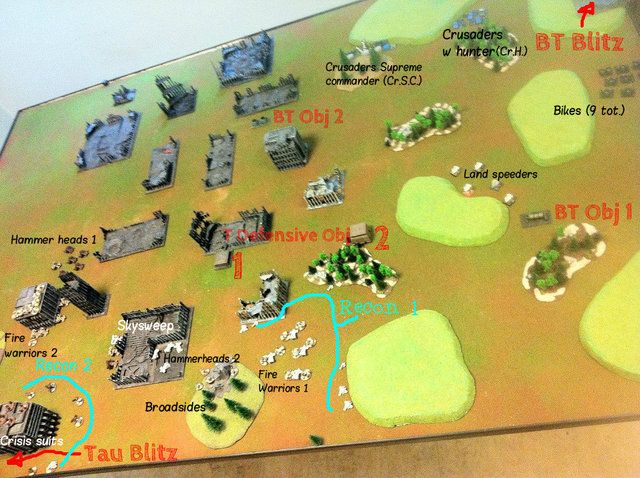
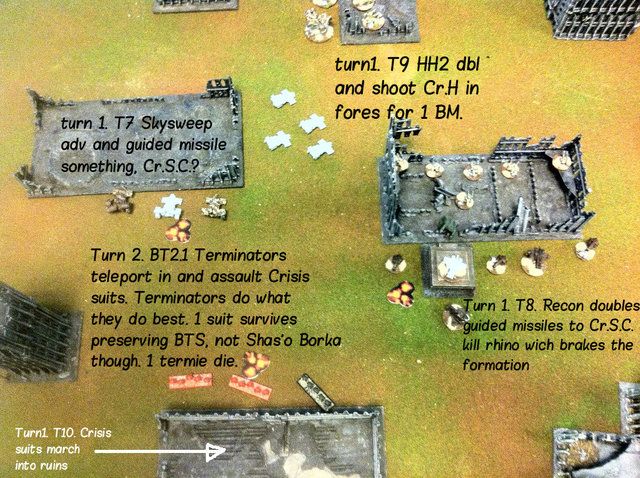
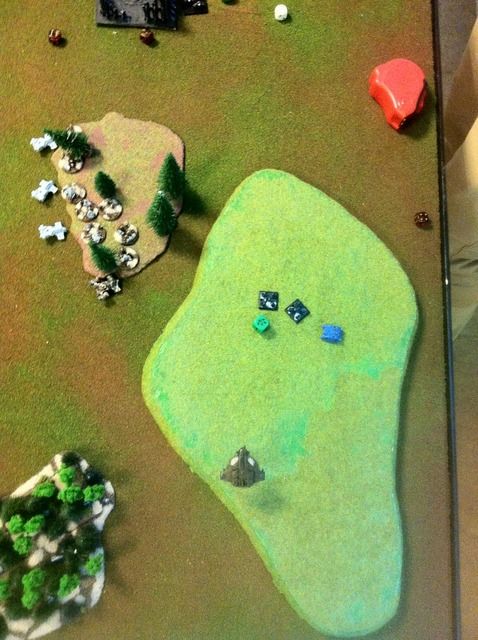
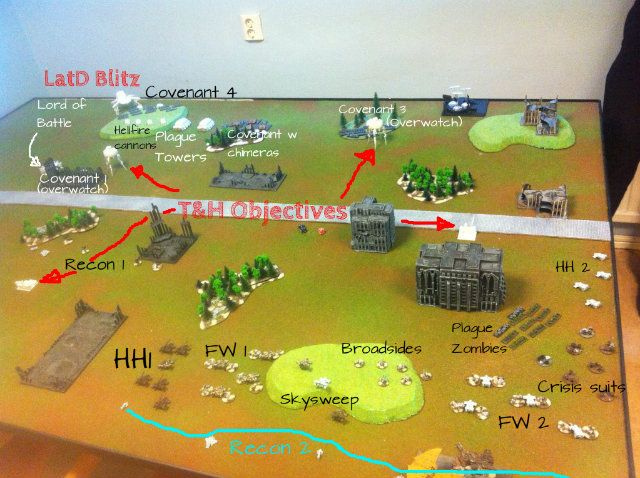
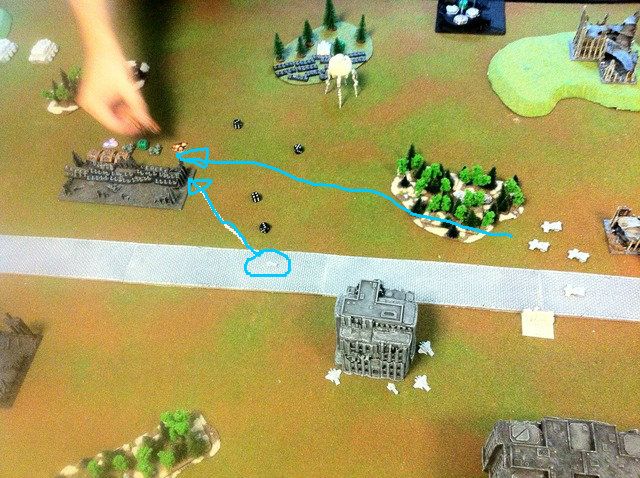
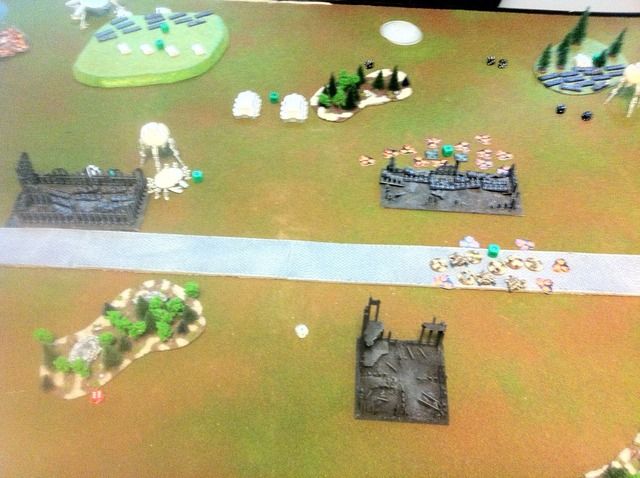
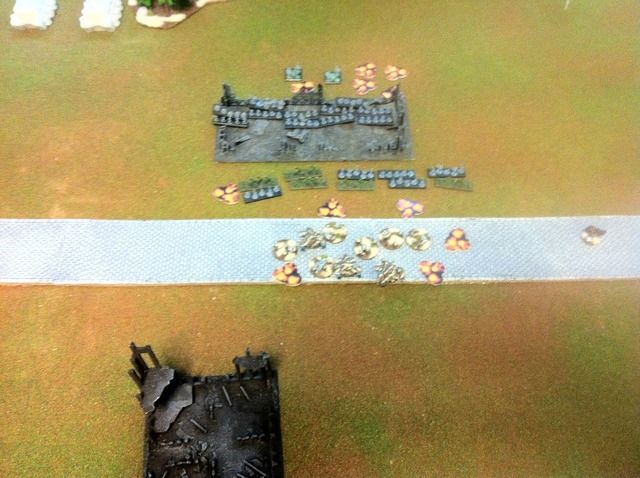
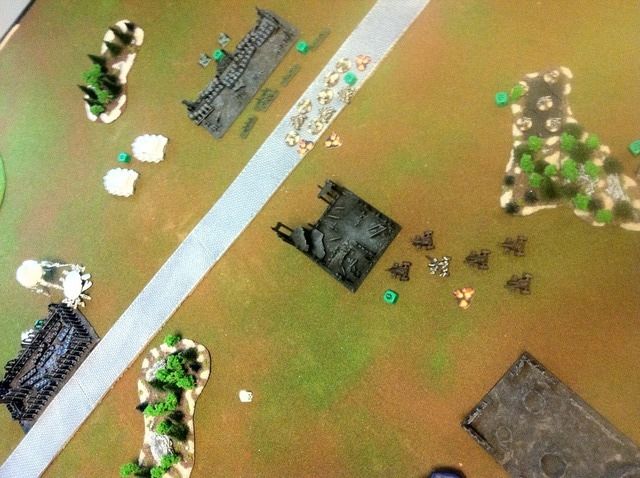
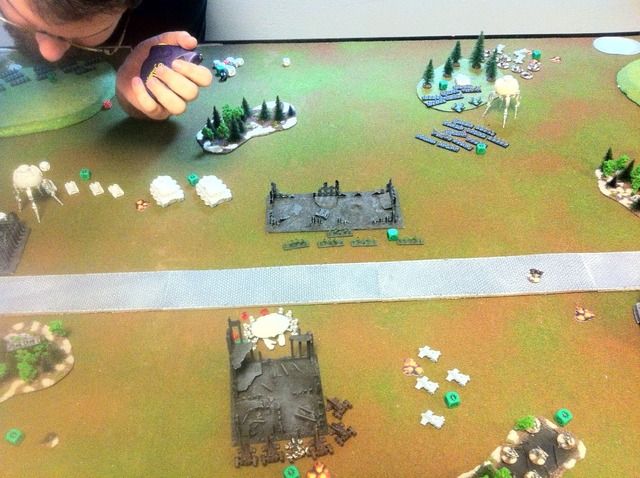
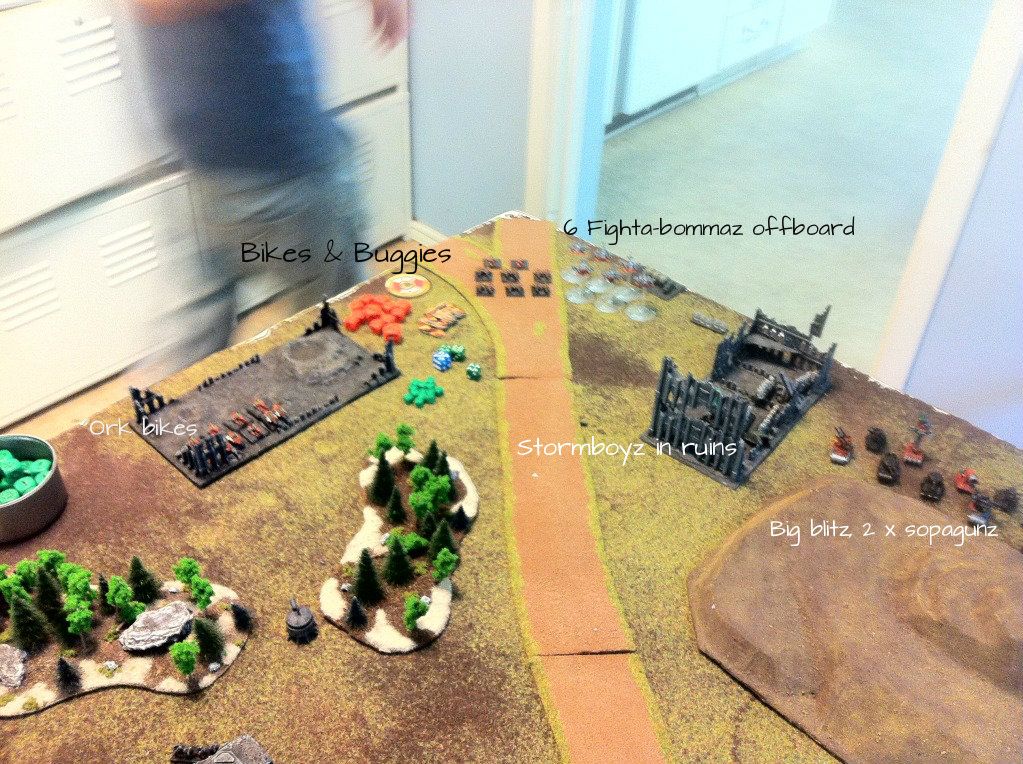
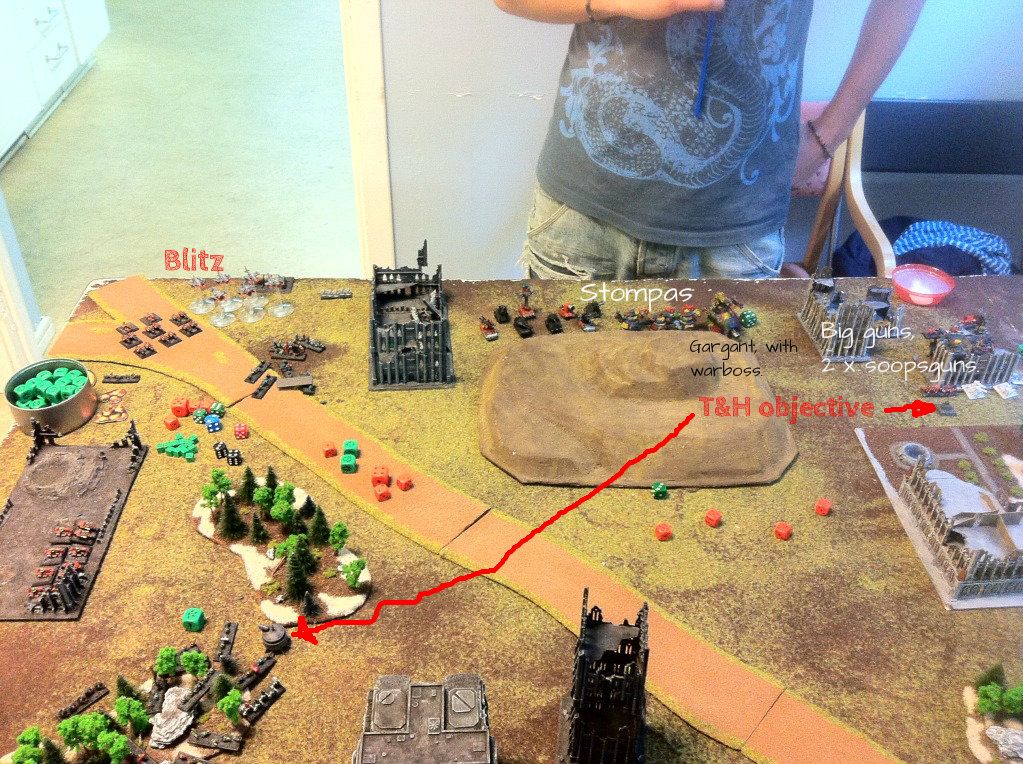
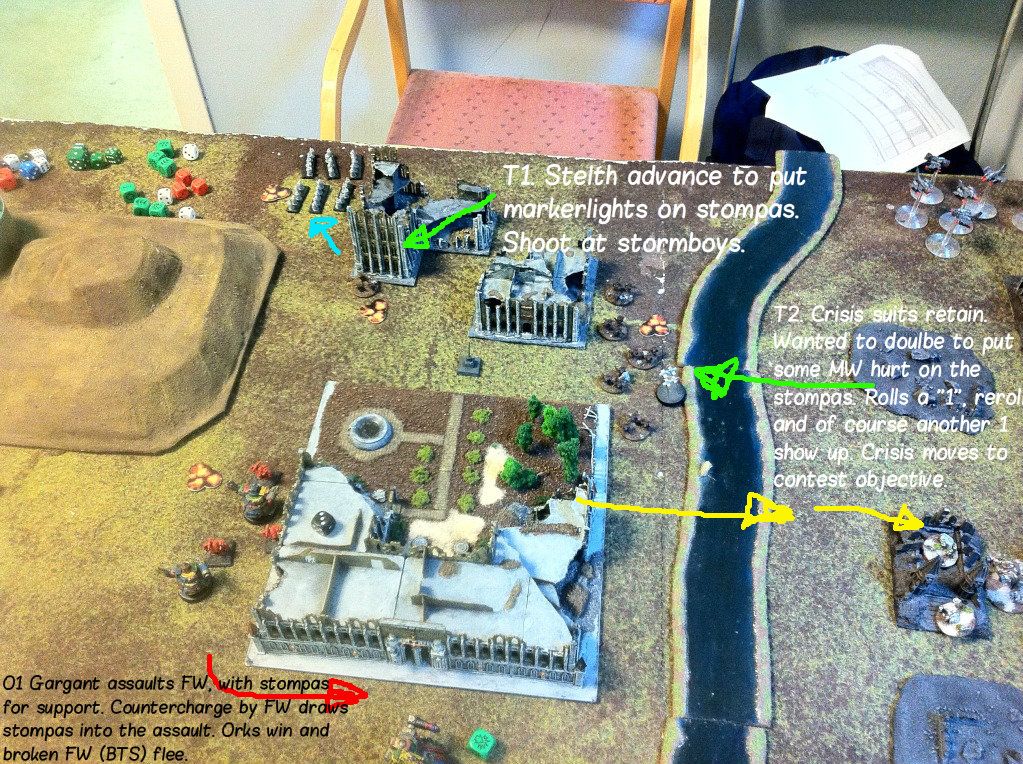
Below is deployment. My opponent chose to "teleport" in one of his Zombie infestation formations in front of my Crisis suits. The formation got 10 units and no blast markers(!). Tau blitz is in the lower right corner out of the picture.
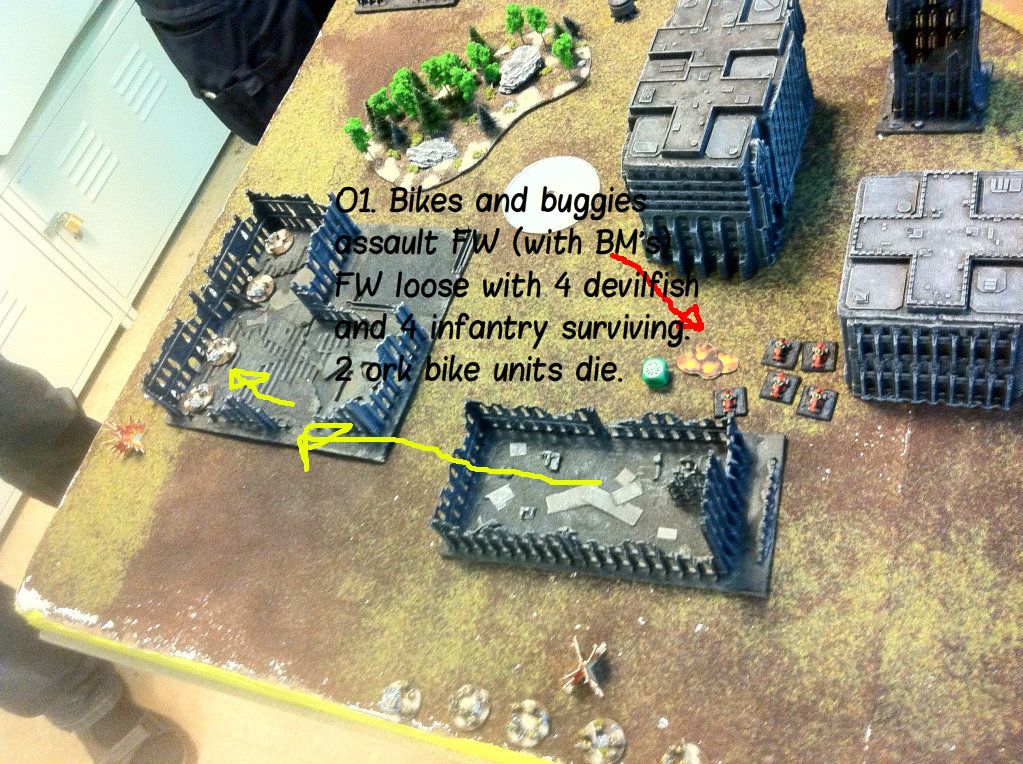
The strategy roll went to LatD and the first activation of the game was the zombies assaulting (LatD 1.1) my cirsis suits. No hits were scored however by the zombies. Crisis suits and supporting fire from nearby FW2 resulted in 5 dead zombie units. A big win from resolution to Tau, the zombies being fearless stayed put.
The initiative went over to Tau and the crisis formation sustained (T 1.1) on the Marker-lit (from pathfinders) zombies, which were all wiped out. Question to the forum. Should I have been able to do this? Or should I have been forced to try and get out of ZoC of the Zombies. I mean take an assault action (or alternatively use FW to kill the zombies)?
LatD (1.2) the sent Doomwings on CAP and Tau (1.2) responded by putting the Barracudas on CAP as well.
Latd (1.3) Chimera covenant doubled into central ruins, could not shoot anything.
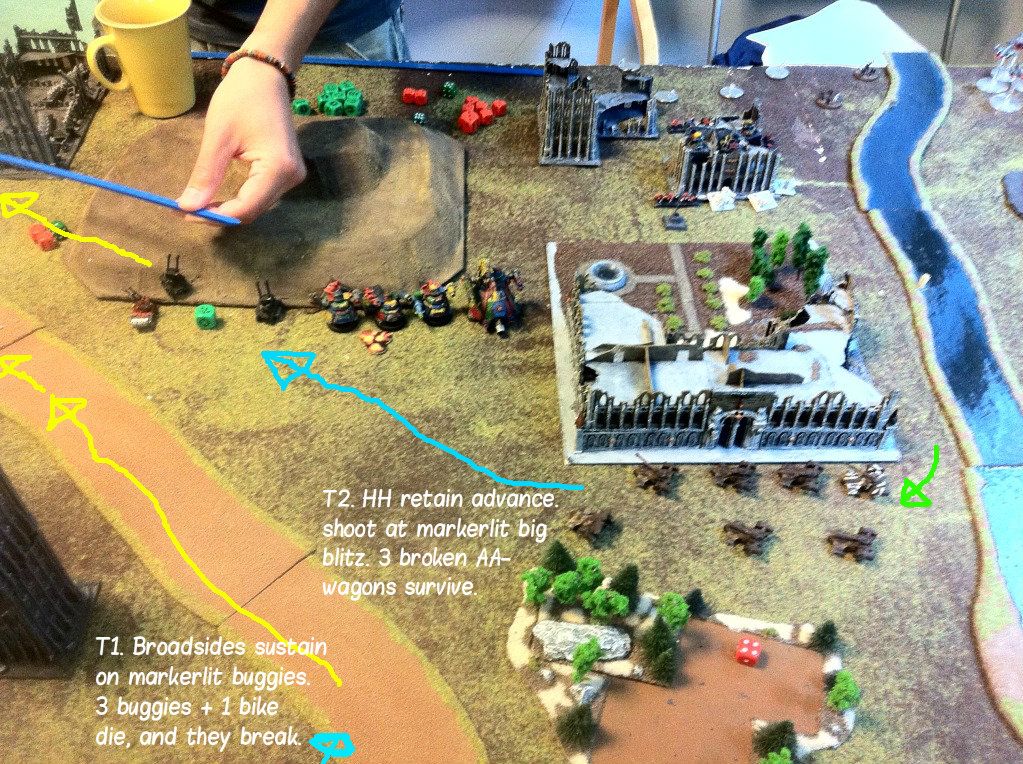
Tau responded by activating Recon 2 which doubled (T1.3) and M-lit/shot chimera covenant. 1 guided missile hit, but it was saved. Tau then retained with HH2 (railguns) and doubled/pop up shot (T1.4) the same target. (They were to far appart for a combined fire order.) The hammerheads managed 4 hits which amounted to 3 dead chimeras (5 BMs)
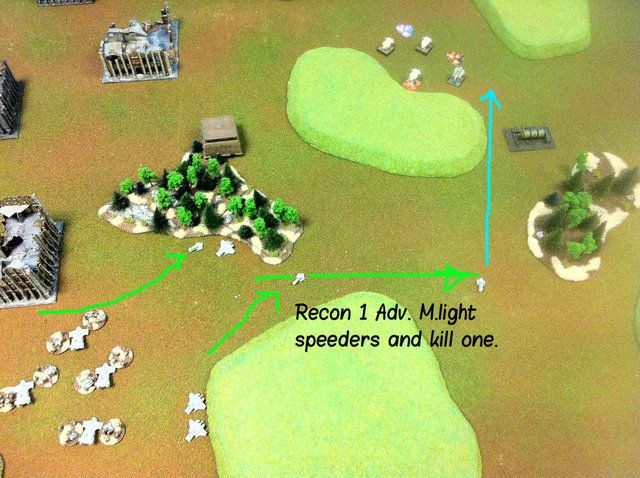
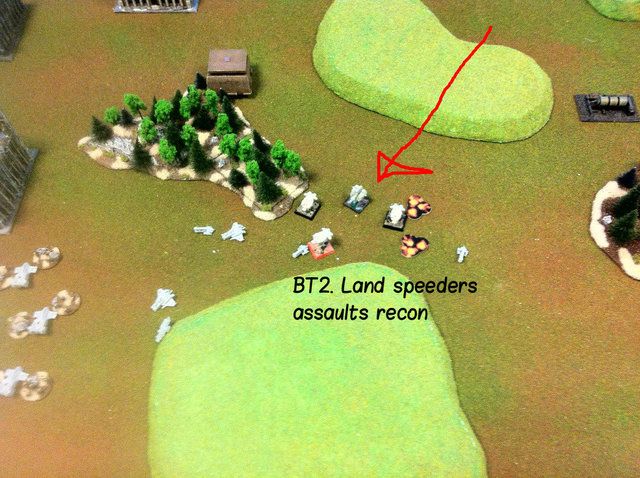
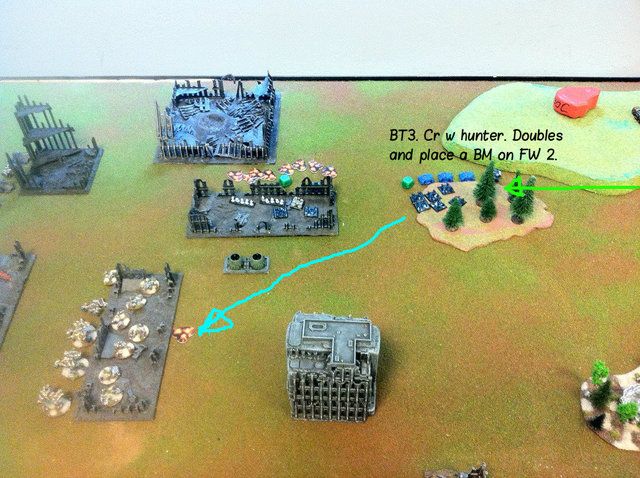
LatD responded by advancing their Plague Towers (LatD 1.4) which shoot their barrage at recon 1, 2 tetras and 1 piranha died and the formation consequently broke. withdrawing back behind a big house.
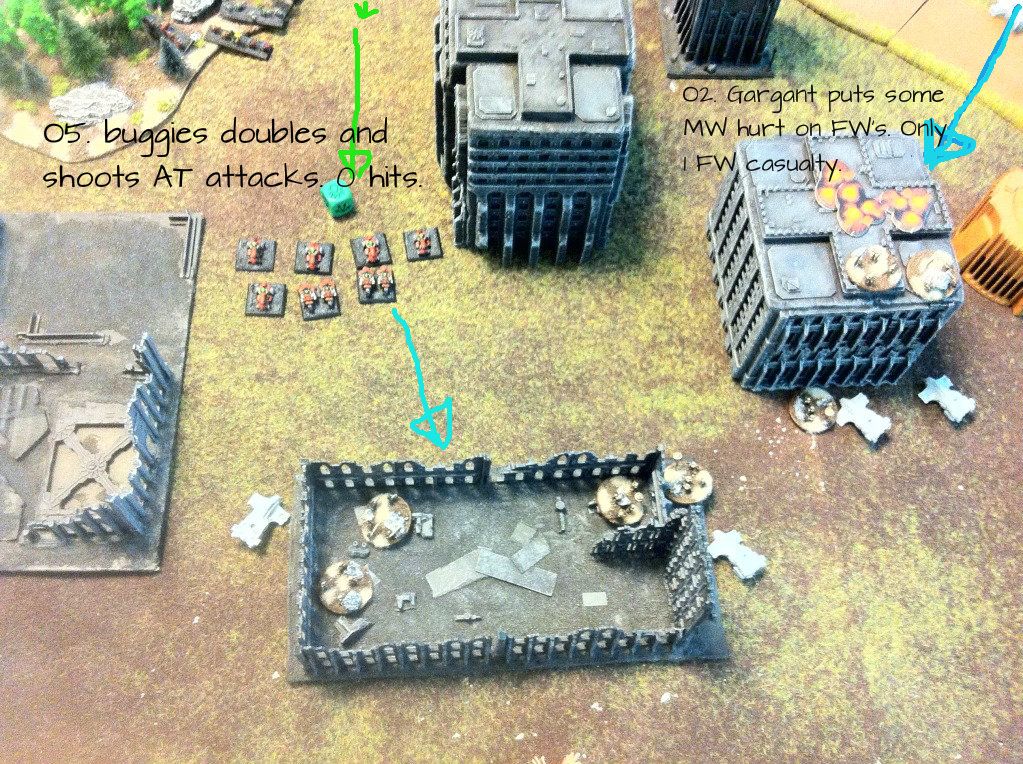
After this Tau decided that FW 1 (T1.5) had to move up and be the shield for the rest of the army. Since the plague Towers had already moved I wasn't afraid of the the big barrage and moved close to get all attacks in, relaying on their 5 + save instead of going into the nearby ruins for cover. I was a bit disappointed with them only killing 1 cultist.
LatD then got to go and activated the Hellfire cannons. I was under the misconception that they fired less than 75 cm, so hadn't factored them in. They sustained (LatD 1.5) on FW 1, killing a FW unit and a devilfish.
The skysweep formation in the Tau team then advanced (T1.6) and fired their guided missiles on the chimeras getting 4 hits for 2 destroyed chimeras.
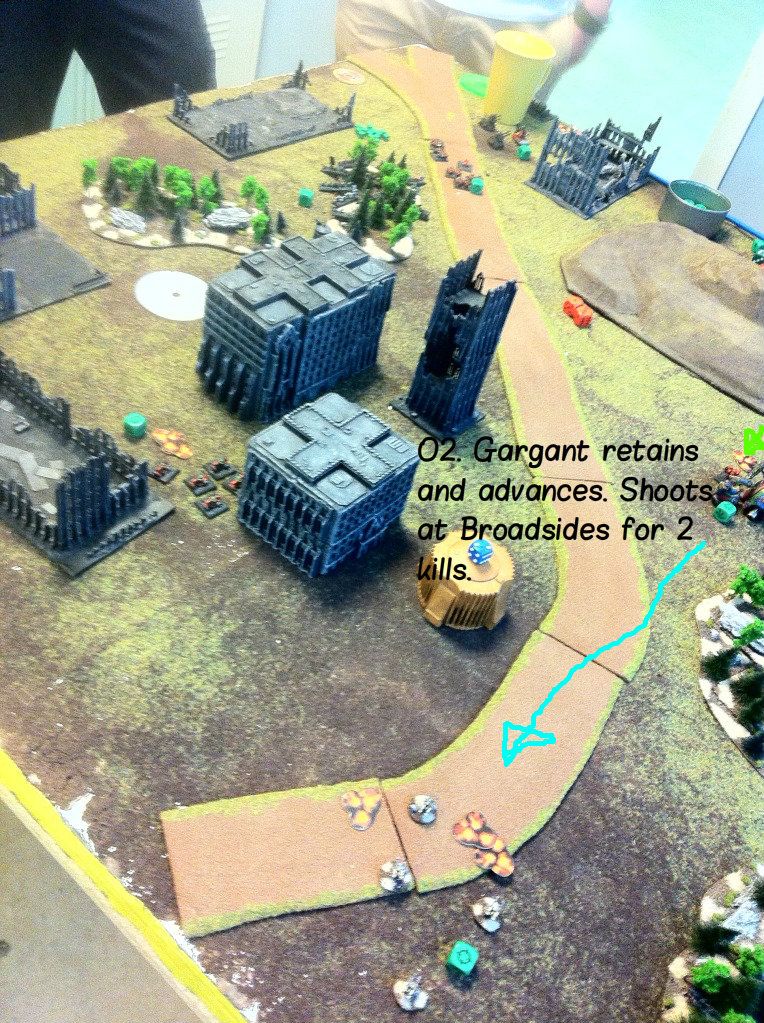
LatD responded by advancing with the LordoB (LatD 1.6) which also shot the FW 1 getting 2 hits killing 1 unit of FWs.
Tau tried to move up the big hammer head formation (T1.7), alas I failed my activation roll. They decided to stay put and shot guided missiles at m-lit chimera covenant. They managed to take out the last chimera. Bringing the formation down to 13 units. They then had 12 BMs.
LatD decided to activate the covenant in the back towards the LatD blitz, they were put on overwatch (LatD 1.7)
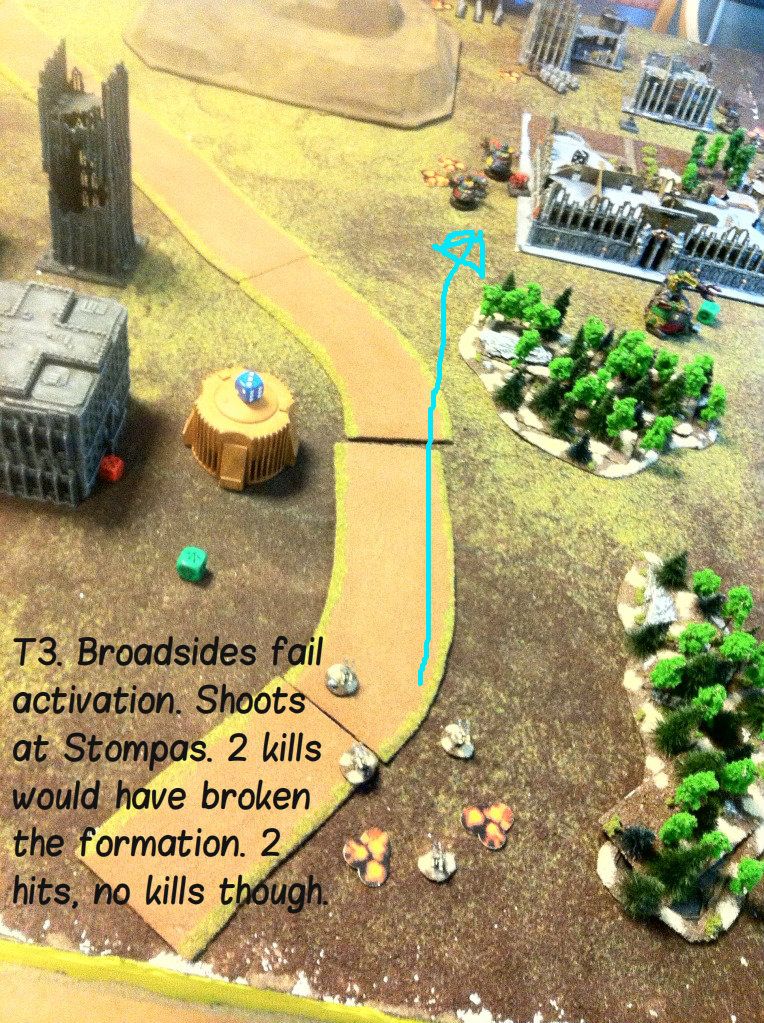
Next up were broadsides who chose to march (T1.

to be ready for next turn. This was another stupid mistake. I had forgot that you can put BMs on formations by shooting at them even tough you can't actually hurt the formation (AP/AT). I should have doubled them instead and shot at the chimera(less) covenant, since that would have broken them.
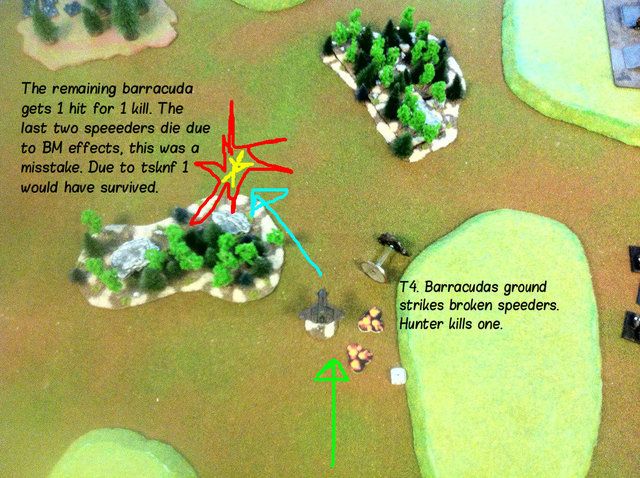
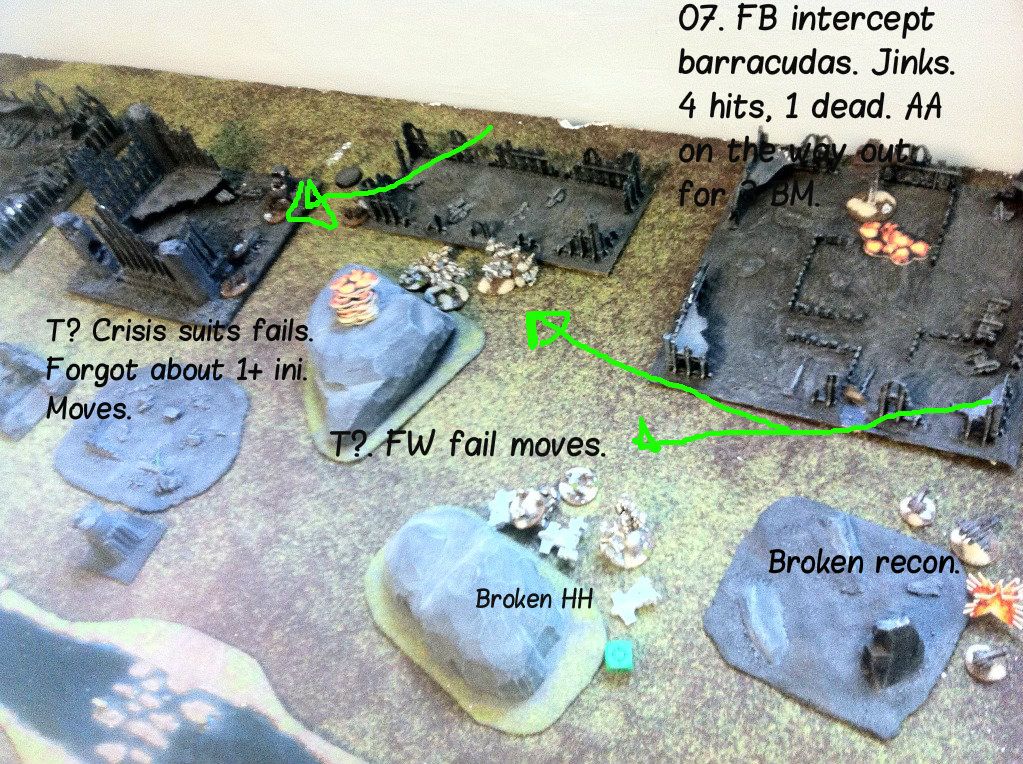
Tau them got to go again. I decided now was the time to bring in the Tiger sharks (T1.9). They went to shoot at the LordOfB. I was careful to stay within skysweep formations range. My opponent decided to send in his doomwings anyway (CAP) I countered with calling in my CAP'ed barracudas. 1 doomwing survived the ground AA, defensive tiger shark AA and the intercepting Barracudas. The doomwing hit and I failed my save so 1 Tiger shark died
The bomber then proceeded and missed it's shot, so no damage on the LordoB. The plane was shot down by a hydras AA attack in the end phase. This was very bad since Tau had now lost their only real threat against the total of 18 hit points worth of reinforced armor, invulnerable save WE's.
The last formation of the turn to activate was FW 2 (T1.10) which failed their initiative test so had to take a hold action. They chose to move closer to the action (staying in their transports).
 End phase
 Recon 1 were the only broken formation and they didn't rally. FW 1 critically didn't rally either. Chimera(less) covenant however managed to rally.
Turn 2Zombies 2 teleported i, in front of the central ruin containing the chimera covenant, getting 1 BM.
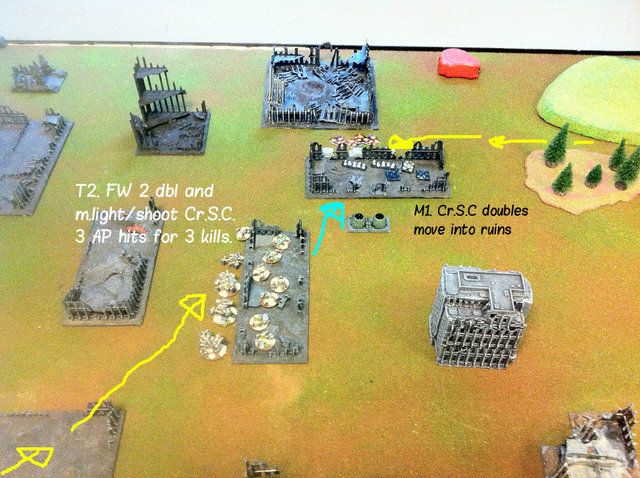
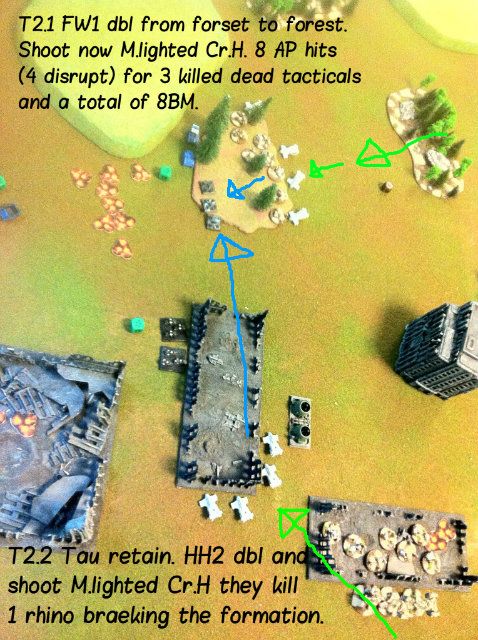
The strategy roll went to Tau, who started by marshalling FW 1 (T2.1) needing the SC reroll. They shot at zombies. A lot of units were supressed due to the failed rally roll, but being Tau they still managed to take out 5 zombies breaking the formation. A bit disapointingly they only managed to remove 3 BM.
Initiative then went over to LatD who also went on to marshall the chimera(less) covenant (LatD 2.1), removing all remaining BMs.
Tau tried to activate recon 2 (T 2.2), but a failed test saw them regroup instead.
The Plague Towers went next and advanced (LatD 2.2) and shot at the broasides in the forest. 4 hits for 2 dead broadsides. The formation broke due to disrupt. The templates also hit the Skysweep formation who were nearby. 1 vehicle went down and the formation broke.
The big Hammer head formation, HH1, tried to activate (T2.3) and failed for the second turn in a row. The elected to move forwards.
Hellfire cannons the sustained (LatD 2.3) on the poor FW 1. They got 3 kills which made the formation break and withdraw.
HH2 activated and doubled? (T2.4) they shot at the LordoB putting a BM on it.
LordoB responded by adv (LatD 2.4) and shooting at the pesky hammer heads getting 3 hits, but all saves were made.
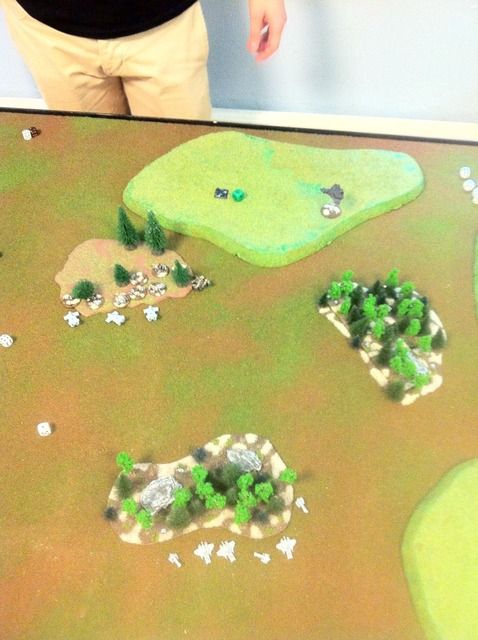
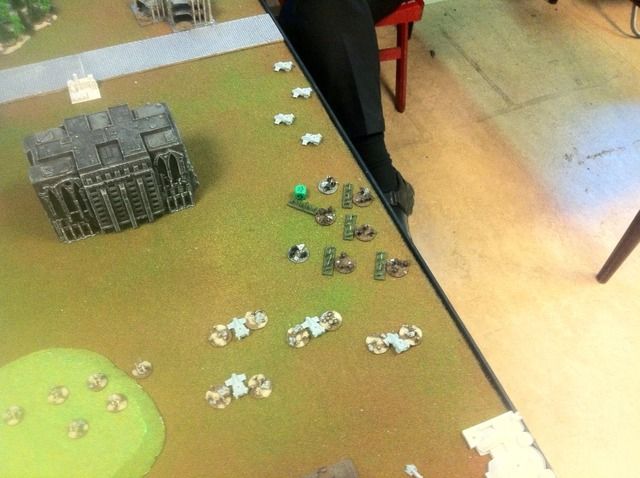
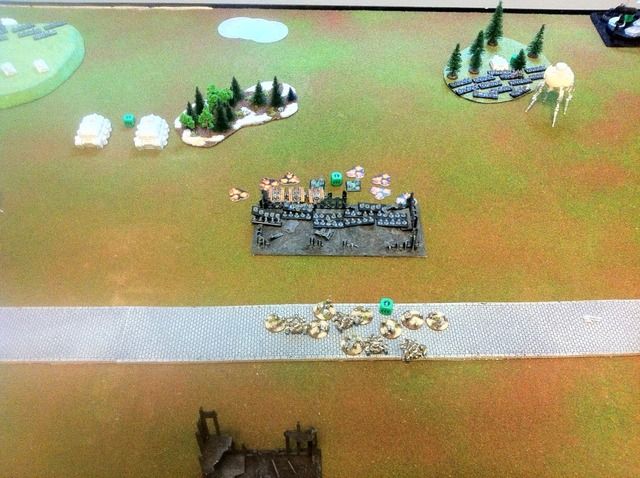
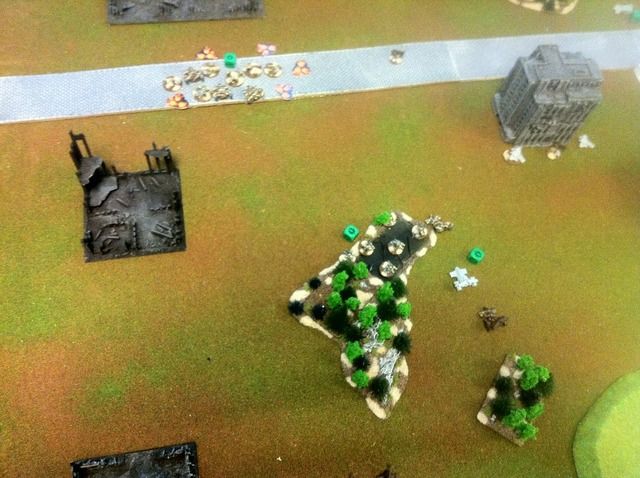
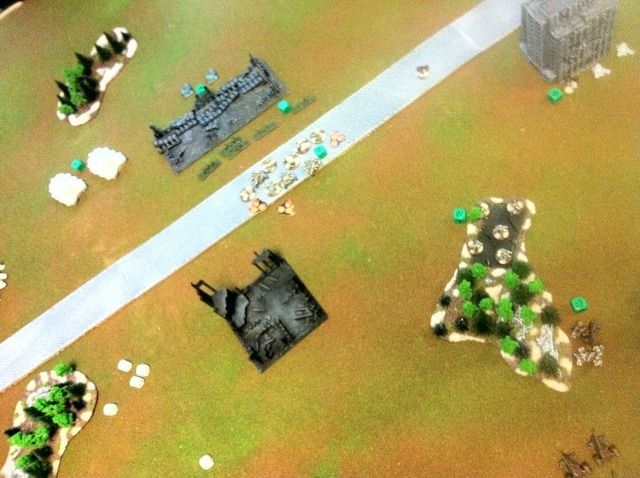
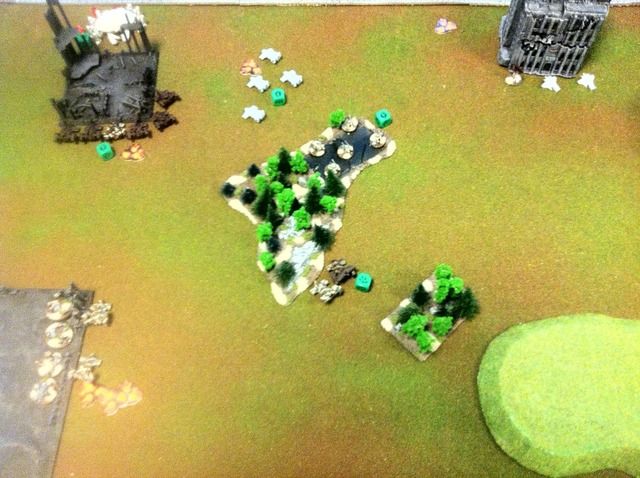
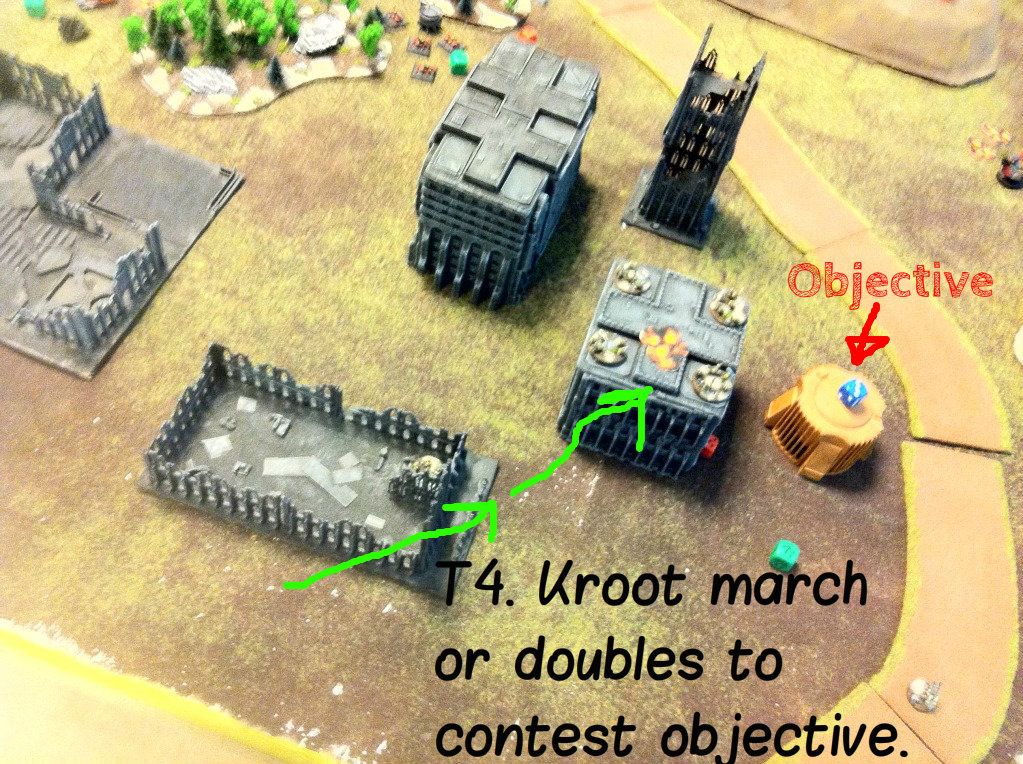
The crisis suits who were stranded back in Tau deployment due to the the zombies, elected to march (T2.5) into woods close to the upper LatD defend the flag objective (se pic after T2.7).
LatD tried to activate the doomwings and my opponent had his only failed activation (LatD 2.5) of the whole game.
Barracudas flew in (T2.6) and put a BM on the LordoB.
Tau then put som more preasure on the LatD left flank by marching (T2.7) close to the garisoning covenant.

That ended the second turn.
All borken Tau formations rallied.
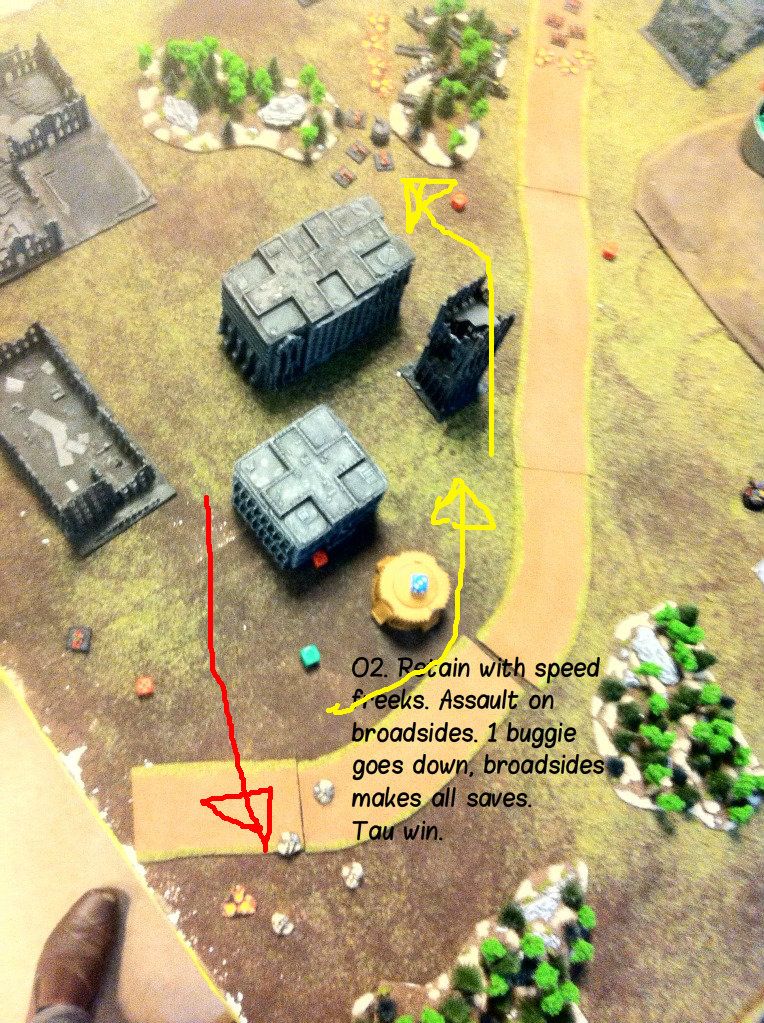
Turn 3Initiative again went to Tau, who marshalled (T3.1) the broadsides they wanted some revenge and put a BM on the Plague Towers.
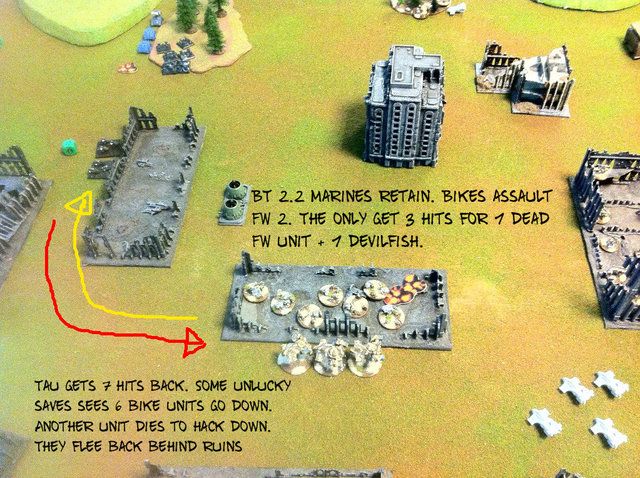
Tau retained the initiative and made a coordinated fire order with FW (T3.2) and the Crisis suits. The FW started by doubleing sort behind the forest to minimise the amount of OW fire they would have to take and no Tau vehicles were destroyed so the infantry could disembark.
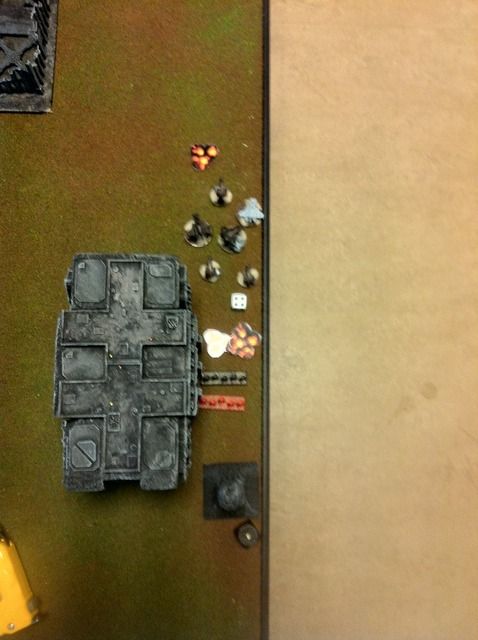
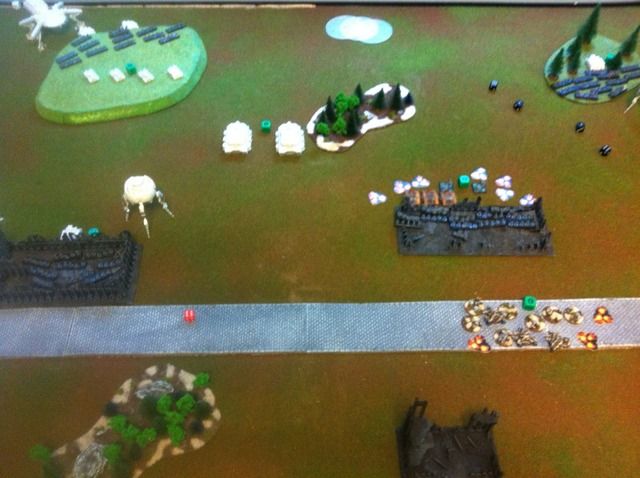
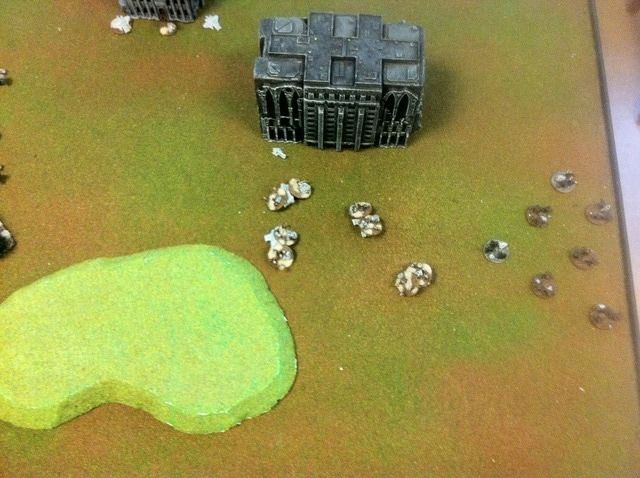
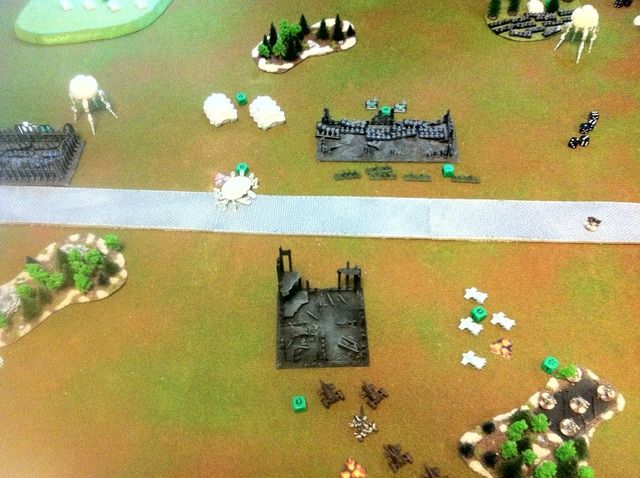
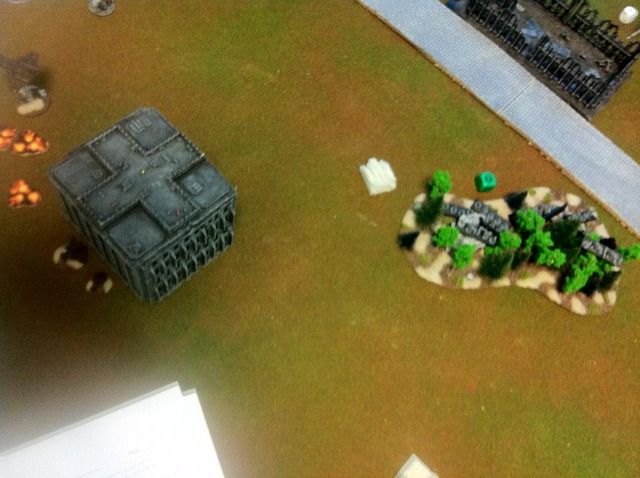
The Crisis suits also doubled (T3.3) but more to the front of the covenant. The two Tau formations together managed to break the covenant which elected to stay put in the forest and not withdraw. Se pic after LatD 3.1 to for placement.
My opponent saw an opportunity to take out my BTS, knowing that his Towers had no MW weapons I felt secure with my crisis suits 3+ Save. I should not have relied on that. The Pl. Towers sustained (LatD 3.1) and managed to reach 1 of my units which ment all were under barrage templates. A lot of hits later and some subpar saves saw all units (including SC) except one die. The surviving crisis unit withdrew to the forest.
LatD then retained with the lone surviving doomwing and Blastmarkered the last crisis suit of the field.
The rallied Recon 1 advanced (T3.4) and M-lit the LordoB ans also putting a BM on it.
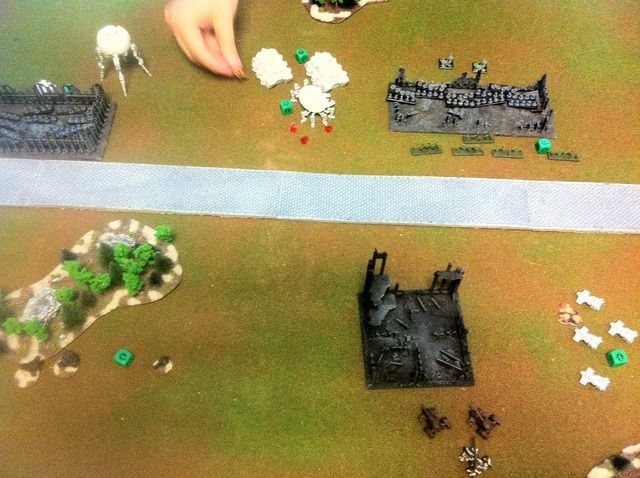
Tau tried to retain with HH2 but failed (T3.5) the 3 unsupressed hammerheads elected to shoot at the LordoB getting 3 hits of which 2 saves were failed. This got the LordoB to 5BMs, 1 from breaking. In addition 1 of the hits managed a critical which sent the WE staggering into the Plague Towers, who being WE counted as impossible terrain for the LordoB, this got an additional damage point on the LordoB and a 6th BM breaking the beast.
Chimera(less) covenant doubled (LatD 3.2) towards FW 2 putting a BM on the firewarriors.
HH1 retained and actually advanced (T3.5) instead of failing for a 3 turn. They moved behind a building to which the LordoB had withdrawingly advanced

and pop upped on him. They got 6 hits in on the m-lit war engine, but all saves were made.
Hellfire cannons then doubled (LatD 3.3) and shot at recon formation but got no hits.
Skysweep had 1 BM and wanted to marshall (T3.6) but failed and broke instead.
The garrison covenant to the tau left decided to quit overwatch and instead doubled (LatD 3.4) closer to Tau and shot at recon 1, 1 piranah went down and the formation broke.
Recon 2 advanced and shot at M-lit LordoB getting 0 hits.
FW1 tried to marshall but failed and regrouped, removing all blastmarkers.
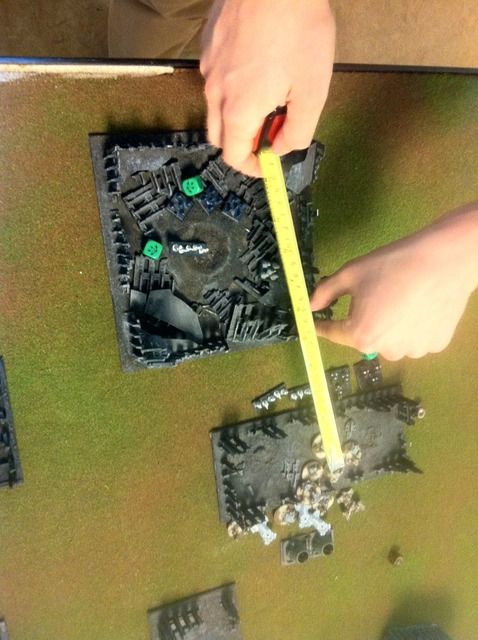
That ended turn 3, I thought my opponent had only BTS. But FW 2 were 17 cm away from the rightmost LatD defensive objective, this gave LatD defend the flag gaol as well. Giving my opponent a 2-0 victory. That should teach me to measure thouroughly.
cheers


![:{[]](./images/smilies/headbang.gif "Headbang")