Login |  Register |  FAQ
   
Post new topic Reply to topic  [ 21 posts ]  Go to page 1, 2  Next

Aeronautica Imperialis Battle Reports- A Log of Sorts

 Post subject: Aeronautica Imperialis Battle Reports- A Log of Sorts
PostPosted: Wed Dec 03, 2014 7:29 pm 
Brood Brother
Brood Brother
User avatar

Joined: Tue Oct 26, 2010 6:44 pm
Posts: 320
Greetings,

I was a bit of a late-comer to0 Aeronautica Imperialis. I really like the game and enjoy playing it. I find the rules easy to learn but hard to master. Plus, it is a dead ruleset so it is static.... except for what I want to add to it! Plus, the scale and low model count is a win in my book. This thread will be about my efforts around this dead game.

The battle report below was for the Aeronautica Imperialis 5th Annual Online Campaign over at the Airspace Forum. If you are interested you can find out all about it here: http://z8.invisionfree.com/Airspace/ind ... ct=SF&f=38

This forum has created variant rules, new scenarios, and new aircraft. I will be using these "house" rules in the battle reports to come. Onto the battle report!

Chaos forces have built a beachhead on St. Augustine's Island (WZ3) near the Fitzcarraldo Opera House. However, Captain Traz Valsk needed to establish Forward Operating Bases across Arbos. A flight of transport craft from the Cabal of the World Walkers was sent to establish a base on the shores of St. Thaddayus Island (WZ 6). In their holds were technicians and crews to establish a small airbase and Augur station. On their way, they were intercepted by Tau aircraft.


Intercept
Warzone: 6- St. Agnes Island

Cabal of the World Walkers
1 Hell Blade- Styl'Byk
12 points

1 Hell Blade- Ga'Ven
12 Points

1 Tormentor Bomber- Hwe'vere
16 points

3 Vandals- Bly'k, Ka'aw, By'rrd
5 points each

Total= 43 points

The Graceful Hunters
Barracuda- Ki'ra
+Ace- Stick Like Glue
+Escape Pod
25 points

Barracuda- H'deo
18 Points

Total= 43 Points

Set-up:

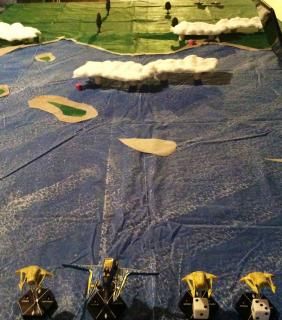
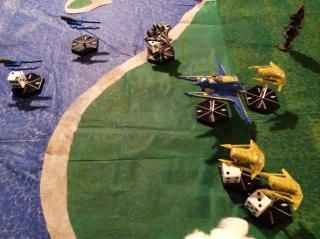
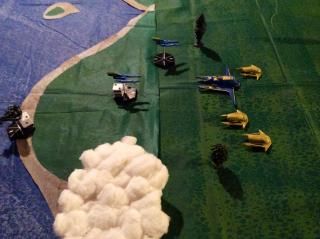
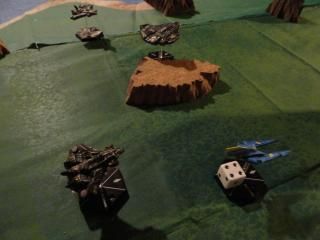
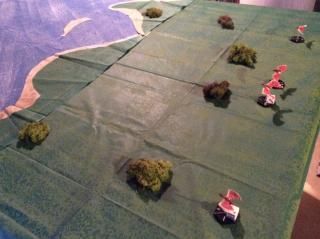
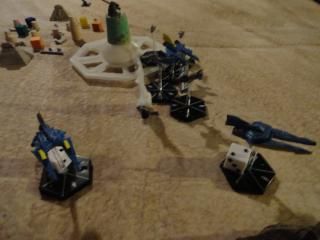
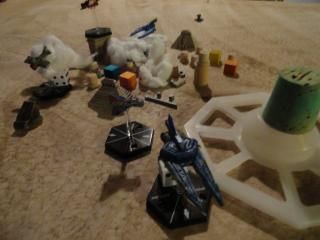
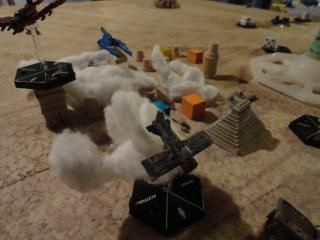
For each Transport Point landed in the 12 by 12 landing area, the Chaos forces score +10 VP. For each transport point destroyed the Tau earn +10 VP. The landing zone is a 12 inch by 12 inch square a foot away from the opposite board edge. We added three cloud banks for fun, and they were randomly placed at altitudes 3, 4, and 6.

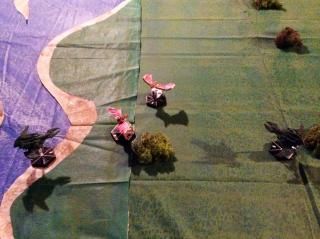
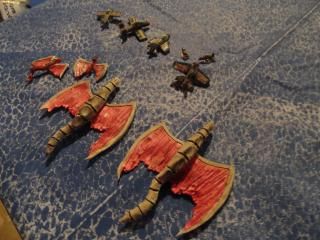
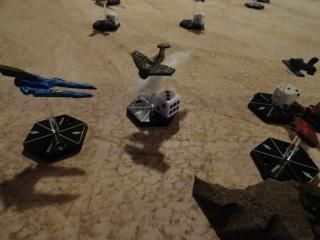
The Tau came on off center of the board at medium speed and medium height. The Chaos forces were aimed for the target zone. The Vandals and Tormentor were at Alt 1 and speed 4, while the Hellblades were flanking at altitude 4 and speed 6.

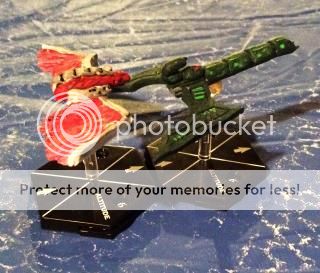
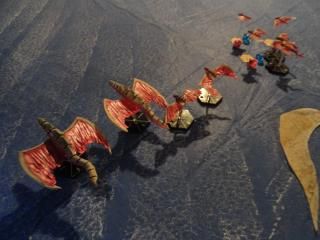
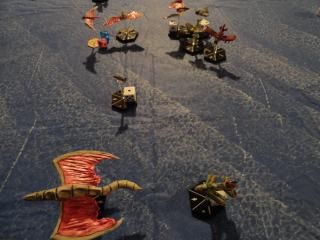
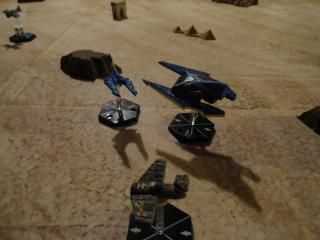
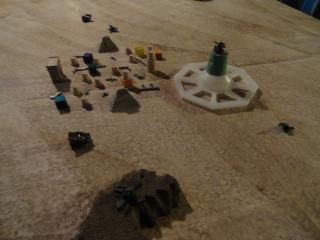
Image

Turn 1:
Initiative: Tau

Moving:
Barracuda 2 sideslips to provide top cover to his wingman as they drop and move to intercept the Chaos transports. The Vandals race forward, blasting across the ocean waves. The Tormentor rises up slightly to cover their approach. The Hellblades turn in to provide top cover.

Shooting:
None

Turn 2:
Initiative: Tau

Moving:
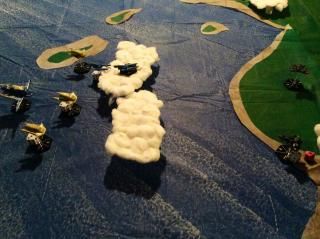
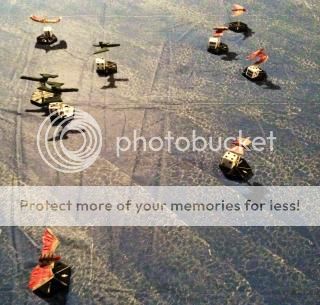
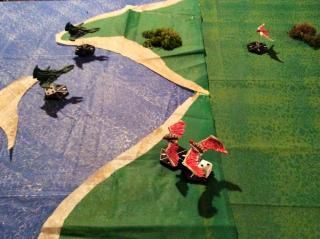
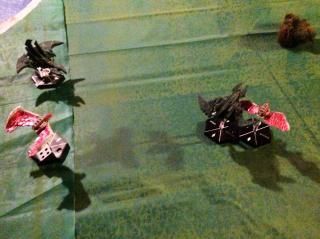
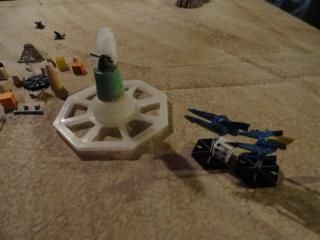
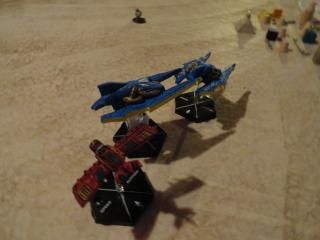
The two Tau fighters set-up for their attack runs. Ki'ra in Barracuda 1 was lined up at the hard deck on the incoming transports, and H'deo in Barracuda 2 was at Alt 2 and in a good firing position. The Vandals began to slow their approach in preparation for their landing runs. The Tormentor moved in to cover the landing, while the Hellblades dove through the cloud cover and put themselves in the line of fire.

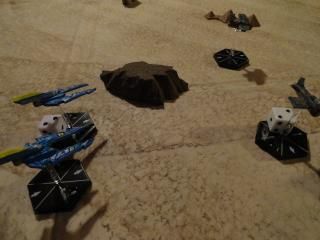
Both Tau took a long range Ion cannon shot at Hellblade 1, but missed. The Chaos forces were still too far away.

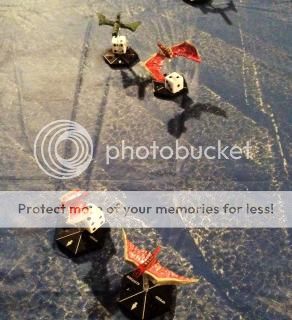
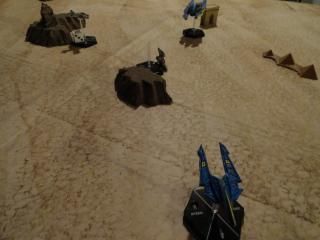
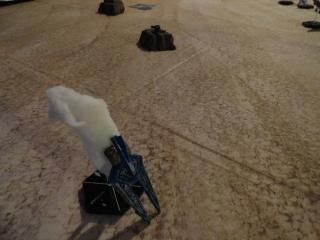
Image

Turn 3:
Initiative: Chaos

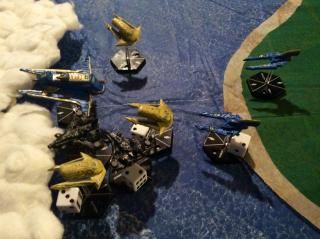
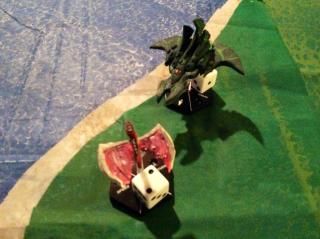
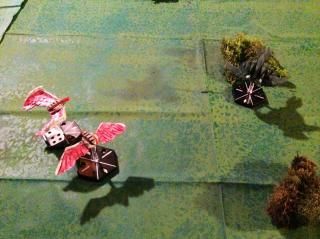
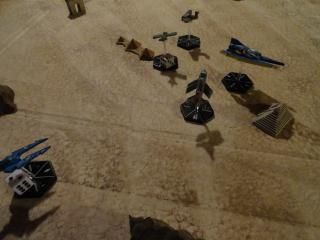
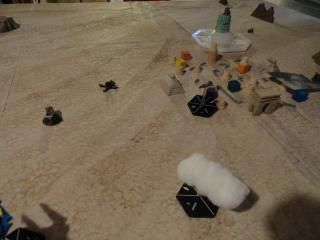
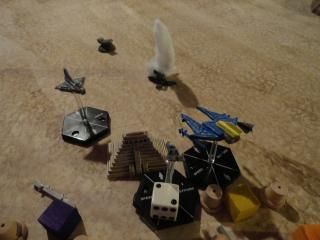
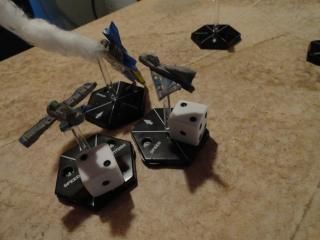
Moving: Everyone get stuck on really close as the assault transports try to make the landing zone and the Tau try to intercept.

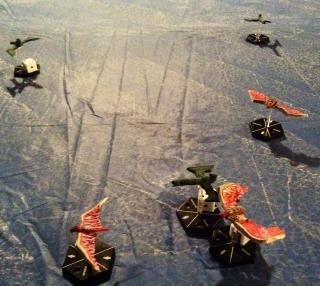
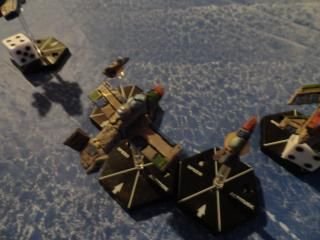
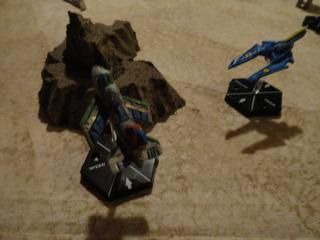
Image

Shooting:
Hellblade 1viffs and snaps a burst of Auto-cannons shells at Ki'ra in Barracuda 1. Tzeentch must guide his aim as three shots tear into the Tau craft. Ki'ra successfully ejects as her plane is torn apart around her. That was a lucky break for the Chaos forces.

H'deo unloads his forward weapons at the Tormentor, but the elevation difference saves it from being pasted. The shots fly over the target. The Burst cannons also fire on the two vandals bracketing him. But they all fail to find their mark. 13 dice and none hit. Tzeentch be praised!

The Tormentor's turret returns fire on Barracuda 2, but the shots go wide.

Turn 4:
Initiative: Chaos

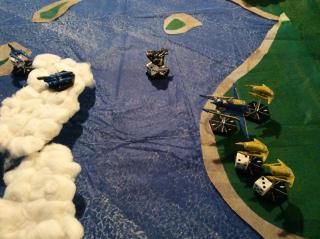
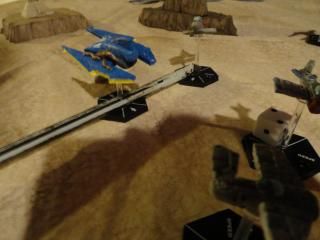
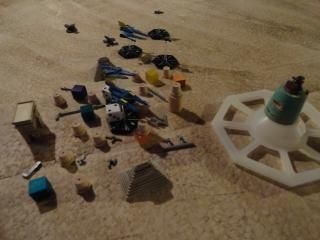
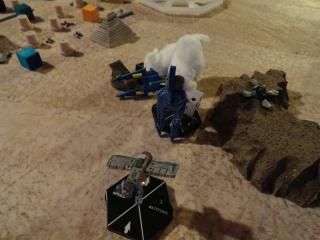
Technically, this should be the Disengagement turn, but we decide to play it out and see if I can actually get the Chaos craft into the landing zone. :)

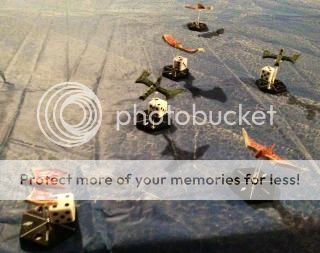
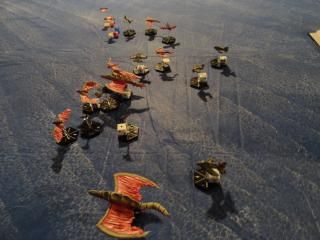
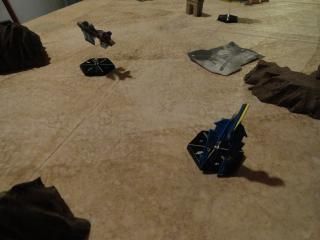
Image

Moving:
Vandal 1 and 3 turn back to tighten their formation and prepare to land with Vandal 2. The Tormentor also lines up on target. The Barracuda cuts out wide and tries to circle back in, but he may not make it in time. The Hellblades try to circle in behind, but two is out of position.

Shooting:
Hellblade 1 unloads a burst at Barracuda 2, but misses as the shots stitch beneath the banking Tau fighter. The Barracudas starboard Burst cannons automatically fire on the Tormentor, but miss. The Tormentor returns fire and a few shells scrap across the Barracuda's hull, but leave it undamaged.

Turn 5:
Initiative: Chaos

Moving:
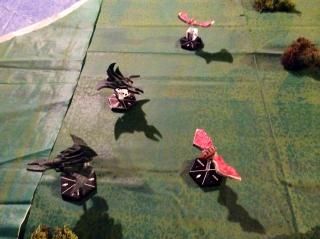
The landing craft are set-up for a picture perfect landing in the drop zone. The Tau pilot uses his fighters slow speed handling to get a nice bead on his targets, but the Hellblades are determined to take him out of the picture.

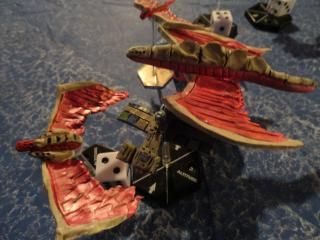
Image

Shooting:
Sadly for Barracuda 2, Chaos has the initiative. Hellblade 2 opens up with a medium range salvo, but his shells only knick the paint on the Tau fighter.

The Barracuda pilots opens fire with everything he has on the Tormentor. The big transport begins to blow smoke as the Ion cannon blasts into it and showers sparks as the burst cannons light it up. However, it is too little too late.

Hellblade 1 fires on the Tau fighter at close range, and gets good hits, but at the range they simply pierce straight through the Barracuda and fail to hit anything vital.

Turn 6:
Initiative: Chaos

Moving:
The Chaos transports successfully land in the target area as their Hellblade escort races by overhead. Truimph!

Meanwhile, Barracuda two makes High-G turn and bugs out. He is eager to report and get his wing leader Ki'ra picked up by friendlies.

Image

Conclusion
No need to even add up the points. To be honest, this mission was an uphill climb for the Tau. They just didn't have enough aircraft and it may have been more even if they had a points bump to start with. Hellblade 1 and his lucky shot taking out Barracuda 1 before she could fire was a pretty big game changer too.

Overall a fun time. I had forgotten how quick and fast a game of AI can be completed.

_________________
Do you like Free Wargames?
http://bloodandspectacles.blogspot.com/


Top
 Profile Send private message  
 
 Post subject: Re: Aeronautica Imperialis Battle Reports- A Log of Sorts
PostPosted: Wed Dec 03, 2014 7:58 pm 
Brood Brother
Brood Brother
User avatar

Joined: Sat Feb 11, 2012 8:24 pm
Posts: 9625
Location: Manalapan, FL
Those are some interesting proxies! :D

_________________
He's a lawyer and a super-villian. That's like having a shark with a bazooka!

-I HAVE NO POINT
-Penal Legion-Fan list
-Help me make Whitescars not suck!


Top
 Profile Send private message  
 
 Post subject: Re: Aeronautica Imperialis Battle Reports- A Log of Sorts
PostPosted: Tue Dec 09, 2014 6:11 pm 
Brood Brother
Brood Brother
User avatar

Joined: Tue Oct 26, 2010 6:44 pm
Posts: 320
Thanks Jimmy. I sculpted them myself. I got into this game a little late to the party, so I have had to make due with what I could build myself.

Tau forces have begun to try and perform aerial scans of the planet in order to locate salvageable parts of the White Wyrm. To accomplish this Tigersharks have been outfitted with sophisticated sensor arrays.

Just such a craft and its escorts from The Graceful Hunters were on a routine patrol near the coast of St. Thaddayus Island. They were set upon by a roving intercept squadron from the Cabal of the World Walkers.


Flight of the Vigilant
Warzone: St. Thaddayus Island

Cabal of the World Walkers
1 Hell Blade- Styl'Byk
12 points

1 Hell Blade- Ga'Ven
12 Points

1 Hell Blade- E'gal
12 Points

Hell Blade- D'rkroe
12 Points

Total= 48 points

The Graceful Hunters
Barracuda- H'deo
18 points

Barracuda- Se'rah
18 Points

Tigershark- G'en
Detection Gear
20 Points

Total= 56 Points

Set-up:

My wife wasn't happy with our last battle and wanted a rematch. This time she wanted to fly one of her big birds, and have me to try and shoot it down. I was happy to oblige.

The Flight of the Vigilant mission the attacker tries to fly their bomber off the opposite board edge to win the scenario.

The Tau came on together as a group at Max speed and Alt 7 towards the center of the board. The Tigershark was in the center, flanked by both Barracuda. The Hell Blades came in on the opposite board corners in pairs. They were at speed 8 and Alt 3 and 5 on the East and 7 and 9 on the West. I wanted to cover the board as best I could.

Turn 1:
Initiative: Chaos

Moving:
Both sides raced forward towards contact. The Tigershark and Barracuda 2 turned to the East while Barracuda 1 side slipped towards the west. The Hell Blades did not change altitude or speed and angled towards the center of the board.

Shooting:
None

Turn 2:
Initiative: Tau

Moving:
Barracuda 1 moves up the center of the board to act as bait, and Hellblade 3 goes for it. They are going head-to-head. Barracuda 2 and the Tigershark shrewdly stay to the Eastern side of the board. Hellblade 1 and 2 move to intercept, but don't have the right altitude to engage the Tigershark. Hellblade 4 mistimes his turn in and is out of position.... for now.

Image

Shooting:
Barracuda 2 opens fire on Hellblade 2 who is the closet to closing in on the Tigershark. His aim is true and Hellblade 2 is vaporized and the pilot incinerated in the blast.

Seeing his Cabal brother go down, Hell Blade 3 viffs and fires a strafing burst on Barracuda 1. Shells tear into the Tau machine and cause it to blow smoke. The Tau pilot returns fire and vaporizes the petulant Hellblade in a storm of Ion and Smart Missiles. The pilot's ashes are scattered across the ocean of Arbos.

Turn 3:- Disengagement Turn
Initiative: Chaos

Moving:
Hell Blade 1 has had enough and shoots away from the furball. Hell Blade 4 tries to anticipate and get behind the Tigershark, but instead ends up in the sights of Barracuda 2. The Tigershark easily eludes him with a Power Dive away from his position.

Image

Shooting:
Barracuda 2 opens fire on Hellblade 4, but his shots go wide of the mark.

With that, the Chaos forces peel off and bug out. The Tigershark is free to continue its mission.

Conclusion:
Well, lesson learned. Don't try to take Hellblades head-to-head against Barracudas again. I forget how fragile they can be sometimes. This time I got a bit cocky, and paid a heavy price. No need to add up the points again. The Tau won easily.

_________________
Do you like Free Wargames?
http://bloodandspectacles.blogspot.com/


Top
 Profile Send private message  
 
 Post subject: Re: Aeronautica Imperialis Battle Reports- A Log of Sorts
PostPosted: Tue Dec 16, 2014 12:26 am 
Brood Brother
Brood Brother
User avatar

Joined: Wed Nov 26, 2014 4:46 pm
Posts: 35
Location: Geneve, suisse
Looks great. I'm just starting to build an Imperial and an Eldar squadron, off of eBay. Not cheap, but looks pretty cool. Hoping to get some people interested enough to play.

_________________
Looking for Aeronautica Imperialis, Epic 40K/Titanicus, Dark Future, Mordheim, Necromunda/Kill Team/ITEN/D-squads, BFG, in NoVA/DC area. http://miniwars.co.uk/players http://www.tabletoptournaments.net/play ... ted-States http://nearbygamers.com


Top
 Profile Send private message  
 
 Post subject: Re: Aeronautica Imperialis Battle Reports- A Log of Sorts
PostPosted: Tue Dec 16, 2014 5:04 pm 
Brood Brother
Brood Brother
User avatar

Joined: Tue Oct 26, 2010 6:44 pm
Posts: 320
Good to hear! In our annual Campaigns at Airspace the Imperials are under-represented. For some reason it surprises me every year!

Bug Hunt
A swarm of Tyranid bio-constructs was traveling across the Sea of Sorrow on a patrol for bio-mass. They were approaching the Harkmaann's Fisheries. However, a patrol of Dark Eldar Raven's decided to indulge in a bit of sport and attacked the Tyranids from behind.


Bandits over the Sea of Sorrow
Warzone: 2- Sea of Sorrow

Swarm of the White Wyrm
4 Hags
10 points each

2 Virago with Synapse Link
19 Points each

Total= 78 points

Cabal of the Broken Blade
Raven 1- Lilex
24 points

Raven 2- Hamri
24 Points

Raven 3- Hasdrubel
24 Points

Total= 72 Points

Set-up:

My wife was interested in the Tyranid swarm because they were pink. However, I advised her that they were slow and I had no idea how competitive they were and that I wanted to test them out. She agreed to and told me she wanted to fly the Dark Eldar against them. Well, this should be a HUGE challenge.

Per the rules for Bandits of the Karsundi River, the Tyranids were placed in the center of the board heading South. The Hags were at Altitude 6, and the Virago were at Altitude 7. They were at speed 3. The Dark Eldar Ravens came in on the North board edge at full speed and staggered high altitudes.

There is no way the Tyranids can outrun their pursuers and they are caught in the open over the ocean. This will be a huge test for the Nids. My plan is to use the Hags to try and lure the Dark Eldar Ravens into predictable attack lanes, and use the Very High maneuverability of the Virago to get a shot at them. They only have 1 hit after all.... and a Shadow fields. Gulp.

Turn 1:
Initiative: Per the rules the Dark Eldar get initiative.

Moving:
The Dark Eldar raced in at max speed! Dang they are fast. The Tyranids try to scatter but the abilities of the Ravens still leave many of them in danger.

Shooting:
Raven 3 took a snap shot at Virago 1 with his Dark Lance, but missed.

Everyone else was out of range.

Turn 2:
Initiative: Tyranids

Moving:
The Dark Eldar race forward. Raven 2 gets a bead on Hag 3 as it tries to scramble away. Raven 3 drops low to snag any potential power dives, while Raven 1 spirals and goes high to protect the rear.

Meanwhile, the Hags just scramble to stay out of the way. I'm honestly not sure if they will be able to turn around before the board edge or if they will simply disengage.

Virago 1 takes a High G turn to parallel the attacking Dark Eldar. Virago 1 spirals back into the action and gains altitude. This will give him a shot at Raven 1. The outnumbering is helping so far. I can see exactly where the DE will end up before moving my Virago.

Image

Shooting:
Raven 2 opens fire at Hag 3, but misses completely.

Virago 2 fires on Raven 1 with his Devourers. The Devourer beetles bounce harmlessly off the Raven's armor, their kinetic energy spent.

Turn 3:
Initiative: Dark Eldar

Moving:
The Dark Eldar try to pin down the Hags fleeing to the East. However, despite being close, they are at the wrong altitude to intercept. The hags' are at their Max Altitude of 7 while Raven 2 and 3 are at 5.

Raven 3 is attempting to get into position and is way outside the furball. Virago 1 and 2 and attempting to home in on Raven 3, but only Virago 2 has the angle.

Image

Shooting:
Raven 2 takes a long range Dark Lance shot at Virago 2 and hits! The shot sears across bone and sinews and the Virago's body begins to drip ichor and tissue. The damage causes Virago 2 to miss his shots on Raven 3.

Turn 3:
Initiative: Tyranids

Moving:
Hag 3 tries to avoid the oncoming Raven 1, but Raven 2 races ahead of him and spirals into close range. The other Hags continue to scatter, but it is unclear if Hag 4 will be able to turn enough to stay on the board. Raven 2 spirals into the center of the action and forces the Virago to scatter away from his guns.

Image

Image

Shooting:
The Tyranids have the initiative so Hag 3 fires on Raven 3. The Hag has its most firepower at close range, so maybe he has a chance? 2 Hits, but no damage. Raven 3 returns the favor and blasts the Hag out of the sky with Splinter and Dark Lance fire.

First blood to the Dark Eldar! Only three more to go!

Turn 4:
Initiative: Tyranid

Moving:
The remaining Hags try to swing around and stay on the board, while the Dark Eldar try to swoop in behind. Virago 2 comes about and is heading straight for Raven 2, while Virago 1 spirals and swoops down onto Raven 1.

Image

Image
Talon Attack!

Shooting:
Virago 2 fires a burst of Devourers at Raven 2, but the Dark Eldar craft flies right through with no damage. In return, Raven 2 targets Hag 2 and opens fire. The Dark Lance sears right through Hag 2 and the creature plummets from the sky.

Virago 1 peppers Raven 1 as it closes in and for a rake attack. The Devourer beetles all fly wide of the mark. The talons get two solid hits, but fail to cause any serious damage. That was probably my best chance to take out a Raven and I just blew it. :(

Raven 3 targets Virago 2 and opens fire. The splinter cannons fail to find their mark, while expending the last of his Dark Lance ammo for no effect.

Turn 5:
Initiative: Tyranids

Tailing Fire:
Virago 1 fires on Raven 1 with Tailing Fire. The Devourers miss, but the Talons get two solid striking hits. However, the Ravens Night Shield deflects the blows. Dang it!

Moving:
The two Hags skate the edge of the board and avoid disengaging while Raven 2 and 3 leisurely fall into firing positions. Virago 2 moves to attack Raven 2 and Virago 1 tries to catch up with Raven 3. Raven 1 is content to spiral and shake the Virago that was attacking him.

Image

Shooting:
Virago 2 fires the last of his living ammo at Raven 2, but misses all of his shots. Raven 2 fires on Hag 4 and blasts him from the sky.

Virago 1 takes a mid-range desperate shot at Raven 3 and hits twice! However, he fails to cause any damage. Raven 3 is out of Dark Lance ammo so fires his Splinter Cannons at Hag 1 but misses.


Turn 6:
Initiative: Dark Eldar

Moving:
Raven 1 spirals and races back towards the fray, looking to get a kill. Hag 1 traces the edge of the board while Raven 3 follows slowly behind. Virago 2, out of ammo, dives onto the pursuing Raven 3 for a claw attack! Virago 1 tries to get an angle on Raven 3 as well. Raven 2 breaks hard away and rockets away from the action.

Image

Shooting:
Raven 3 fires the last of his ammo on Hag 1. He hits but fails to finish off the critter! Virago 1 uses the last of his ammo to attack Raven 3, but misses.

Raven 1 coming up from behind fires on Virago 1. The Dark Lances blasts a deep wound across the Viragos body. Now both have been injured.

Virago 2 attacks Raven 3 with his Talons. He gets two damaging Hits and the Night Field saves 1. The Viragos blade slices through the cockpit and decapitates the Dark Eldar pilot!

Turn 7:
Initiative: Dark Eldar

Moving:
The Tyranids disengage off the board while the Dark Eldar move in for the final kill.

Shooting:
None

Conclusion:
Well, my plan almost worked! The Hags were nice fat and slow targets that the Dark Eldar couldn't resist going for. Due to the outnumbering, they were the only targets she could reliably get a bead on. That allowed my Virago to move into attack.

The Virago's slow movement wasn't terrible. It actually helped them get into position for Talon attacks. However, the Low maneuver of the Hags was a huge problem. They could barely stay on the board. However, they are low cost and ensure you can outnumber your foes and gain an advantage that way.

It didn't necessarily feel like it, but the game was relatively close. The Dark Eldar were downing my low points craft, so even destroying one of theirs was equal to two of my Hags.

However, in the final analysis, the Dark Eldar won this round!

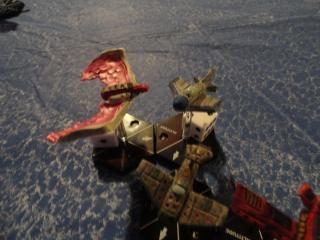
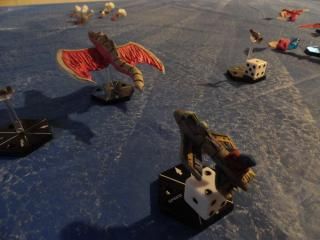
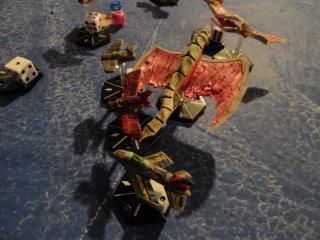
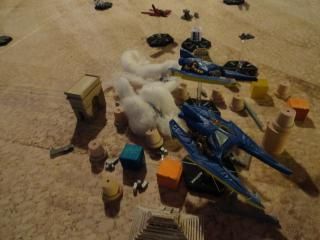
Just Some Random Pictures that I don't recall where they go...
Image

Image

_________________
Do you like Free Wargames?
http://bloodandspectacles.blogspot.com/


Top
 Profile Send private message  
 
 Post subject: Re: Aeronautica Imperialis Battle Reports- A Log of Sorts
PostPosted: Wed Dec 24, 2014 10:59 pm 
Brood Brother
Brood Brother
User avatar

Joined: Tue Oct 26, 2010 6:44 pm
Posts: 320
The Dark Eldar are looking to capture some Tyranid specimens to bring back to Cormorragh as arena gladiators. However, to do that they first need to locate some of the creatures. A flight of Razorwings was sent to St. Abelgard's island to locate pockets of the beasts. Once discovered, the Dark Eldar can send a raiding party to capture them on the ground.

As the Razorwings approach St. Abelgard Island, they are met by a small swarm of Tyranid air creatures trying to interdict them. Pleasure ensues.


After Action Report
Warzone: 1- St. Abelgard's Island

Swarm of the White Wyrm
2 Hags
10 points each

2 Virago with Synapse Link
19 Points each

Total= 58 points

Cabal of the Broken Blade
Razorwing 1-
+ Detection Gear
30 Points

Razorwing 2- Hasdrubel
+Drainleech Missiles
30 Points

Total= 60 Points

Set-up:
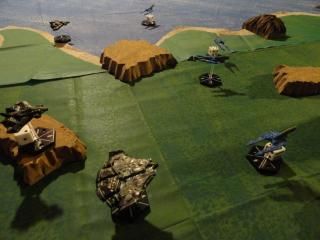
Per the rules, we set-up 6 targets for the Razorwings to try and Recon. They were scattered on the island shore on my board edge at least 8 inches from any edge. The Razorwings came in on the opposite board edge at Alt 5 and mid-speed.

I deployed the Virago in the center at full speed and mid-altitude. The Hags were on either flank moving slow and at low altitude.

Image

Turn 1:
Initiative: Dark Eldar

Moving:
All sides move forward. The Dark Eldar head towards the target on the pennisula. The Virago's side sweep away from the Razorwings to avoid going head-to-head. The Hags move forward.

Shooting:
No shooting as everyone is too far away.

Turn 2:
Initiative: Dark Eldar

Moving:
The Razorwings move into range of the first target after power diving towards the hard deck. It shouldn't but their speed catches me off guard. Virago 1 side sweeps as he his out of position. Virago 2 tries to turn in as does Hag 2. Hag 1 gains altitude and moves towards the Dark Eldar.

Image

Shooting:
Razorwing 1 tries to use his detection gear on the first target and fails. He also chooses not to take a long range shot with his Dark lance at Hag 1 due to the altitude difference. I guess The DE aren't too scared of Hags.

No one else has the proper attack angle.

Turn 3:
Initiative: Dark Eldar

Moving:
Razorwing 1 turned towards another target area to Recon. Hag 1 tried to gain altitude as Razorwing 2 spiraled around and got a firing arc on him. Virago 1 tried to chase down Razorwing 1 but failed to get a good vector. Virago 2 was too high to engage Razorwing 2.

I failed to take any photos this turn. Sorry.

Shooting:
A precision blast from Razorwing 2's Dark Lance cut Hag 1 completely in half. Razorwing 1 failed to recon the target.

Turn 4:
Initiative:Tyranids

Moving:
Razorwing 1 banked sharply and dropped altitude as they approached another Recon target. Virago 1 swung in behind them. Razorwing 2 was on a mission to show just how useless Hags are and casually flew into firing position on Hag 2. Virago 2 banked towards his board edge but was out of position.

Image

Shooting:
Razorwing 1 failed to get an image of the target area.

Virago 1 peppered Razorwing 1 with Devourer beetles, and what looked like a clean hit was only an illusion thanks to Razorwing 1's Shadow Field.

A drainleech missile hit from Razorwing 2 caused Hag 2 to drop to the jungle below and crash. Only a bloody smear remained. That amused my wife very much.

Turn 5:
Initiative: Dark Eldar

Tailing Fire: Virago 2 opens up on Razorwing 1, but fails to cause any damage. Instead, she smears the Razorwing's paint with spattered bug juice.

Moving:
This time, Razorwing 1's turn does not give them a new Recon target. Razorwing 2 also cuts across to try to cover Razorwing 1 as Virago 1 mistimes her turn and loses her tail on the Dark Eldar. Virago 2 cuts in and tries to line up a shot on Razorwing 2.

Image

Shooting:
Virago 2 takes a mid-range Devourer shot at Razorwing 2 but misses.

Razorwing 2 fires on Virago 1. The Dark Lance sears the Virago's flesh, but the creature continues to fly despite the wound.

Turn 6:
Initiative: Tyranid

Moving:
Things don't look good for the Virago as the Dark Eldar have gotten them wedged in between the two plans firing arcs. A mistimed spiral and failure to gain altitude by Virago1 could be its undoing.

Image

Shooting:
Razorwing 1 forgets about the target area and instead unloads on Virago 1. However, all of her shots miss.

Virago 2 takes a desperate shot at Razorwing 1, but misses as well.

Razorwing 2 fires his splinter cannons at Virago 2, but misses.

Lot's of shooting and missing.

Turn 7:
Initiative: Dark Eldar

Tailing Fire: Razorwing 1 uses it on Virago 1, but her shots go wide.

Moving:
Razorwing 2 spirals to set-up a kill zone as Razorwing 1 powers towards a target. Hoever, Virago 1 is right there to meet the Dark Eldar. Virago 2 tries to circle in and support the attack but can't get the angle.

Image

Shooting:
Razorwing 2 uses the last of his ammo to try and blast Virago 1 away from his wingman. However the proximity to the other Dark Eldar craft protects the beast.

The Virago attacks Razorwing 1 from above, but the altitude difference is enough to keep the slashing claws away from the fighter.

Razorwing 1successfully snaps a recon scan of one of the Target zones.

Turn 8:
Initiative: Dark Eldar

Moving:
Razorwing 2 makes a Hig-G turn and blasts off the board edge. He is out of Ammo and disengaging.

Razorwing 1 makes another pass at a Target area. Virago 1 misjudges the Razorwings maneuver and ends up out of position. Virago 2 is in a better place, but possibly too far away,

Image

Shooting:
Razorwing 1 fails to scan the target area. Virago 2 fires at mid-range and misses the Dark Eldar.

Turn 9:
Initiative: Tyranid

Moving:
With her victory well in hand, Razorwing 1 pulls away and rockets off over St. Abelgard's Island. The slower Virago can only watch her go.

Conclusion:
Well, that was a bit of a turkey shoot. The Dark Eldar wracked up 39VP to my... 0. I had a couple chances but they just didn't break my way. Virago's with Synapse Link are okay to get in position but Devourers kind of suck at damaging stuff. Talons and claws are their best attack, which isn't a surprise. They are Tyranids.

The only thing that kept me in the game so long was the fact that my wife couldn't seem to snap a recon scan of any of the target areas. Once she did, she was satisfied she would win and took off. We were both amused when the Drainleech Missile actually worked as intended on a Hag. Tee Hee.

Another Dark Eldar win over the Tyranids.

_________________
Do you like Free Wargames?
http://bloodandspectacles.blogspot.com/


Top
 Profile Send private message  
 
 Post subject: Re: Aeronautica Imperialis Battle Reports- A Log of Sorts
PostPosted: Wed Dec 31, 2014 4:51 pm 
Brood Brother
Brood Brother
User avatar

Joined: Tue Oct 26, 2010 6:44 pm
Posts: 320
Cheers! If any of my fellow Tac Commers play any games of AI, I would love to see them added here as well.

The Orks of Arddab Da Obzezzt hit Arbos like a hammer. However, after making landfall, they were relatively quiet. As war torn across Arbos, the Orks went about building up their strength. The Kaptin knew that the beasts of the White Wyrm seemed to be concentrated around St. Abelgard's Island. The best way to get a lot of his boyz over there was to build big boats, so that is what he did.

However, as he began to ferry his troops across the oceans, the Swarm of the White Wyrm descended on the craft, eager to keep them away from their base.


Ship Attack
Warzone: 4-

Swarm of the White Wyrm
3 Hags

2 Virago with Synapse Link

2 Harpy with Synapse Link

2 Spined Harridans (Bomber Variants)

Da' Skrapperz
1 Dakkajet- On Your Six
+ Ace

4 Fightas

1 Fighta- Bomma
-Grot Bombs

1 Fighta- Bomma
-Rokkits

Destroyer Warship
6 Hits
2 Hydras
1 Manticore

Set-up:
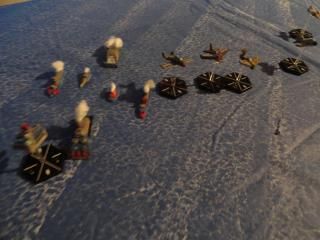
Per the rules, I used a group of Ork warships from my Aquanautica Imperialis fleet to act as the Destroyer. I didn't have a suitably large template, so I spaced the fleet out to cover the same approximate area, and placed one ship for each hit the Destroyer could take. My opponent placed it close to the east edge of the board as close as he could, putting it in the corner.

Flying cover were a pair of his Fighta-Bommas at mid-range and low speed. Then flanking them was a clump of Fightas at low altitude and mid-speed. Finally, at the center of the board and anchoring the flank was his Ace in the Dakkajet. I knew that guy could be pretty deadly.

I lined up my Harridans to head straight for the target at high altitude and max speed, a whopping 3! Escorting them were the Virago. The Harpy were behind a screen of Hags, all at mid-altitude and max speed Tyranid speed.

Turn 1:
Initiative: Tyranids

Movement:
For the most part, the Tyranids fly forward and maintain course, content to see what the Orks are up to. The Orks begin to shift towards the ships and move to intercept head-to-head. The Dakkajet and 1 wingman fighta go out wide the opposite way.

Shooting:
None.

Image

Image

Turn 2:
Initiative: Orks

Movement:
The Main ork force and the Tyranid bombing force looked like they set-up to go head-to-head.

The Hags turned slowly to try and screen the Harpy's from the flanking Dakkajet and Fighta.

Shooting:
Fighta-Bomma 1 popped their Grot Bombs, but has no other shots due to altitude. Harridan 2 finds that the closest Ork fightas are still just out of range. That means everyone is still out of range since both sides tend to lack long range firepower.

Image

Turn 3:
Initiative: Orks

Movement:
A chaotic furball shapes up where the Orks either swooped in or half looped to try and get behind or tot he side of the oncoming swarm. Notably, the flanking Ork aircraft swoop in behind the Hag defensive screen, but are put into danger by the Harpy. Fighta-Bomma 2 half-loops into a good position on the Harridan, but they Harridan 1 furiously beats its wings and rises above the Ork craft. Meanwhile, Fighta-bomma 1 swoops in and is swarmed by a Virago and Harridan 2 up close.

Image

Shooting:
Fighta-bomma 1 is base-too-base with Harridan 2 and desperately opens fire to survive! The short range blast rips into the great beast, and it screams in pain and rage as it begins to weep blood. 3 hits out of 4 down!

Image

Harpy 2 uses its Venom Cannons on Fighta 4 but misses. In return Fighta 1 opens fire on Harpy 2 and takes it down at mid-range with an accurate burst of fire. First blood to the Orks! Fighta 1's victory is short lived as Harpy 2's venom cannons rip him from the sky, killing the pilot.

Fighta 3 fires a burst and blasts through the last damage point on Harridan 2 and it tumbles from the sky like a brick. It splashes into the waiting ocean below. That could be a problem for the Nids as 2 of their 4 bombers have been shot down.

Virago 2 tears Fighta-bomma 1 from the sky with its Talons. The pilot is eviscerated in the attack!

Fighta-Bomma 2 opens fire on Virago 1 but fails to cause any damage. Fighta 4 targets Harpy 1 but fails to damage anything.

That is all the shooting. Pretty brutal turn overall.

Turn 4:
Initiative: Tyranids

Movement:
The Hags try to dive towards the hard deck and head towards the Ork ships. Fighta 4 moves to intercept, but finds himself engage up close by Hag 2, and in the sites of Harpy 1 and Virago 1. Gulp!

The other Orks move to intercept the Harridan and have a great angle and staggered altitudes. A terrible power dive by the Harridan puts in a terrible position, with Fighta-Bomma 2 in a trailing position. Things look bad for the harridan too. Grot Bomb 1 tries to angle in on it but just overshoots the target and will go off the board harmlessly next turn.

Image

Shooting:
Hag 3 tears and beats at Fighta 4 causing it to blow smoke and oil, but not enough to bring it down. In return, the Ork opens fire desperate to snag the beast, and blasts its wing apart. Hag 3 plunges from the sky screaming in rage.

Fighta-Bomma 2 opens fire on the Harridan, but the beast manages to evade them all! How is that possible!

Virago 1 tears Fighta 2 from the skies and kills the pilot.

Image

Dakkajet Ace and Fighta 3 fire at mid-range and fail to cause damage on the Harridan as well.

Harpy 1 fires on Fighta 4 and misses with its Venom Cannons. Virago 1's devourers also miss the Ork plane.

The Ork Warships open fire on the Harridan and manage to take a point of damage from it! Something all those big shootas failed to do!

Turn 5:
Initiative: Tyranid

Tailing Fire:
Fighta-Bomma 2 gets Tailing Fire on Harridan 1. This time taking out one more point of damage from the beast.

Image

Movement:
The Very High maneuverability of the Harridan pays-off as it manages to dodge behind the pursuing Ork aircraft to try and survive long enough to get to the target area.

Image

The Hags move to strafe the Ork ships, while the harpy closes in on Fighta 4. The Viragos flap around trying to get the bead on the pursuing Ork fightas.

Shooting:
Harpy 1 manages to snag Fighta 4 with the venom cannons and sends him spiralling down into the ocean below. Another dead Ork pilot! With that, it brings them below half!

The AA from the ork ships manages to hit the Harridan again! Reducing it to one hit left!

Virago 1 misses Fighta- Bomma 2 with its Devourer.

Grot Bomb 2 falls harmlessly from the air and into the ocean.

Turn 6:- Disengagement Turn
Initiative: Orks

Movement:
The Ork air cover bugs out leaving the Ork ships to weather the Tyranid assault. The Nids all close in on the Ork ships, but the Bombers can't get over them.

Shooting:
The first AA Hydra opens fire on Hag 3 to try and fight off its Talon attack, but misses. In return, the Hag causes 1 point of damage to the ship with its talons.

The Next Ork Hydra AA brings down the battered Harridan with a salvo of shots. The big beast crashes into the ocean with a giant splash!

The final Manticore misses the Harpy.

Game Over!

The Tyranids failed to sink the Ork ships so this one is going down to the Victory Points.

Orks killed- 48 points worth of Tyranid Critters
Tyranids Killed- 70 Points worth of Ork gear

Image

The first victory for the Tyranids! A narrow victory but a victory none-the-less!

Now, let's talk about how the Tyranid aircraft performed. As I expected, the Venom Cannons are much better at killing things than the Devourers.

The Grot Bombs let the Orks pretty much match me in numbers and neutralized some of my swarming tactics for a few turns which was a surprised and allowed my friend to get some good positions on my Harridan bombers. Only a few bad rolls kept the Ork aircraft from downing it earlier. However, if they can't find a target you are giving away free VP. I'm not sure they are a good investment or not.

The Harridan's slow speed is a liability when you are trying to get to a target defended by AA. It gives the ground defenses plenty of time to hit it as it closes in. However, with four hits they proved to be fairly resilient. Its ability to do Very High maneuvers also allows it to shake enemy fighters in a pinch.

The Harpy did surprisingly well. Again, the killing power of the venom cannons help it. However, it was pretty fragile to enemy fire.

Talon attacks again proved to be useful and possible! The only thing I messed up was getting in front of Ork craft for a Talon attack when they had the Initiative. That allowed them to shred the attacking Tyranid at close range.

Overall, a fun game and an interesting scenario from the first Airspace Campaign; The War Over Zephyrus. I'm glad I finally got a chance to try it out. Plus, it gave me an excuse to bust out those Aquanautica Imperialis models I made a few years back.

_________________
Do you like Free Wargames?
http://bloodandspectacles.blogspot.com/


Top
 Profile Send private message  
 
 Post subject: Re: Aeronautica Imperialis Battle Reports- A Log of Sorts
PostPosted: Fri Jan 23, 2015 3:15 am 
Brood Brother
Brood Brother
User avatar

Joined: Tue Oct 26, 2010 6:44 pm
Posts: 320
The campaign is over. However, my regular opponent and I are hoping to run a linked series of games. It will pit my Cabal of the World Walkers Tzeentch warband against Da Skrapperz Ork force.

Under the employ of Mistress Merciveaux the Cabal of the World Walkers participated in her assault on an Ork-held world in Wilderspace. Her spies indicated that the planet had once been the center of an ancient civilization that had powerful warpcrafters. The Mistress intended to scout the ruins and locate any artifacts of value.

Her flagship, The Scorned Lady; slipped into orbit over the planet. The Orks below were relatively primitive and could not stop her warship. However she did not wish to risk an orbital bombardment as she wished to capture the ancient civilization's artifacts intact. Instead, her sorcerers located likely locations of warp power. She then deployed scouting aircraft to sweep the area and report any warp signatures that were detected.


Recon Sweep

Cabal of the World Walkers
1 Hell Driver Recon Plane- Hy'wok

1 Hell Blade- Ry'Zor

1 Hell Blade- Spar'Ow

Da' Skrapperz
1 Fighta- Grimtoof

1 Fighta- Drillsnik

1 Fighta- Bomma- Snikgit
-Rokkits

Set-up:
We rolled up 4 potential recon targets. If you get a plane within one altitude and 6 inches you roll to see if they are worth doing further recon. WE placed them in a somewhat straight line in the middle of a shallow valley that was angles slightly off the center line of the table.

The Cabal entered the board high and fast to represent them coming out of Orbit and racing down towards the planet to complete their missions. The Hell Diver was in the right, with the Hell Blades paired up next to it.

The Ork defenders were at mid altitude and medium speed. The Fighta-Bomma took the center, while a fighta took each flank. The targets were ancient ruins situated in a valley between a series of altitude 1 and 2 rock outcroppings.

Turn 1:
Initiative: Orks

Moving: The chaos planes race forward trying to bleed off altitude so they can actually perform their mission, they don't even vector towards their targets yet. The Orks look like they want this to be a low-level dogfight and drop down a bit and fly over the Valley of the Temples where most of the Recon targets are.

Shooting: None

Turn 2
Initiative: Orks

Move: Fighta 1 wings-over to stay in the valley and drops down lower confident that he will be safe from the Chaos planes. However, he underestimated their speed and agility as they power dive down and rocket towards him. Hellblade 2 has an angle on him, but his wingman is still too high.

Caught by surprise by their aggressiveness, the remaining Orks are out of position and broke hard to the left, expecting them to continue to move straight to slow down. The Hell Driver dives low, but its lower speed means it is trailing her escorts considerably.

Shooting: Hellblade 2 opens fire on Fighta 1, but his shots go high over their mark. Consider it a warning shot!

Image

Turn 3
Initiative: Chaos

Moving: The Hell Driver takes a high-G turn towards to cross the Valley of the Ruins. Fighta-Bomma 2 cunningly completes a wing-over to try and chase the recon plane down. However, Hellblade 2 anticipated the move spiraled around to intercept.

Hellblade 1 went after the Fighta-Bomma, but a Half-loop took the Ork plane above his foe and almost made the hunter the hunted.

Shooting:
Hellblade 2's auto-cannons stitched Ork Fighta 2, but failed to hit anything useful. Instead, a bunch of bolt-on plates and debris fell away from the scrap plane.

The Hell Driver was just out of short range and an altitude level away. However, a couple loose shells found their mark, but failed to do anything other than scratch-up the paint.

Turn 4
Initiative: Orks

Move:
Fighta 1 and 2 turn to go over the Valley of the Ruins, but they overshoot the action and end up out of position. The Hell Driver breaks hard right after skirting the Pyramids and the final temple in the valley. Neither seem to have any warp signature to speak of.

The Fighta-Bomma roars over the top of the valley walls and power dives in, its fuselage just cresting the top of the jagged rocks by inches. Despite his impassioned flying, he comes up just out of position on the Chaos Recon plane. The HellBlades circle back into the action, with the aggressive flying of Hallblade 2 letting him line-up another shot, this time on the Fighta-Bomma. Can he make it stick this time?

Image

Shooting:
Per the request of the Ork player, we take a closer look at the attack vector of the Fighta-Bomma, and it is judged to have an angle on the Hell driver after all!

Image

Despite the close range fusillade of shots, none damage the Hell Driver. Too bad he is too close for Rokits.

Hellblade 2's firing tone solid, and he opens fire on the Fighta-Bomma, this time causing the Ork craft to blow smoke! However, he only has one burst of ammo left.

Turn 5
Initiative: Orks

Move:
The Orks realized that they could not stop the Hell driver from scanning the last temple, so moved to try and stop it from circling back to the arch ruin by crossing back to the opposite side of the Valley. The Hell Driver completed its can of the final temple and found nothing of interest and broke hard to begin circling back.

Fighta 12 tried to shake the pursuing Hellblades and broke away fromt eh battle, but Hellblade 2 used his superior handling to easily follow him.

Shooting:
Orks have no shots. Oh no!

Hellblade 2 uses the last of his ammo, and causes Fighta 2 to blow smoke. Tzeentch works in mysterious ways as Hellblade 2 is out of ammo. Despite some excellent flying he will have to go home empty handed.

Turn 6
Initiative: Orks

Move:
The Orks moved to try and intercept the Hell Driver, but the Chaos craft cut behind them and powered past their trap. Meanwhile, Hellblade 1 cut in and got the interior line on Fighta 1 and the the Fighta-Bomma.

Hellblade 2 raced away from the battle. His controller gave him permission to break, and then return to the Scorned Lady in orbit.

Image


Shooting:
Orks have none! Oh no!

Hellblade 1 opens fire on Fighta 1, but only manages to spark his shells across the fuselage.

Turn 6
Initiative: Chaos

Move:
This time the Ork Fightas were able to swing in on the Hell Driver as it raced past the final ruins. Again, no warp energy was detected, so the entire Valley of the Ruins had been a wild goose chase!

Hellblade 2 was bale to move in behind Fighta 1, and hopefully he would be able to take him out before he could fire on the Recon plane.

Shooting:
Hellblade 2 prayed to Tzeentch and opened fire. His burst ripped the wing right off Fighta 1 and the plane plummeted into the Valley below taking its pilot with it. Boom!

Image

Fighta 2 saw his wingman go down just as he fired on the Hell Driver. Most of his shots went wide, but a few managed to harmlessly go through the tail fin.

Turn 7
Initiative: Ork

Move:
The Hell Driver Half-Loop caused the Ork Fightas to break away to the head of the Valley. However, it wasn't far enough as Hellblade 1 managed to cut across and come in perpendicular to the Fighta-Bomma.

Image

Shooting:
Oh No, the Orks have no shooting!

Hellblade 1 riddles the Ork aircraft, but again nothing seemed to stick. Perhaps the smoke from the damage craft had thrown off the Hellblades firing.

Turn 8
Initiative: Chaos

Move:
The Orks decided to call it a day and tried to disengage. Fighta 1 managed to while being pursued by the Hell Driver. Hellblade 1 tried to chase the Fighta-Bomma but it dived away.

Shooting:
The grot in the Fighta-Bomma ball turret opened fire on the Hellblade as a parting shot. The Grot was lucky and the Hellblade disintegrated in mid-air and the pilot was killed.

Image

Turn 9- Disengagement Turn
Initiative: Chaos

Move:
Now the game was in doubt, and the Hell driver moved to try and intercept the Fighta-Bomma. However, it wasn't enough and the Ork plane gleefully raced off the board.

Shooting:
None

Conclusion
Grumble, grumble, grumble. I won the game, but the victory was marred by a last minute lucky Grot shot. I should have just let the filthy savages go, but I got greedy.

Anyway, on VP,s it was a narrow victory, but Mistress Merciveaux had learned that eh Valley of Ruins was just that. No valuable warp artifacts would be located there. Perhaps elsewhere on the planet had yielded better results.

As for the Hell Driver, it did its job just fine. No complaints here. As for the mission, I was disappointed that none of the targets of the Recon Sweep proved to be anything worth using the Glyphs of Scrying on. So, it really was just an elaborate dogfight after all. However, the mission objectives made sure it didn't just devolve into a straight up furball.

_________________
Do you like Free Wargames?
http://bloodandspectacles.blogspot.com/


Top
 Profile Send private message  
 
 Post subject: Re: Aeronautica Imperialis Battle Reports- A Log of Sorts
PostPosted: Mon Mar 09, 2015 7:12 pm 
Brood Brother
Brood Brother
User avatar

Joined: Tue Oct 26, 2010 6:44 pm
Posts: 320
Battle of the Hovels- Part 1

After initial reconnaissance flights of the planet were complete, Mistress Merciveaux knew where to pinpoint her attacks. However, the Orks were now alerted to her presence and were digging in. Any attempt to land on the planet's surface would be heavily contested.

Therefore, early on the third day after her arrival, she launched a wave of fighters into the upper atmosphere. As they raced towards planet, the Ork defenders were alerted and took to the skies. However, they could not converge on a single point of defense, as their was no clear target. At the last moment, the Chaos forces skimmed the lower atmosphere and springboarded back to their Mistresses' command ship.

Not all of the Chaos forces peeled off. Tactical strike forces of chaos planes moved to the sites with identified warpcraft signatures. The Orks who had mobilized for a large scale offensive were mostly caught out of position as small spearheads raced to their targets below. The first wave of the surprise attack was to swoop in and destroy any established Ork air defenses that could hinder the oncoming ground assault on identified sources of warp energy.

One such site, designated as The Hovels; was situated amidst an Ork village. A strike package from the Cabal of the World Walkers was assigned with clearing out the Greenskin vermin from the site.


Air Defense Suppression

Cabal of the World Walkers

1 Hell Fury
+Weapon Load
16 points

1 Hell Fury
+Weapon Load
16 points

1 Herald Strike Fighter
+ Weapon Load
21 points

1 Hell Hammer
+ Weapon Load
14 points

1 Hell Hammer
+ Weapon Load
14 points

105 points

Da' Skrapperz

3 Flakwagons
24 points

1 Eavy Flak Kannon
10 points

1 Traktor Kannon
25 points

2 Grot Bomb Launchaz
10 points

Reserves:
1 Fighta
14 points

1 Fighta
14 points

1 Grot Buzza
8 points

1 Grot Buzza
8 points

Total= 113 Points

Set-up:
We set-up the Ork village in their half of the board about 2/3rds of the way down. Their were several shacks and buildings that were set-up clustered around two temples and an Arch of ancient origins. There was also a line of altitude 1 rocky cliffs crossing the board diagonally.

Image
The Hovels looking to the East

Ork Ground Defenses were set-up around the village. A Grot Launcher flanked each side of the village and was covered by a Flakwagon. The Heavy Flak Kannon was behind the village was also covered by a nearby Flakwagon. The dreaded Traktor Kannon sat in a position to cover eastern side of The Hovels.

To represent the surprise nature of the attack, all Ork aircraft were placed in reserves. Any Ork Reserves would enter the board on the short board edge closest to The Hovels at any speed or altitude.

The Chaos forces would enter on the opposite board edge at max speed and altitude 9 to represent them coming in hot from orbit. They came in a line centered by the Herald, with a Hellfury and Hell Hammer on each wing respectively.

Turn 1:
Initiative: Chaos

Movement:
The Chaos forces power dive in from the upper atmosphere. The Herald heads towards the west, while Hell Hammer 1 goes East. The rest go straight. Not great power dives, and most craft only drop 1 or two altitude and keep going at full speed.

Shooting:
Everyone is out of range.

Turn 2:
Initiative: Chaos

Movement:
The Chaos attack continues to power dive into range. They cover the distance to the Hovels very quickly, and better power dives put them into the range of the ground defenses. However, the Cabal are still mostly too high and fast to attack properly.

Shooting:
The Flakwagons on the rocky ridges to the East open fire on Hell Hammer 1. They manage to bracket the craft and send it crashing down trailing smoke. However, the Pilot manages to eject safely.

Image
Hell Hammer 1 is downed by the Grot Gunnerz

A Flakwagon on the West makes Hall Fury 1's approach a bit rough, but fails to damage the craft. Distracted by the Flakwagon, Hell Fury 1 fails to see the Eavy Flak Shell smash through his canopy and kill him instantly. Another Chaos planes goes down!

Image
Grot Gunnerz strike again. Hell Fury 1 is obliterated in a puff of smoke!

A Grot Bomb launches from the Eastern Launcher and buzzes over the Hovels.

Turn 3:
Ork Reserves fail to arrive, but so far it doesn't look like they need them!

Initiative: Chaos

Movement:
The remaining Chaos craft race over the Hovels, but poor flying puts them in bad positions. The Grot Bomb tries its best to chase after them.

Image
The Cabal of the World Walkers buzzes over the Hovels at low altitude

Shooting:
Chaos has no shots! Oh no! That's what I get for sending Dregs instead of Vend'igo to do the flying.

The Eavy Flak Kannon fires on the Herald. It looks like a clean hit, but the craft Viffs away at the last moment. However, the Western Flak Wagon manages to snag the Herald and pepper it with shells. The Chaos craft begins to blow smoke and incense.

Grot Bomb 2 launches and easily catches the low flying Herald, but misses the plane. Perhaps the little Grot was blinded by all the smoke?

Turn 4:
An Ork Fighta and Grot Buzza race in from the South!

Initiative: Chaos

Movement:
The Chaos craft rush forward. Hell Fury 2 realizes he won't get an attack angle on the Western Flakwagon and pulls up hard, racing above the wagonz firing range.

The Herald also overshoots his target, and in return is swarmed by the Grot Bombz! Grotz everywhere!

The Hell Hammer manages to try to Dive Bomb the Traktor Kannon, while the Fighta and Buzza try to move to prevent it.

Shooting:
The Hell Hammer's bombs drop free from the specially designed bays. As the plane rockets away, they saturate the area and the extra damage finishes off the Traktor Kannon and Grot Krew.

Image
The dreaded Traktor Kannon goes up without firing a shot.

Grot Bomb 2 misses the Herald again! Grot Bomb 1 manages to detonate close to the smoking plane, but fails to cause damage with a roll of 1!

Turn 5:
The remaining Ork reserves do not show up.

Initiative: Chaos

Movement:
Hell Fury 1 cuts back and tries to line up a pass on the western Flakwagon. Meanwhile, Fighta 1 lazily flies over and waves at the Krew on the Flakwagon below.

The Hell Hammer and the Herald both seem to be interested in taking out the Eavy Flak Kannon and are in line on the tower mounted gun.

Shooting:
The Herald goes Weapon's Hot with its Deathshead missiles. A few seconds later, the Eavy Flak Kannon is nothing but a smoking ruin! Take that Grotz!

Image
Vengeance!

The Western Flakwagon sees what the Hell Fury is up to and opens fire. However, the shots go wide.

Turn 6:
No new ork reserves.

Initiative: Orks!

Movement:
The Hell Fury overshoots the Flakwagon. Worse, Fighta 1 does a perfect wing over to give him a shot at the Hell Fury. However, for some unknown reason Hell Hammer 2 starts going straight down the Ork Fightas throat!

The Herald peels off and aims for the Eastern Flakwagon. Buzza 1 is in a good position to intercept except for being too high. However, the herald is doggedly pursued by Grot Bomb 2 with its last bit of fuel.

Shooting:
Fighta 1 has to deal with the Hell Hammer in his face! The Hell Hammer pilots ejects as the Ork plane slowly dismantles the Chaos fighta with accurate Big Shoota fire.

The Herald uses its last Deathshead Missiles to take out the Eastern Flakwagon. That's for shooting me up before!

Image
Grotz in a Flakwagon get what is coming to them.

Meanwhile, the Western Flakwagon methodically cuts down the Hell Fury that overshot it. The pilot manages to eject safely as his plane streaks into the ground and explodes.

Image
The Valley of Death as Cabal of the World Walker planes fall from the sky as wreckage.

Finally, the Grot Bomb uses the last of its fuel and attacks the Herald. The little Grot lines up and..... misses. The Bomb drops from the sky like a brick.

Turn 7:- Disengagement Turn
The remaining Or Reserves come in from the South.

Initiative: Orks

Movement:
The Herald slows down to try and strafe the Grot Launcha, but overshoots the target area. In the meantime, Ork Fighta 1 and 2 race to catch the last Chaos craft.

Shooting:
Fighta 1 and 2 spray fire at the Herald but miss.

Conclusion:
The pilot of the Herald finally realized how lucky he was and gunned it out of there to a nearby ground base. Of the five aircraft in the flight he was the only one making it home, and his plane was smoking like a hot house fire. However, did they complete their mission?

It was Air Defense Suppression and the game started with 7 Air defense installations. The Chaos attack managed to take out 3. Granted, they were the dreaded Traktor Kannon and a Eavy Flak Kannon, so some heavy hitters; but ultimately their mission would be deemed a failure.

Ork Win!

How did the aircraft do overall?

Herald- This guys did a good job at his role. Fly low, fly relatively slow, and blow things up on the ground. The Deathshead Missiles did their job nicely. The added Hit was also very helpful for weathering the storm while coming in. I made the Hell Hammers as extra Ground Sttack as I was out of missiles, I forgot that a Herald can be armed with more than just missiles. Maybe next time I will addd a Herald or two instead.

Hell Fury- I included these guys in the strike package to strafe and take on enemy aircraft. They did neither and instead just died. Bad flying with them on my part.

Hell Hammer- Well, the first one didn't get a chance to do much. The Dive Bombing worked as intended and obliterated the ground target when Hell Hammer 2 got a chance to use it. Other than that, I again didn't really get to use them to their full potential.

This game I was just not with it. Bad piloting and choices on my part left my pilots in bad spots, and I could not get the angle for the ground attacks right at all. Oh well, good thing the next battle at the Hovels will be a Bombing Mission. Too bad they still have plenty of Ground Defenses to contest the Bombers.

_________________
Do you like Free Wargames?
http://bloodandspectacles.blogspot.com/


Top
 Profile Send private message  
 
 Post subject: Re: Aeronautica Imperialis Battle Reports- A Log of Sorts
PostPosted: Mon Mar 09, 2015 7:16 pm 
Brood Brother
Brood Brother
User avatar

Joined: Tue Oct 26, 2010 6:44 pm
Posts: 320
Battle of the Hovels - Part 2 - Bombing Raid

The initial attacks on Ork positions were only marginally successful. Despite these set-backs, Mistress Merciveaux's forces were all ready in motion and phase II of the operation had begun. Part of the initial attack had Forward Operations Bases established in the planet's vast, barren wastelands while Ork eyes were focused on the Air Defense attacks.

From these Forward Bases, Hell Talon Bombers were quickly deployed to follow-up the initial raids. The intent was for the Ork Ground Defenses to be in ruins so as not to stop the oncoming bombers. However, the relative failure of these initial raids let the Orks know where the key targets of the Chaos attack were located. With surprised no longer an asset, the Chaos forces would face stiff resistance.

In a stand-up fight, Mistress Merciveaux's forces were heavily outnumbered on the ground. The bombing raids were intended to help clear the area around the warptech sites and allow her ground troops to deal with minimal resistance. Ork aircraft began to swarm in and defend the dropzones, so the bombers had to fight their way through.


Bombing Raid

Cabal of the World Walkers

1 Hell Talon
+Weapon Load
28 points

1 Hell Talon
+Weapon Load
28 points

1 Hell Hammer
+ Weapon Load
14 points

1 Hell Hammer
+ Weapon Load
14 points

1 Hell Blade
14 Points

98 points

Da' Skrapperz

2 Flakwagons
16 Points

2 Grot Bomb Launchaz
10 Points

1 Fighta
14 points

1 Fighta
14 points

1 Fighta
14 points

1 Grot Buzza
8 points

1 Grot Buzza
8 points

1 Grot Buzza
8 Points

1 Dakka Jet
+Ace- Going Ballistic
19 Points

Total= 103 Points

Set-up:
This was a continuation of the Battle of the Hovels. Therefore, we kept the Hovels and Ground Defenses set-up as the last game. The Temples are invulnerable for this mission. The goal is to eliminate as many of the smaller Ork buildings as possible, while the Orks will try to stop the destruction. Bomb hits to the area of the Hovels is all that matters.

The Chaos forces will enter on the North end of the board. The Hell Talons were to the West side of the deployment zone at medium speed and medium altitude. Next came the Hell Hammers and then the lone escort.

On the South side were the Orks. They were also mid-altitude and speed but closer to the center of the board. The Dakkajet was in the center, and they were generally staggered Fighta, Buzza, Fighta, Buzza.

Turn 1:
Initiative: Orks

Movement:
The Chaos forces all took High-G turns towards the Eastern board edge and paralleled their deployment zone. This confounded the Ork interceptors who just moved forward cautiously. They began to cluster near the Hovels.

Shooting:
None- No one was even close to being in range.

Turn 2:
Initiative: Orks

Movement:

Chaos forces began to turn and move to attack along the Eastern board edge. The Ork forces carefully turned to meet them, wary of the Chaos planes sudden speed and ability to turn. They did not want to let the Cabal of the World Walkers get behind them.

Shooting:
None. No one was in range yet.

Turn 3:
Initiative: Chaos

Movement:
The Chaos Bombers began setting up for their run at the targets moving from Northeast to Southwest. Again, the Orks were cautious about over committing to the engagement.

Meanwhile, the Ork Ace flew ahead as tempting bait to the lone Chaos Hell Blade. The brash pilot was eager to take the bait and swooped in, gunning I engine. However, it was a trap as Fighta 3 swung in to go head-to-head with the Hell Blade at close range!

Shooting:
The Hall Blade pilot realized his mistake and prayed to Tzeentch. He desperately opened fire at the oncoming Fighta knowing that if he missed, he would be dead. His prayers were answered as his Auto-cannons dissected Fighta 3 along with its pilot. First blood to Chaos!

Image
Tzeentch be praised!

Turn 4:
Initiative: Chaos

Movement:
The Hell Talons begin their bombing runs by Power Diving. They successfully dive behind and beyond the Ork lines. The Ork Ace sweeps in from the side, and just misses the angle of attack. He had been in the right position and anticipated correctly, but he was off by seconds.

Image
Begin your attack run now.

Meanwhile, the Grot Buzzaz and Fighta 2 try to gang up on Hell Hammer 1 while Hell Hammer 2 drops and kicks in his engines to blast by them.

One of the Grot Bomb Launchaz sends up their Grot Bomb. Brave little grot. Good luck!

Shooting:
Seeing the end coming, Hell Hammer 2 opens fire on Grot Buzza 1. His shots just sail over and through the little plane, but it continues undeterred.

Grot Buzza 2 returns the favor, and his little shootas tear through the Hell Hammer at extremely close range. The chaos plane explodes in a puff of sweet smelling incense and blue flame dragging the pilots soul to the Warp. Scratch one bomber.

Image

Turn 5:
Initiative: Chaos

Movement:
The Hell Talons race over the Hovels. Again, the Dakkajet can't seem to get behind them and into shooting range.

Fighta and Buzza 2 try to chase after the Hell Hammer. The rest try to circle back towards the Hovels.

Shooting:
The Hell Talons unload their bombs on the Hovels and with Extra Damage do 8 hits. Pretty good for Hell Talons!

Image
Special Delivery!

The Flakwagon to the West can barely reach Hell Talon 2 and opens fire. The shots scratch up the paint and stop the crews victory celebrations, but fail to cause any real damage.

The second Grot Bomb Launcha fires.

Turn 6:
Initiative: Orks

Movement:
The Hell Hammer tries to set-up for its dive bombing run, but Fighta 2 and the DakkaJet are bracketing him and ready to fire. The Hell Blade tries to get a shot in on Fighta 2, but can't get the right angle.

The Hell Talons wing over/Half Loop to get ready to retrace their steps out of here and maybe do a bit of dog-fighting.

Shooting:
The Dakkajet opens fire, but misses the Hell Hammer. Fighta 2 follows up and sinks a few shots into the Chaos plane, but fails to hit anything vital.

Turn 7:
Initiative: Chaos

Movement:
The Hell Talons make a break to escape, and look like they are home free. However, Buzza 2 swoops in to take a few shots at Hell Talon 2. The last Hell Hammer Power Dives over the target area, ready to saturate the Hovels with more bombs.

Meanwhile, the Ork defenders move about trying to catch any of the elusive Chaos aircraft. Buzza 1 just misses getting into position on the Hell Hammer. The Hell Blade manages to tuck into a tailing position on Fighta 2.

Shooting:
The Hell Hammer's bomb load manages to fall into the Hovels and cause two more points of damage! Huzzah for precision dive bombing!

Image
Bombs Away![/b]

Grot Buzza 2 opens fire on the fleeing Hell Talons, but fails to hit home. However, the grot was very satisfied with his spray of bullets.

The Hell Blade opens fire on a jinking Ork Fighta 2. However, the Ork plane is out of luck, as the auto-cannon shells chew through the junk fighter, and hit its fuel tank. The plane explodes into a sheet of flame and dives into the ground. The Ork pilot failed to eject and rode the flaming bird in.

Image
[i]Another kill. Glory to Chaos!


The Western Flak Wagon on the ridge opens fire on the fleeing Hell Hammer, but fails to strike home.

Grot Bomb 1 runs out of fuel and falls from the sky.

Turn 8:
Initiative: Orks

Movement:
The Hell Talons manage to disengage off the board to the South, their bomb bays empty. Hell Hammer 2 also decides to kick in the after burners and disengage, but off the Western edge. The Buzzaz and Fighta 1 try to move and cut off the Hell Hammers escape, but they are too slow.

Hell Blade 1 power dives and tries to jet off the board tot eh West at maximum speed, but can't make it.
The Dakkajet tries to pursue but can not get the angle.

Shooting:
The Western Flakwagon takes a ranged parting shot at the Hell Blade. The Grot Gunnerz make it interesting, but fail to find the soft spot in the chaos fighters hull.

Grot Bomb 2 falls from the sky as it runs out of fuel.

Since the last Chaos craft will easily Disengage next turn, we decide to call it a game.

Conclusion

Chaos wins! We manages to hit the target area for 10 points of damage and took down 2 fightas! In return we only lost a Hell Hammer that tried to get all cocky and tried to take on a Buzza.

With the successful bombing run against the Hovels, it cleared the way for a Ground Assault. Clearing the air defenses on the Eastern side of the Hovels in the last game gave me a good attack route. In addition, I spent some time letting my attack form early on instead of simply lining up on target and kicking in the afterburners. This allowed my attack to be less predictable and harder to stop. My bizarre opening moves seemed to throw off my opponents flying for the rest of the game.

The Hell Talons are not great bombers, but they managed to do the job today with Extra Damage. The Hell Hammers also worked as advertised. No complaints about either of them today.

The Grot Bomb Launchaz on the ground are only a threat if the enemy has to come to the target. Otherwise, the Grot Bombs inability to gain height takes away their effectiveness.

_________________
Do you like Free Wargames?
http://bloodandspectacles.blogspot.com/


Top
 Profile Send private message  
 
 Post subject: Re: Aeronautica Imperialis Battle Reports- A Log of Sorts
PostPosted: Mon Mar 09, 2015 8:01 pm 
Brood Brother
Brood Brother
User avatar

Joined: Fri Feb 14, 2003 12:46 am
Posts: 27069
Location: Edmond, Oklahoma USA
Hi!

Great report!

Primarch

_________________
Primarch


The Primarchload
Magnetized Titans Tutorial
Net Epic Gold
Heresy Rules


Top
 Profile Send private message  
 
 Post subject: Re: Aeronautica Imperialis Battle Reports- A Log of Sorts
PostPosted: Tue Mar 10, 2015 10:02 pm 
Brood Brother
Brood Brother
User avatar

Joined: Sat Feb 11, 2012 8:24 pm
Posts: 9625
Location: Manalapan, FL
Yes yes yes

_________________
He's a lawyer and a super-villian. That's like having a shark with a bazooka!

-I HAVE NO POINT
-Penal Legion-Fan list
-Help me make Whitescars not suck!


Top
 Profile Send private message  
 
 Post subject: Re: Aeronautica Imperialis Battle Reports- A Log of Sorts
PostPosted: Tue May 19, 2015 7:48 pm 
Brood Brother
Brood Brother
User avatar

Joined: Tue Oct 26, 2010 6:44 pm
Posts: 320
Thanks for the response guys!

After the success of the Bombing Runs on their intended targets, Mistress Merciveaux was confident that the ranks of the Ork ground forces had been thinned. Thus, her third attack wave commenced. It was time for a ground assault. The assault would be a low-orbit Drop using Icon Dropships to deliver her best troops. Her more expendable mutants and foot soldiers would descend in Vandal transports. These would be accompanied by fighter escorts for protection. Hopefully, the dual prongs of the attack would keep the Ork defenders at bay.


Battle of the Hovels- Part 3- Ground Assault

Cabal of the World Walkers

1 Icon Dropship- Represented by my Tormentor
15 Points

3 Vandal Transports
15 points

1 Hell Driver Command Ship
+Additional weapon load
30 points

2 Hell Blades
24 points

84 points

Da' Skrapperz

2 Flakwagons
16 Points

2 Grot Bomb Launchaz
10 Points

3 Fighta
42 points

3 Grot Buzza
24 points

1 Dakka Jet
+Ace- Going Ballistic
19 Points

Total= 111 Points

Set-up:
This was a continuation of the Battle of the Hovels. Therefore, we kept the Hovels and Ground Defenses set-up as the last game. The Temples are invulnerable for this mission. The goal is to land as many troops as possible in the Hovels. Each troop unit successfully landed will provide a +1 modifier to determine if Mistress Merciveaux's forces have successfully retrieved the artifact. At the end of the game, roll a d6 and add the number of troops successfully landed. If the result is 7 or better than the warp artifacts have been recovered by the ground troops.

Chaos forces had the Vandals and fighters coming in from high altitude towards the weak side of the Ork Defenses. The Icon was coming in on the opposite side. The Grot Buzzaz and a fighta were opposite the Icon, and the Dakkajet and the other fighta were opposite the main attack. They were at mid-speed and range. The seemed to plan on intercepting the Chaos forces in the middle altitude bands.

Turn 1:
Initiative: Chaos

Movement:
The Chaos forces all power dived from high orbit towards the target area. The Hell Driver and Hell Blade 1 move to escort the Icon, while Hell Blade 2 and the Vandals go the opposite way. The Orks moved forward to meet them all at mid-altitudes.

Shooting:
None- No one was even close to being in range.

Turn 2:
Initiative: Orks

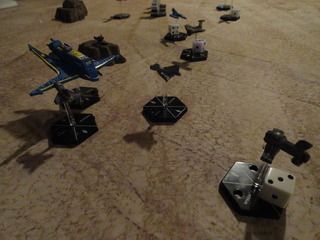
The Icon keeps moving to get over the target area, but is going to go head-to-head with a swarm of Grot Buzzers. The Hell driver and the Hell Blade come in from the flank, but Fighta 3 does the same. There is going to be a lot of shooting soon.

The Vandals dive towards the side, but it isn't enough as the Ork fightas move in for the kill. The Ace uses his Ace abilities to swing around behind the Vandals, but he is far too high!
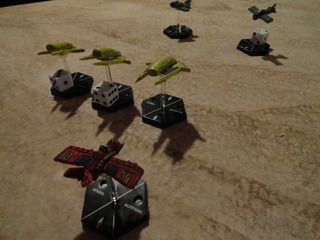
Image

Image

Shooting:
Fighta 3 opens up ont eh Icon, just out of short range. However, his Big Shootas find their mark and reduce the dropship by 1 hit, only 2 left!

The Hell Driver opens fire with his Auto-cannons, and takes Grot Buzza 2 down with a puff of smoke.

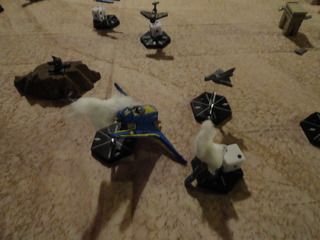
Grot Buzza 3 and the Icon trade shots, but fail to hit anything. However, Grot Buzza 1 fires his little blastas right through the windshield of the Icon, killing the command crew and sendign the Dropship tumbling from the sky in an uncontrolled spin. Drop troopers are thrown roughly from the ship just before it crashes into the dessert sands below. However, there are few survivors. Scratch 1 transport!
Image

Hell Blade 2 gets the drop on Fighta 3, and causes him to start to blow smoke from a barrage of auto-cannons shots. Not enough to drop the ork craft.

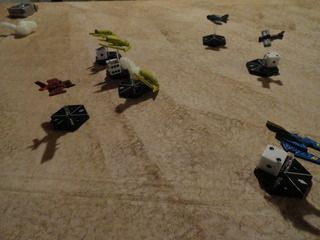
Fighta 1 misses his Vandal target, but Fighta 2's aim is true. He splashes his target with a burt of Big Shoota fire. Another transport goes down.
Image

Turn 3:
Initiative: Orks

Movement:
The Chaos fighters move to the edge of the Hovels and try to get in a position to support the approaching Vandals. Only Hell Blade 2 is in a good position, as a bit of a traffic jam occurs. Meanwhile, the Vandals keep dropping to the hard deck and heading out wide. It is unclear if they will be able to circle back to the Hovels to land.

Manwhile, the Ork Fightas and Grot Buzzaz converge on where the drop ships are, but they are a bit too high to get good shots.

Shooting:
Both Grot Bombz launch from their ground stations.

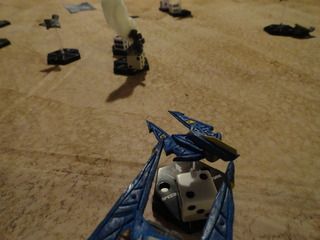
Hell Blade 2 takes a pop-shot at Grot Buzza 3 and blasts the little plane from the sky. The Grot didn't even see it coming!

The Ork Flakwagons fire on Hell Blade 1, but both miss.
Image

Turn 4:
Initiative: Orks

Movement:
The Ork fightas were going pretty fast, so struggled to slow down and get the right angle on the slowing Vandals. Meanwhile, the Chaos fighters raced in to cover the approach.

Shooting:
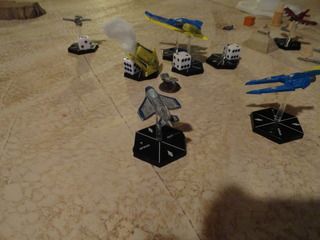
Fighta 1 was coming in low along the hard deck, and lined up on the trailing Vandal. His shots rip through the Chaos craft and cause it to slowly lose power. The pilot and some of the passengers manage to bail-out, but most are carried into the ground and killed in the ensuing fireball. Only 1 Vandal left!
Image

The Hell Driver snaps a psychic image of Fighta 3 (+1 VP :) ), before firing its auto-cannons. The shots all fly wide of the mark.

Grot Bomb 2 lines up on the last Vandal, and surges forward. However, he is only a Grot and completely misses his target!

Hell Blade 1 opens fire on Fighta 1, trying to get revenge for the downed Vandal. He peppers the Ork craft and causes him to start to blow smoke. Not enough for a clean kill.

The Ace in the Dakkajets opens fire on the Vandal and manages to spark some shells off the transport plane's hull, but can't find the weak spot. The height difference probably kept the Chaos plane alive!

Turn 5:
Initiative: Chaos

Movement:
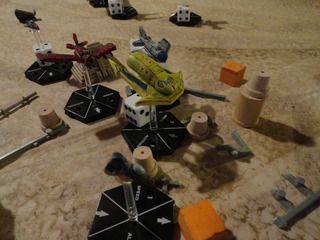
The Vandal come sin low over the Hovels, and the troops get ready to disembark, except they are still too high to land. The Ork Ace, Fighta 1, and a Grot Bomb all converge on him.
Image

Meanwhile, the Chaos fightas are out of position to protect the lonely transport. Things do not look good.

Shooting:
The Hell Driver takes a pop-shot at Grot Buzza 1, but fails to cause any real damage.

The Ace in the Dakkajet opens fire first. Despite the spray of bullets, nothing sticks tot eh transport, and it flies on.

Hell Blade 1 fires on the same Grot Buzza who is trailing the battle,and takes him down. The little guy goes down with his Buzza.

The damaged Fighta 1 opens fire at close range on the Vandal, but he too misses most of his shots! It is no time to get cocky, as Grot Bomb 1 tries to collide with the Vandal, but misses his chance! 17 shots, 2 hits, and no damage! Now is it time to get cocky?

No, because a measurement finds that one of the Flakwagons can take a shot at the Vandal too! Two hits! The damage roll comes up and.... nothing! Okay, NOWcan I get cocky? My opponent informs me not to get cocky until he lands successfully. Duly noted!

Turn 6:
Initiative: Chaos

Movement:
The Chaos fighters swoop back in over the Hovels. The Orks try to get around in front of the Vandal, but the transport surprisingly does a half loop. It manages to reduce its speed, but it is still too high.

Grot Bomb 1 is on a collision course!

Shooting:
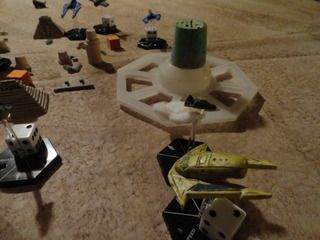
Hell Blade 1 sees the danger to the transport and fires with his auto-cannons. He blows the little Grot Bomb right out of the sky with some fancy shooting!
Image

The Ork Ace fires on the Hell driver, but barely even causes it to jink.

An Ork Flakwagon fires a burst of tracers into the air at the Vandal, and the bullets shoot straight through the crafts weak superstructure and cause no serious damage.

Grot Bomb 2 falls from the sky! The Ork pilots laugh.

Turn 7:
Initiative: Orks

Movement:
The Vandal side slips and drops to altitude 1. Next turn it should be able to land, but will it hit the Hovels?
The Ork Ace and Fighta 3 try to bracket the Chaos craft, but don;t seem to get the angle. Meanwhile, the Chaos fighters move to cover the landing.

Shooting:
Fighta 1 opens fire on Hell Blade 1 at close range, and sinks 4 shots into the target. However, the Chaos plane miraculously survives the barrage and flies on. A number of big shoota holes decorating its hull.

Hell Blade 1 was too busy soiling himself, and missed his shots at the Ork Ace.

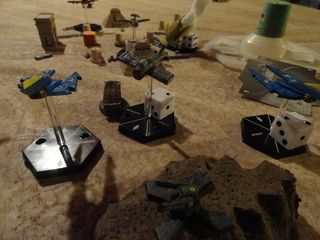
A Flakwagon takes some pot shots at the Hell Driver, but misses. Good thing they have unlimited ammo! The other Flakwagon opens up on the Vandal again, and this times its luck runs out. The tracers damage the engine, and the pilot manages to bail-out just before the transport crashes in amongst the Hovels.
Image

With that, the last transport goes down in flames, and it is time to disengage!

Turn 8: Disengagement Turn
Initiative: Chaos

Movement:
Hell Blade 1 and 2 go after Fighta 2 and 1 while they attempt to break off. Fighta 1 is happy to oblige and goes head-to-head with Hell Blade 2.

The other craft break-off and head for home.

Shooting:
Hell Blade 2 opens fire on the smoking Fighta 1, and blows him from the sky. The pilot goes down with his bird.

However, the Flakwagon the downed the Vandal gets revenge, and takes out Hell Blade 2. The Chaos pilot managed to eject before his plane disintegrated around him.

Hell Blade 1 managed to damage Fighta 2 as they passed. However, it wasn't enough to down the plane. The nearby Flak wagon opened fire, but despite the heavy barrage of shells, none struck home on the chaos plane.
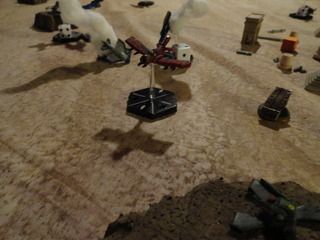
Image

With that, the game ended as everyone disengaged.

Conclusion
Ork win, since it wasn't much of a ground assault. Chaos boots never even touched the ground.

I would love to tell you how the Icon Dropship performed, but it was smoked so fast I can't! Over all, a fun game, even though it was looking pretty grim by the end of Turn 2 for the Chaos forces. Chances are even if my lone Vandal did manage to land, it wouldn't have been enough troops to storm the Hovels. The failure of the ground attack craft to suppress the Ork air defenses ended up costing us two aircraft this game.

Now Mistress Merciveaux is going to have to try and take the ruins in a more traditional type of battle. First step, get boots planetside, and then slog across the wasteland the hard way!

Hunt for the Artifacts Campaign:
Valley of Ruin- Chaos victory- 1 point
Air Defense Suppression- Draw- 0 points
Bombing Raid on the Hovels- Chaos Victory-1 Point
Ground Assault on the Hovels- Ork Victory- 1 Point

Chaos 2 and Orks 1 point.

_________________
Do you like Free Wargames?
http://bloodandspectacles.blogspot.com/


Top
 Profile Send private message  
 
 Post subject: Re: Aeronautica Imperialis Battle Reports- A Log of Sorts
PostPosted: Tue May 19, 2015 9:46 pm 
Purestrain
Purestrain
User avatar

Joined: Thu Jul 10, 2008 9:04 pm
Posts: 5964
Location: UK
great looking minis, got any larger pictures of the razorwings?

_________________
AFK with real life, still checking PMs


Top
 Profile Send private message  
 
Display posts from previous:  Sort by  
Post new topic Reply to topic  [ 21 posts ]  Go to page 1, 2  Next


Who is online

Users browsing this forum: No registered users and 8 guests


You cannot post new topics in this forum
You cannot reply to topics in this forum
You cannot edit your posts in this forum
You cannot delete your posts in this forum
You cannot post attachments in this forum

Search for:
Jump to:  


Powered by phpBB ® Forum Software © phpBB Group
CoDFaction Style by Daniel St. Jules of Gamexe.net