Login |  Register |  FAQ
   
Post new topic Reply to topic  [ 33 posts ]  Go to page 1, 2, 3  Next

Is this sort of topic helpful at all?
This topic is interesting and useful I want to see more! 78%  78%  [ 28 ]
This subject is dumb stop wasting space on the inter-webs. 3%  3%  [ 1 ]
I Like to click on things! 19%  19%  [ 7 ]
Total votes : 36

Kit Bashing a Defiler Tutorial

 Post subject: Kit Bashing a Defiler Tutorial
PostPosted: Mon May 12, 2014 11:42 pm 
Brood Brother
Brood Brother
User avatar

Joined: Sat Nov 13, 2010 1:29 am
Posts: 142
Location: San Jose, CA
Where to start? well I have wanted a Defiler or two for some time, but I never wanted to build it from scratch
that would take for ever and its very fiddly! :P
So this will be a tutorial on how to do a custom defiler out of epic minis you may already have!
what you see in the photo is what you will need to have to build this version i am
making and I hope you like it!
I don't know who to credit for the back leg idea, that i am using
it was on some photo I found randomly on the internets when searching for "defilers epic40k"
but the rest of it is my own creation! :D
All right what I used was 2 SM 1st Ed ork battle wagons one chaos dreadnought, 2 imp sentinels
2 sec ed orks with looted heavy weapons, 1 sec ed gun wagon battle cannon and I am using a 40k
Necron scarab as part of this build, plus a few odds and ens , including some spiky bitz from the first 40k Dark Eldar plastic box set from the 90's. I may use a tiny bit of the ever useful
plastic styrene sheets !
more soon don't for get to subscribe to this thread if you like it!
To be continued . . .


Attachments:
DC1.jpg
DC1.jpg [ 560.47 KiB | Viewed 6586 times ]

_________________
"In the desert, the line between life and death is sharp and quick." Zensunni fire poetry from Arrakis

my gaming blog https://vongutenboom.wordpress.com/
Top
 Profile Send private message  
 
 Post subject: Re: Kit Bashing a Defiler Tutorial
PostPosted: Tue May 13, 2014 7:57 am 
Brood Brother
Brood Brother
User avatar

Joined: Sat Nov 13, 2010 1:29 am
Posts: 142
Location: San Jose, CA
Alright then as of now The polls show 3 of you would like to see more of this! and one of you just likes to click useless buttons ! ;P so lets do this!
First off I cut the legs off of the sentinels ( this is easier if you have not glued them to begin with) ;D
next I severed the battle cannon at the breach where it changes sizes , (keep all parts you cut off you'll-
need some of them later). then I use a hobby file to flatten the top of the turret , and bring the sides in more
and make them more parallel. I use a small pin vice to to drill out the breach to make the barrel.
also cut the Ork off of the looted gun, cut down on both sides of the gun to remove the Ork
( as seen in photo DC1 the cut flat along the underside of the gun then file off exes, then
mount the two guns side by side, see photo DC2.

Next we can cut the Chaos dreadnought in half see"photo DC2" for the cut, take note on the legs
off to the side where I cut it. next I cut the left gun off, leaving just half of the mounting arm.
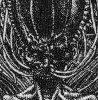
for later, save the gun for another time. next up cut the head off of the Chaos dreadnought
right about the bottom of the third bump down its back( see photo DC3) then you will need to file the bottom of what is left of the dreadnought to fit on top of the Ork turret. when that's ready you can glue it to
the turret, then glue the gun you made ti the arm that use to have the Chaos dreadnought auto-cannon.
ok the rest will have to wait till tomorrow.
To be continued . . .


Attachments:
DC1.JPG
DC1.JPG [ 569.96 KiB | Viewed 6539 times ]
DC2.JPG
DC2.JPG [ 518.35 KiB | Viewed 6539 times ]
DC3.JPG
DC3.JPG [ 406.47 KiB | Viewed 6539 times ]

_________________
"In the desert, the line between life and death is sharp and quick." Zensunni fire poetry from Arrakis

my gaming blog https://vongutenboom.wordpress.com/
Top
 Profile Send private message  
 
 Post subject: Re: Kit Bashing a Defiler Tutorial
PostPosted: Tue May 13, 2014 8:30 am 
Hybrid
Hybrid
User avatar

Joined: Tue Apr 19, 2011 12:03 pm
Posts: 6353
Location: Leicester UK
this is looking really superb :)

_________________
NetEA Space Marine, Imperial Fists and Blood Angels Army Champion

NetEA Red Corsairs Army Champion

My hobby/painting threads

Army Forge List Co-ordinator


Top
 Profile Send private message  
 
 Post subject: Re: Kit Bashing a Defiler Tutorial
PostPosted: Tue May 13, 2014 11:25 am 
Brood Brother
Brood Brother
User avatar

Joined: Fri Sep 07, 2012 8:59 am
Posts: 1240
Location: London
More please! :)

_________________
Image


Top
 Profile Send private message  
 
 Post subject: Re: Kit Bashing a Defiler Tutorial
PostPosted: Tue May 13, 2014 5:21 pm 
Brood Brother
Brood Brother
User avatar

Joined: Sat Nov 13, 2010 1:29 am
Posts: 142
Location: San Jose, CA
OK I'm so glad to hear that you guys like tutorials cus I like to do them! ;D
The polls say 7 you want to see more! yeah!
and when given a choice 2 of you have
opted for the "I like to click on things" button, ;D thx you've made my day!
that is very punk rock of you! I approve! lol

Continuing on... this is where it starts to get fun.
So now with the body turret/upper body made time to add the final parts
the head of the Chaos dreadnought I removed comes back in to play.
I take a flat file to the back and bottom of the head so it sits flush, next
take a blade and cut notch out equal to the size of the head, from nose to
back of the head. now take a round file and file the slope on the head, fashion
it in to some horns. :D (if you have some thing in you bitz box that works better
use that! like a skull head off a banner might look cool!) then just glue that puppy on there!
in a later step I will add spikes. you will get to see that photo in the next batch.


OK Legs! your going to want to place the leg so its standing upright use a
good blade to sever the back to stabilizer feet off , do this well and you have instant spikes
for your defiler ( save for later). note in photo DC6 the bottom leg has a slope, I achieved
this with a file then file the sides so there even in shape.


So the last photo sets up for how the chassis is made, I use a Ork first Ed battle wagon because
its parts are very versatile . the spikes on the wheels are useful the wheels them self's and the
spiked ram are good for this conversion.
I like to cut off a little more then i need then file it to where its perfect fit. I do this on the
front of the B-wagon. so the wheel in the center of the photo is a back wheel of the wagon
I found it to be to big for the preportion so I cut the front wheel off another wagon ,as the front
wheels of the first wagon are were the front claws go on this defiler. so the small wheel will require
you to define the top of the wheel with a blade, ( if this is not your cup of tea then the back wheel
works fine) Sorry this is so long, but that's why I do the tutorial in sets of 3 lol.
ignore the necron scarab for now Ill explain in the next installment .
so you quessed it To Be Continued . . . dun dun duuuuun! http://www.youtube.com/watch?v=bW7Op86ox9g


Attachments:
File comment: with head attached
DC5.jpg
DC5.jpg [ 471.51 KiB | Viewed 6481 times ]
File comment: the top leg is the uncut leg, bottom one is the cut and filed leg.
DC6.jpg
DC6.jpg [ 352.52 KiB | Viewed 6481 times ]
File comment: spiky bitz added
DC7.jpg
DC7.jpg [ 604.93 KiB | Viewed 6481 times ]

_________________
"In the desert, the line between life and death is sharp and quick." Zensunni fire poetry from Arrakis

my gaming blog https://vongutenboom.wordpress.com/
Top
 Profile Send private message  
 
 Post subject: Re: Kit Bashing a Defiler Tutorial
PostPosted: Tue May 13, 2014 6:49 pm 
Brood Brother
Brood Brother
User avatar

Joined: Fri Feb 14, 2003 12:46 am
Posts: 27069
Location: Edmond, Oklahoma USA
Hi!

Very cool tutorial!

Primarch

_________________
Primarch


The Primarchload
Magnetized Titans Tutorial
Net Epic Gold
Heresy Rules


Top
 Profile Send private message  
 
 Post subject: Re: Kit Bashing a Defiler Tutorial
PostPosted: Tue May 13, 2014 6:50 pm 
Hybrid
Hybrid
User avatar

Joined: Tue Apr 19, 2011 12:03 pm
Posts: 6353
Location: Leicester UK
MOAR!!

*scuttles off to raid ebay/bits box*

_________________
NetEA Space Marine, Imperial Fists and Blood Angels Army Champion

NetEA Red Corsairs Army Champion

My hobby/painting threads

Army Forge List Co-ordinator


Top
 Profile Send private message  
 
 Post subject: Re: Kit Bashing a Defiler Tutorial
PostPosted: Tue May 13, 2014 6:57 pm 
Brood Brother
Brood Brother
User avatar

Joined: Sat Nov 13, 2010 1:29 am
Posts: 142
Location: San Jose, CA
kyussinchains wrote:
MOAR!!

*scuttles off to raid ebay/bits box*


I can just see plastic Imp, Sentinels disappear on eBay haha

_________________
"In the desert, the line between life and death is sharp and quick." Zensunni fire poetry from Arrakis

my gaming blog https://vongutenboom.wordpress.com/


Top
 Profile Send private message  
 
 Post subject: Re: Kit Bashing a Defiler Tutorial
PostPosted: Wed May 14, 2014 12:29 am 
Brood Brother
Brood Brother
User avatar

Joined: Sat Nov 13, 2010 1:29 am
Posts: 142
Location: San Jose, CA
Alright I'm Sensing some of you want Moar! so Lets just jump in to the next 3 steps!
Ok I like this part! this is were is starts to come together.
So I have mounted the Ork ram to the front of the necron scarab, after some filing.
I hope you saved that gun barrel from the first segment... you did save it didn't you ? ::)
well you need it because it becomes the smoke exhaust pipe, as seen in photo DC8.
next the area behind the skull on the ram carefully slice of the square bits (save these they go on the back of the necron scarab)
I flipped them front to back the swapped sides so the stacks face outward.
mostly its just impotent to make the scarab level with the Ork ram note the dark blue area that looks like
a backward "E" file down till it looks like it in the photo , cus that's where the turret mounts and if
its not level you will have a lopsided defiler. lol

Now the legs yeah! before gluing the leg on i would put the spikes on.
I used the spikes off the ork battle wagon wheels and some dark eldar 40k spikes cut up.
I recommend pinning your legs if your good at pinning if not
just glue in , but i would at least carve with a rounded blade (see photo DC2 if your not familiar
with a rounded blade) a little out to widen the place where the legs sit.
Note in photo DC9 the hole on the outer edge i made that with a pin vise after i caved out a socket of sorts.
the hole in the center is part of the model ignore it ;D
so once you have the legs in the place your happy with glue in place.
you can at this point glue the wheel you cut off the battle wagon and glue on the bottom
of the turret. oh its getting exciting ;D
OK that's it for now :( sorry you'll have to keep tuned to see the final build It will have to be tomorrow!
To Be continued . . .

I hope your enjoying this as much as I am making this :)
TTFN


Attachments:
DC8.jpg
DC8.jpg [ 505.53 KiB | Viewed 6424 times ]
DC9.jpg
DC9.jpg [ 489.79 KiB | Viewed 6424 times ]
DC10.jpg
DC10.jpg [ 528.96 KiB | Viewed 6424 times ]

_________________
"In the desert, the line between life and death is sharp and quick." Zensunni fire poetry from Arrakis

my gaming blog https://vongutenboom.wordpress.com/
Top
 Profile Send private message  
 
 Post subject: Re: Kit Bashing a Defiler Tutorial
PostPosted: Wed May 14, 2014 5:01 am 
Brood Brother
Brood Brother
User avatar

Joined: Sat Apr 30, 2011 3:04 pm
Posts: 2757
Like it! Clever use of bits.

_________________
Nitpicks Knapsack (Scratchbuilding and 3D designing and printing and painting)


Top
 Profile Send private message  
 
 Post subject: Re: Kit Bashing a Defiler Tutorial
PostPosted: Wed May 14, 2014 8:26 am 
Hybrid
Hybrid
User avatar

Joined: Tue Apr 19, 2011 12:03 pm
Posts: 6353
Location: Leicester UK
this is looking really great, but where are the claws?

_________________
NetEA Space Marine, Imperial Fists and Blood Angels Army Champion

NetEA Red Corsairs Army Champion

My hobby/painting threads

Army Forge List Co-ordinator


Top
 Profile Send private message  
 
 Post subject: Re: Kit Bashing a Defiler Tutorial
PostPosted: Wed May 14, 2014 8:51 am 
Brood Brother
Brood Brother
User avatar

Joined: Sat Nov 13, 2010 1:29 am
Posts: 142
Location: San Jose, CA
kyussinchains wrote:
this is looking really great, but where are the claws?


Ah yes the claws are going to be covered in my next installment , l hope
To get this done soon ! I can't wait to post the finished results.
So stay tuned. ;D

_________________
"In the desert, the line between life and death is sharp and quick." Zensunni fire poetry from Arrakis

my gaming blog https://vongutenboom.wordpress.com/


Top
 Profile Send private message  
 
 Post subject: Re: Kit Bashing a Defiler Tutorial
PostPosted: Wed May 14, 2014 5:00 pm 
Hybrid
Hybrid
User avatar

Joined: Tue Apr 19, 2011 12:03 pm
Posts: 6353
Location: Leicester UK
okay, I've hoovered up all the required bits, now finish telling me how to glue them all together!!!

_________________
NetEA Space Marine, Imperial Fists and Blood Angels Army Champion

NetEA Red Corsairs Army Champion

My hobby/painting threads

Army Forge List Co-ordinator


Top
 Profile Send private message  
 
 Post subject: Re: Kit Bashing a Defiler Tutorial
PostPosted: Wed May 14, 2014 6:54 pm 
Brood Brother
Brood Brother
User avatar

Joined: Sat Nov 13, 2010 1:29 am
Posts: 142
Location: San Jose, CA
Ok sorry I did not get as far as I wanted yesterday I was a bit Knackered yesterday, and
i was unable to keep my eyes open to do a photo edit, so i hit the sack.
this is just were we are right now! later to day I hope to have how to make the front
Claw Arms
;)


Attachments:
File comment: here its a multi-view photo so you can see better angles.
4xDC.jpg
4xDC.jpg [ 1.38 MiB | Viewed 6326 times ]

_________________
"In the desert, the line between life and death is sharp and quick." Zensunni fire poetry from Arrakis

my gaming blog https://vongutenboom.wordpress.com/
Top
 Profile Send private message  
 
 Post subject: Re: Kit Bashing a Defiler Tutorial
PostPosted: Wed May 14, 2014 8:08 pm 
Hybrid
Hybrid
User avatar

Joined: Tue Apr 19, 2011 12:03 pm
Posts: 6353
Location: Leicester UK
fricken sweet dude!!!

you have made my day.....

_________________
NetEA Space Marine, Imperial Fists and Blood Angels Army Champion

NetEA Red Corsairs Army Champion

My hobby/painting threads

Army Forge List Co-ordinator


Top
 Profile Send private message  
 
Display posts from previous:  Sort by  
Post new topic Reply to topic  [ 33 posts ]  Go to page 1, 2, 3  Next


Who is online

Users browsing this forum: No registered users and 3 guests


You cannot post new topics in this forum
You cannot reply to topics in this forum
You cannot edit your posts in this forum
You cannot delete your posts in this forum
You cannot post attachments in this forum

Search for:
Jump to:  

cron

Powered by phpBB ® Forum Software © phpBB Group
CoDFaction Style by Daniel St. Jules of Gamexe.net